Let me tell you about one of my all-time favorite desserts: No-Bake Chocolate Cheesecake. I still remember the first time I made it; it was a game-changer! I had some friends over, and I wanted to impress them with a delicious treat that didn’t require hours in the kitchen. This cheesecake has since become my go-to recipe, and I’ve made it countless times. Each time, it disappears faster than I can say “chocolate!” Trust me, once you make this creamy, decadent dessert, you’ll be hooked too!
Why You’ll Love This No-Bake Chocolate Cheesecake
- Easy to Make: With no baking required, this recipe is perfect for beginners and experienced cooks alike.
- Rich Flavor: The combination of cream cheese and cocoa powder creates an irresistible chocolate experience.
- Visually Stunning: This cheesecake is a showstopper that will wow your guests and make you look like a pro.
- Make-Ahead Convenience: Prepare it a day in advance for stress-free entertaining.
- Versatile Base: You can customize the crust and toppings to suit your taste or dietary needs.
The Secret to Perfect No-Bake Chocolate Cheesecake
The secret to this No-Bake Chocolate Cheesecake lies in the balance of ingredients and the technique. The cream cheese must be softened to room temperature to achieve that smooth, velvety texture that melts in your mouth. I always make sure to beat the cream cheese and sugar together until it’s fluffy and light. This is crucial because it creates a beautiful base for the chocolate flavor to shine. Remember, patience is key; don’t rush this step! Trust me, it will be worth it in the end when you taste that creamy goodness.
Rave Reviews from Friends and Followers
“This No-Bake Chocolate Cheesecake was a hit at our family gathering! Everyone was raving about it!” – Sarah J.
“I’ve made this cheesecake twice now, and it gets better each time. So rich and creamy!” – Mike T.
“I can’t believe how easy this recipe is! It’s my new favorite dessert to bring to potlucks!” – Jessica R.
Creative Variations to Try
- Peanut Butter Swirl: Add a layer of creamy peanut butter on top before chilling for a delightful twist.
- Mint Chocolate: Mix in some peppermint extract for a refreshing flavor.
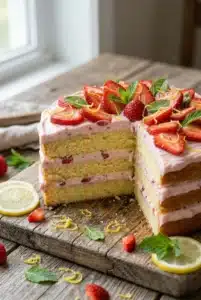
- Fruit Toppings: Fresh berries or a drizzle of raspberry sauce can add a pop of color and flavor.
- Nutty Crust: Replace the graham cracker crust with crushed cookies or nuts for a different texture.
Bonus: Try adding a layer of whipped cream on top for extra creaminess!
FAQs – All Your Questions Answered!
Can I make this cheesecake in advance? Absolutely! It’s best if you let it chill overnight, which allows the flavors to meld beautifully.
How do I store leftovers? Store it in an airtight container in the refrigerator for up to 5 days.
Can I substitute the cream cheese? Yes! Mascarpone cheese works well as a substitute, giving a slightly different flavor and texture.
What if my cheesecake doesn’t set? If it hasn’t set after chilling, it may need more time in the fridge, or you could try adding more gelatin next time for extra firmness.
Storage/Serving Tips
- Store leftovers in an airtight container in the refrigerator.
- This cheesecake can last for up to 5 days when stored properly.
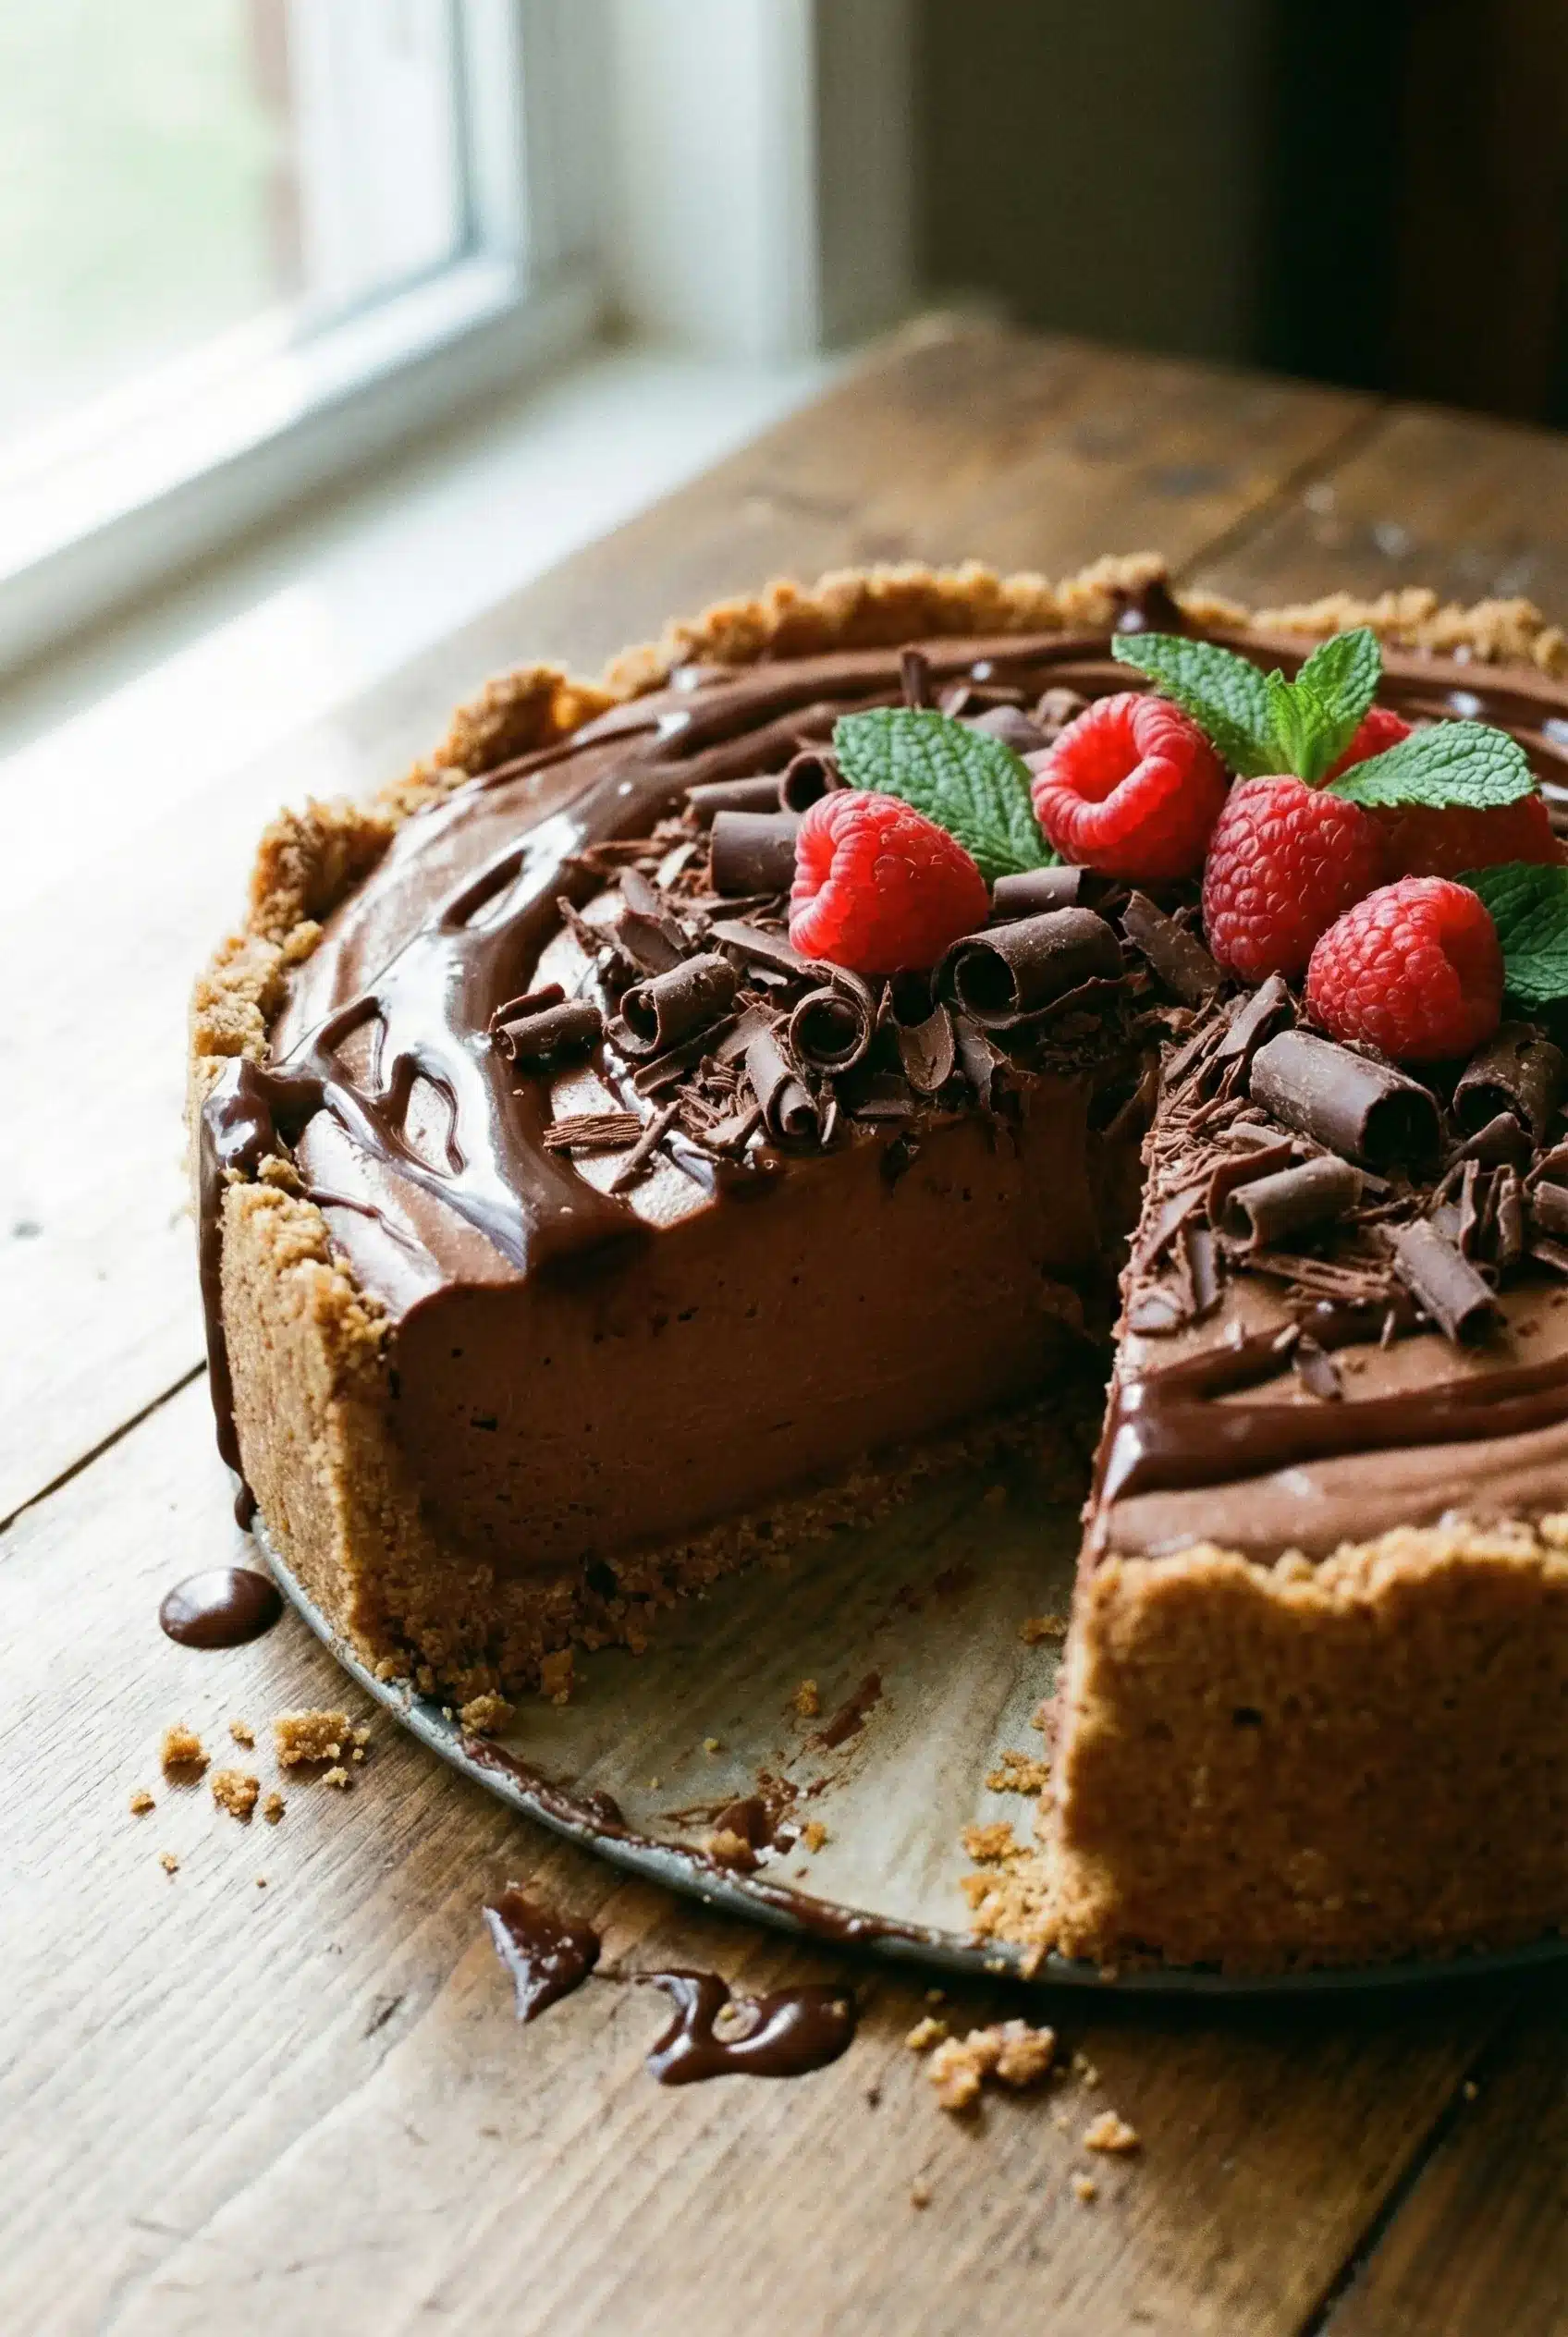
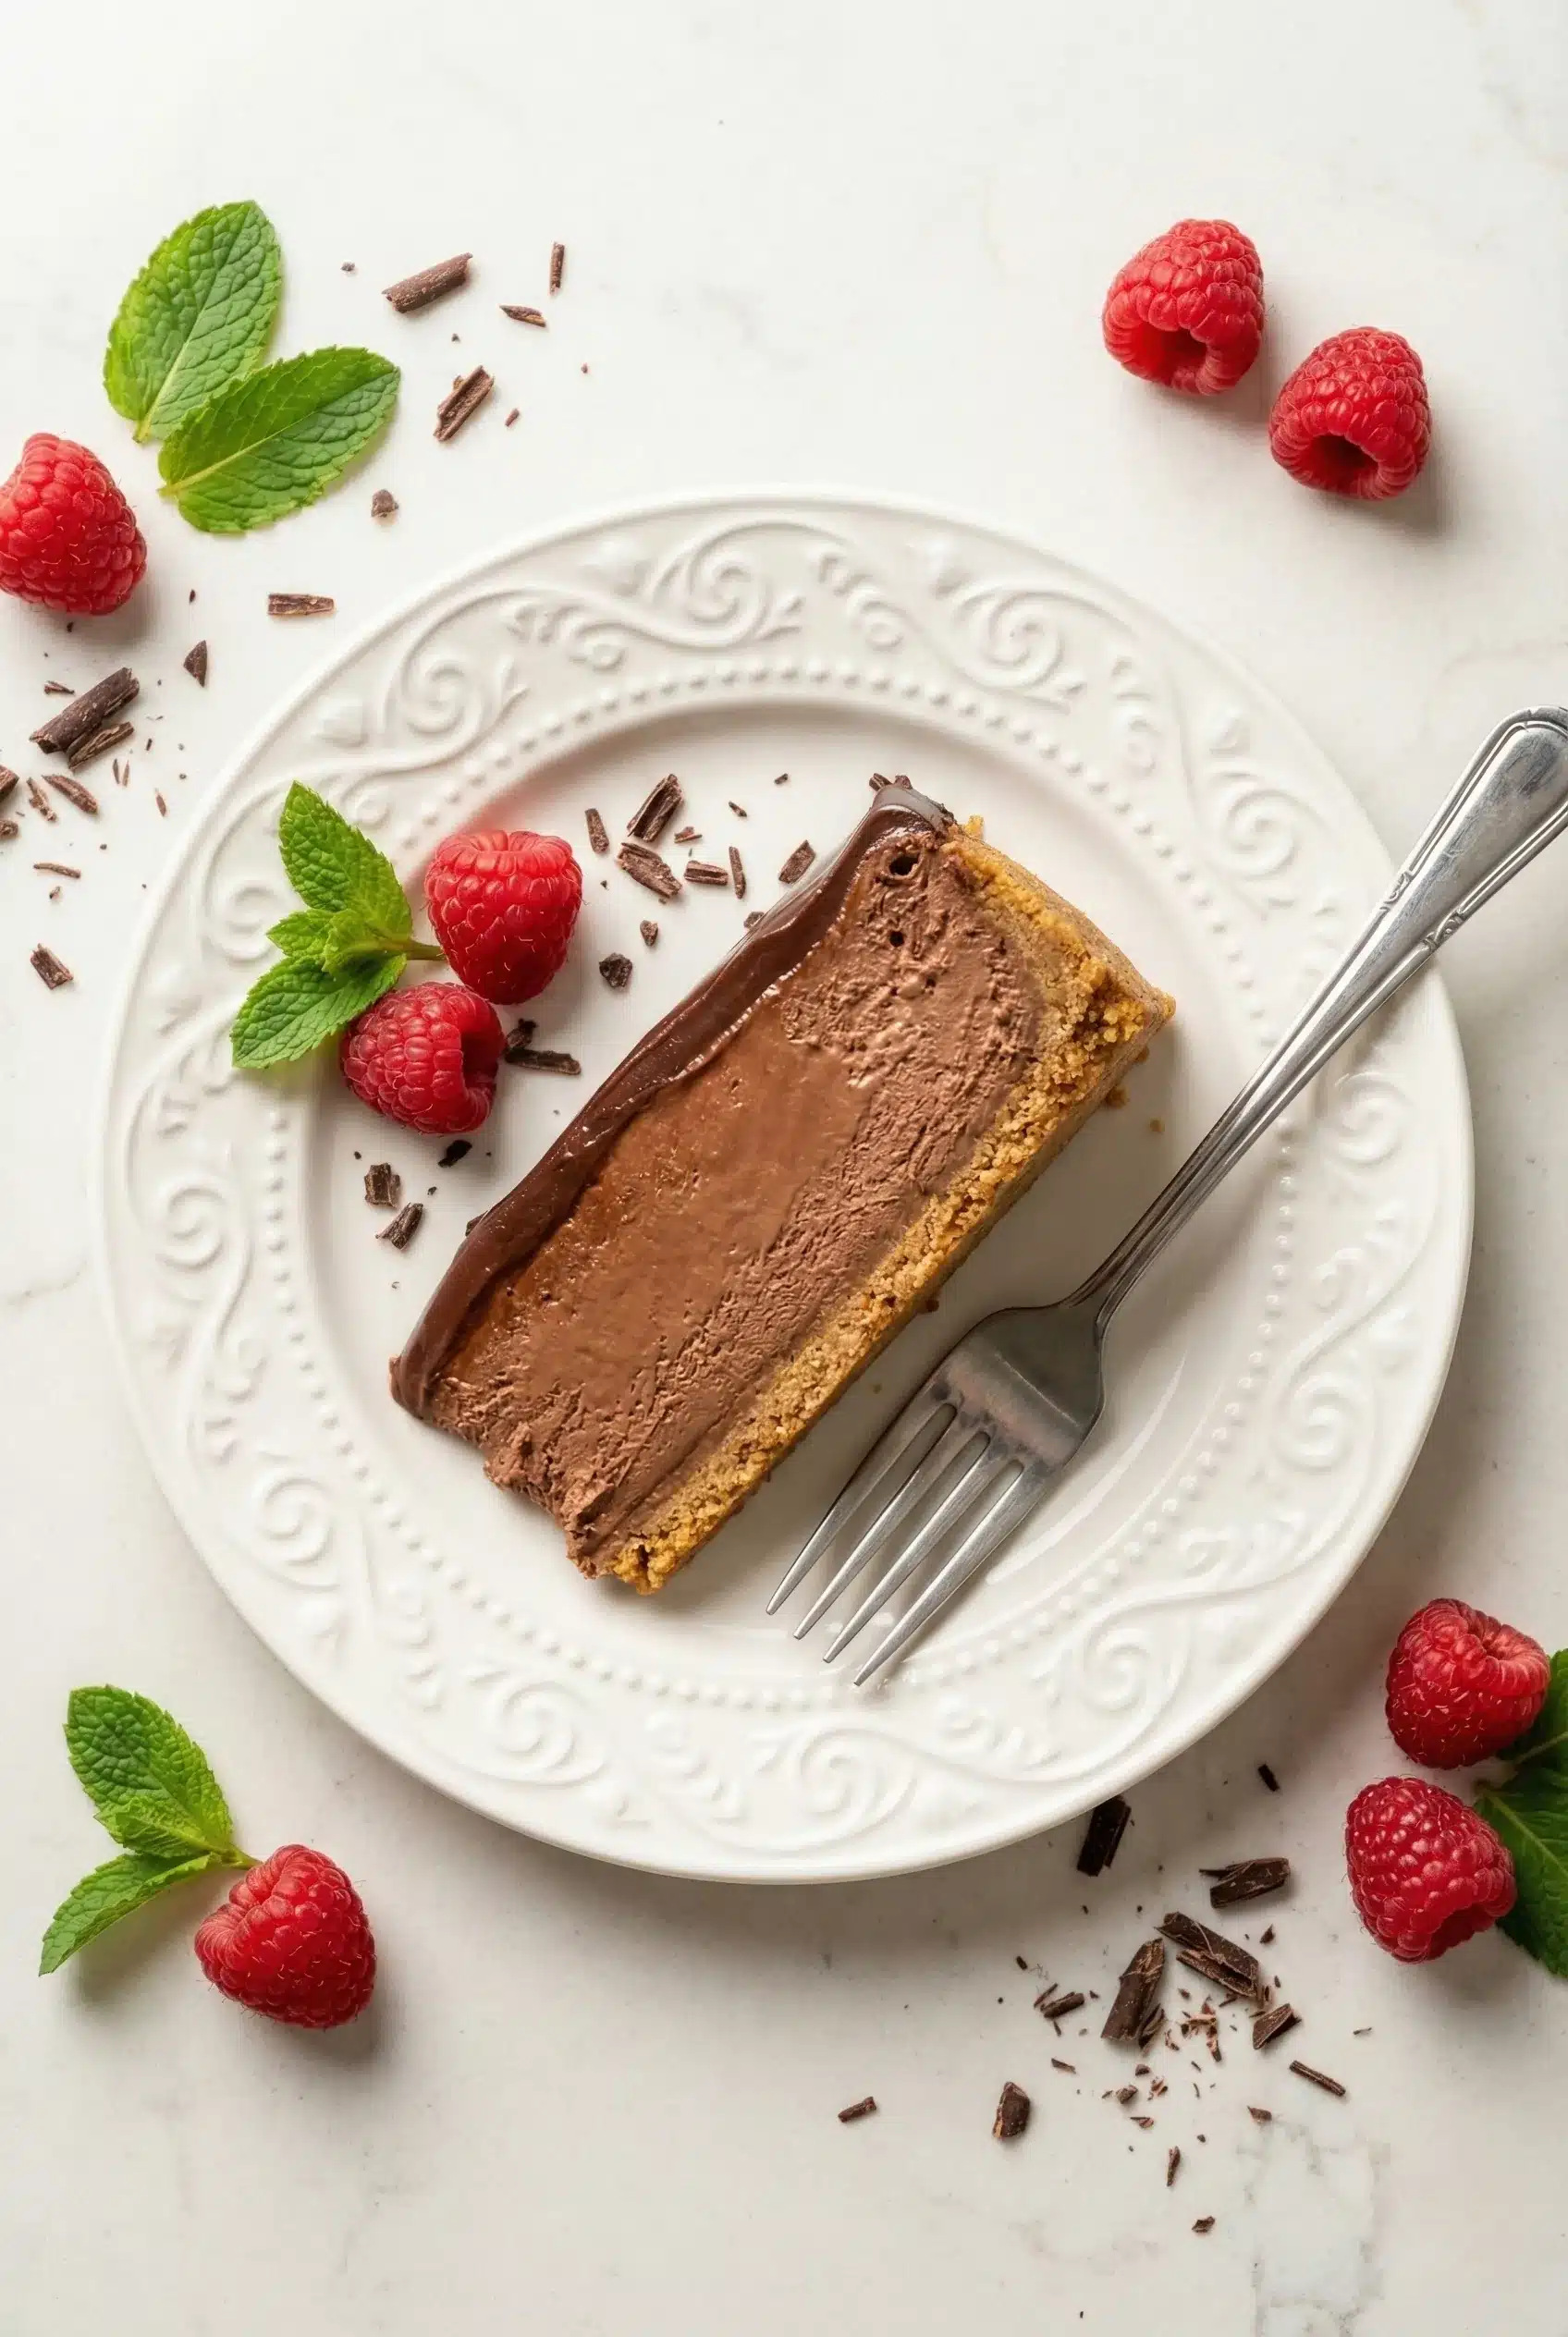
- For a beautiful presentation, garnish with chocolate shavings or fresh berries just before serving.
Perfect Occasions for No-Bake Chocolate Cheesecake
- Birthday parties – a guaranteed crowd-pleaser!
- Holiday gatherings – it adds a festive touch to any table.
- Potluck dinners – everyone will be asking for the recipe!
- Movie nights – indulge in a slice while binge-watching your favorite series.
- Romantic date nights – surprise your partner with a sweet treat at home.
The Complete Recipe
Thank you for joining me on this delicious journey! Now, let’s get to the actual recipe for this amazing No-Bake Chocolate Cheesecake.
No-Bake Chocolate Cheesecake
Ingredients
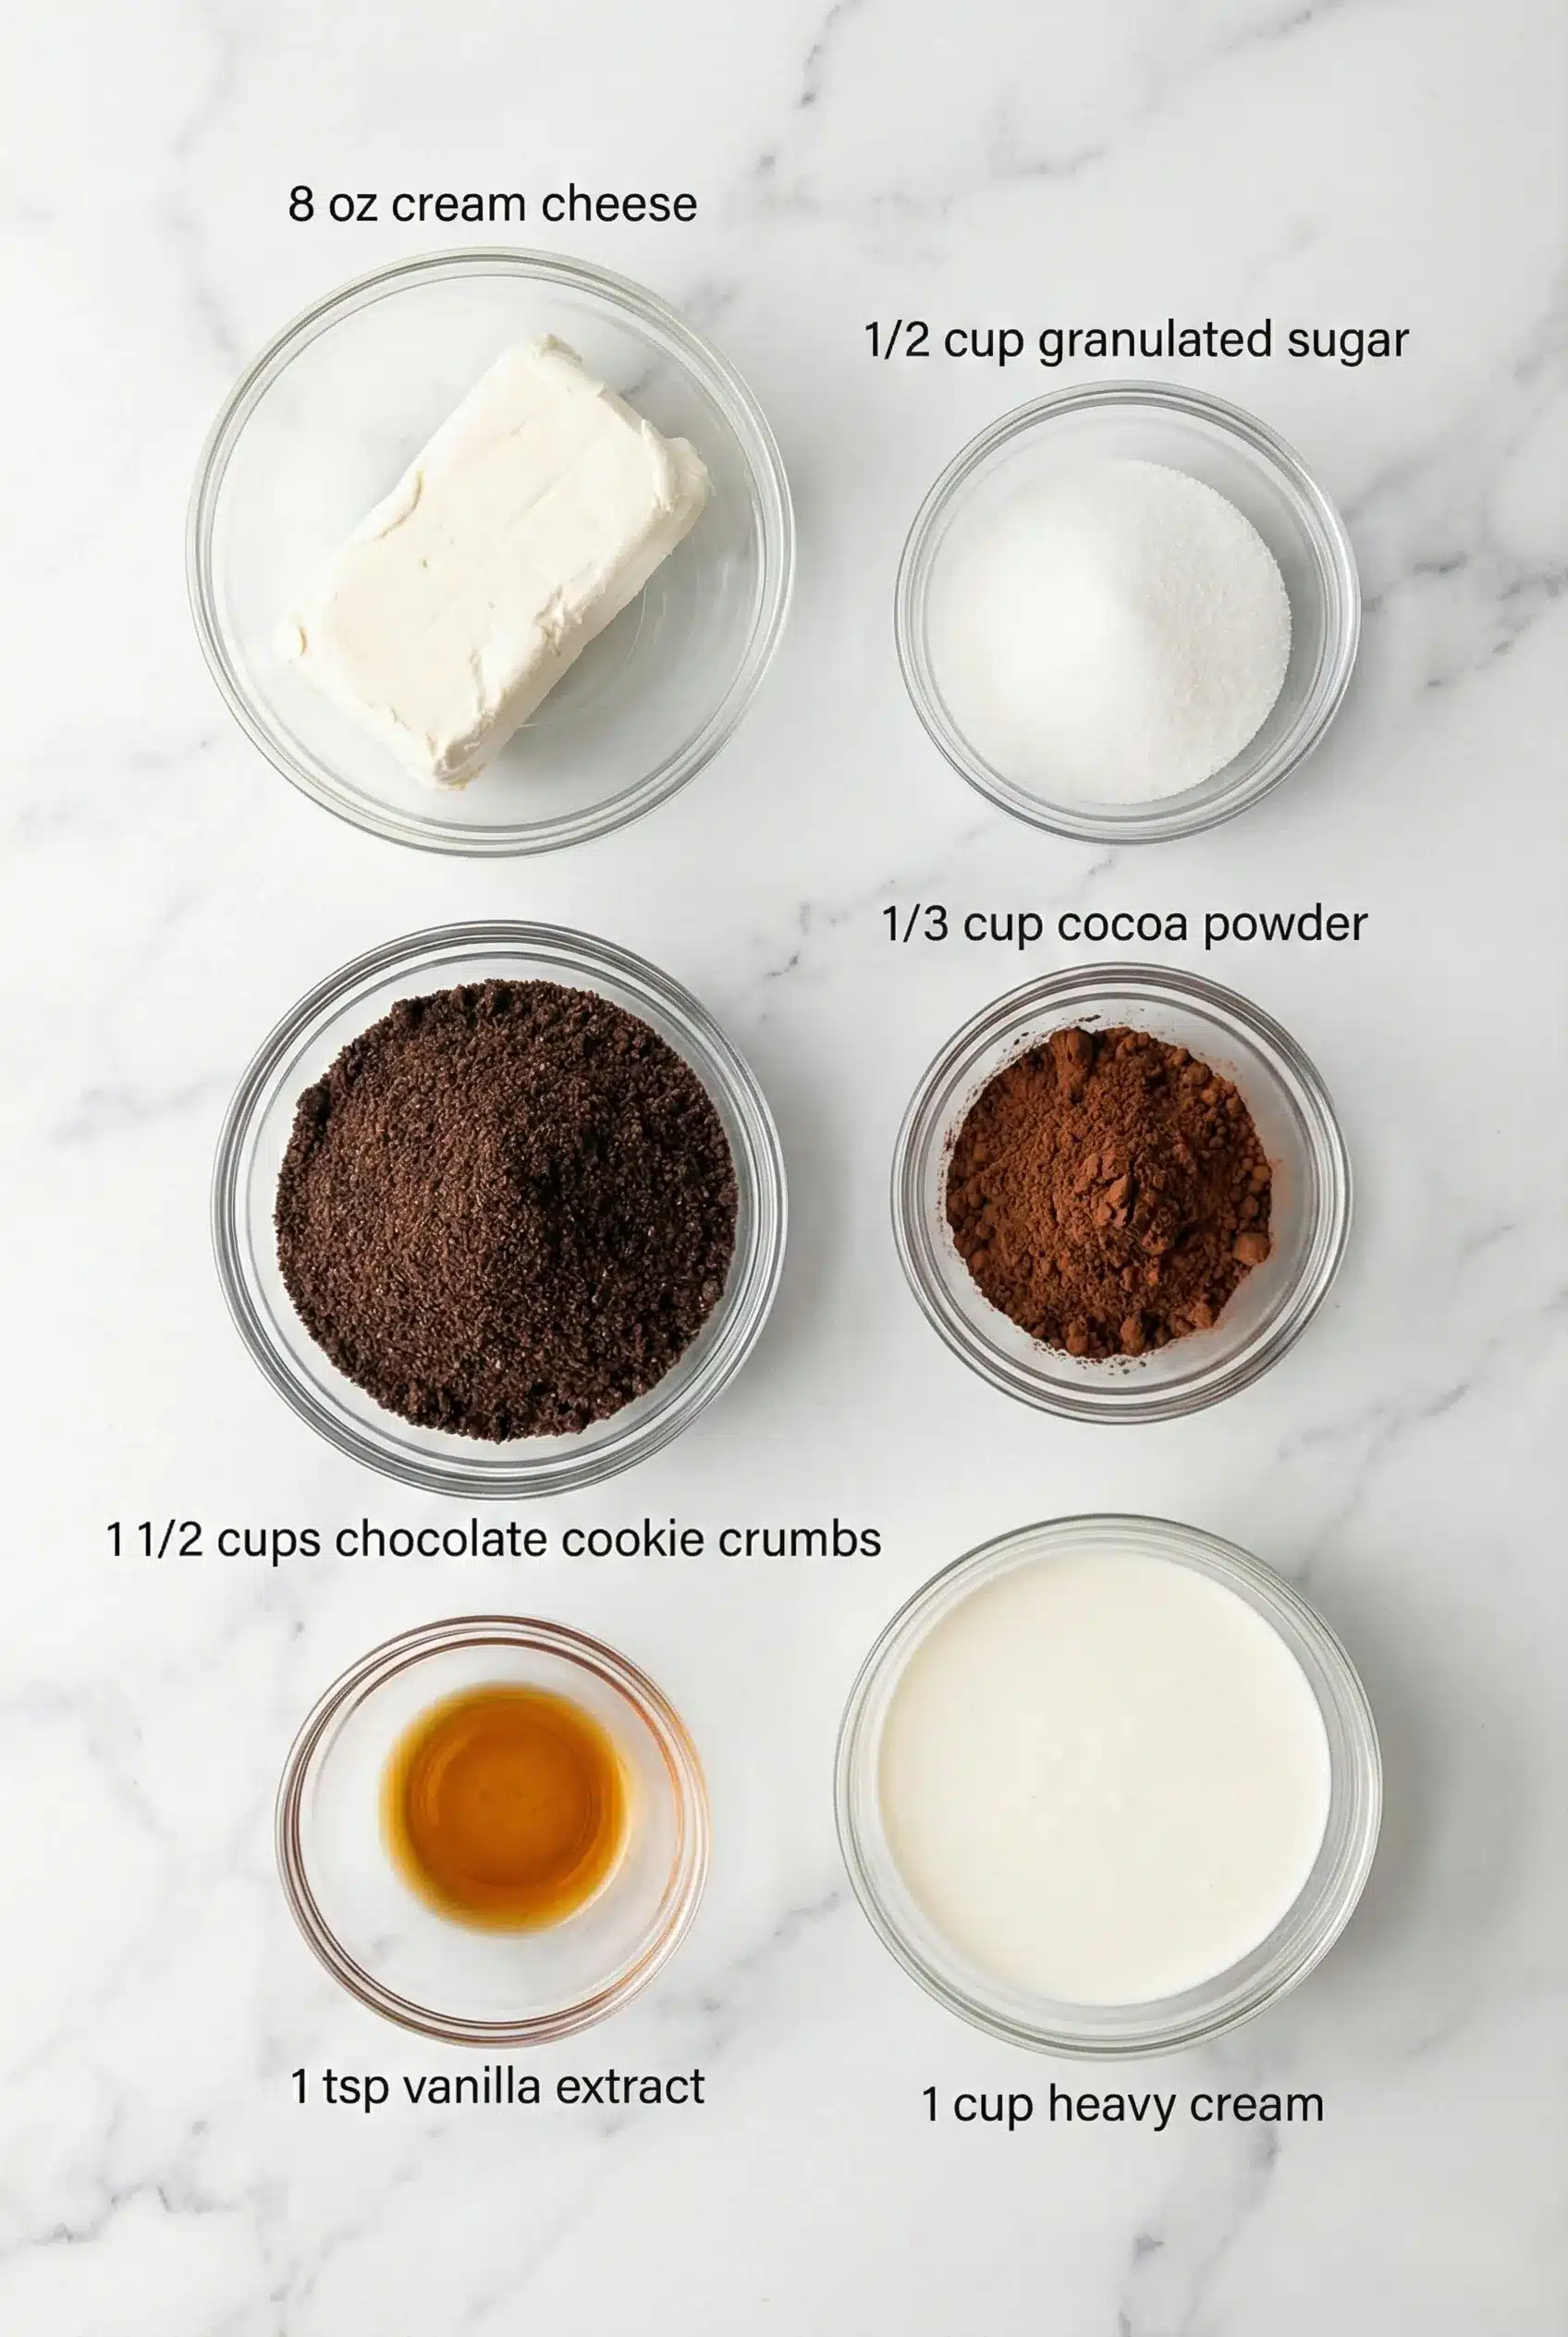
- 1 ½ cups graham cracker crumbs
- ½ cup unsalted butter, melted
- 2 cups cream cheese, softened
- 1 cup powdered sugar
- 1 cup cocoa powder
- 1 teaspoon vanilla extract
- 1 cup heavy whipping cream
Tip: For a richer flavor, use high-quality cocoa powder, and feel free to adjust the sweetness by adding more or less powdered sugar according to your taste.
Extend ingredients section: You can also add a pinch of salt to enhance the chocolate flavor. If you have a nut allergy, consider using a cookie crust made from gluten-free cookies. Each ingredient plays a crucial role in creating that perfect texture and flavor.
Step-by-Step Instructions
Step 1: Prepare the Crust
In a mixing bowl, combine the graham cracker crumbs and melted butter. Mix until the crumbs are evenly coated. Press the mixture firmly into the bottom of a 9-inch springform pan to form an even layer. This crust will give your cheesecake a delightful crunch!
Step 2: Beat the Cream Cheese
In another bowl, beat the softened cream cheese and powdered sugar together until smooth and fluffy. This is where the magic happens – the cream cheese should be light and airy! Make sure there are no lumps for a perfect texture.
Step 3: Add Cocoa and Vanilla
Mix in the cocoa powder and vanilla extract until fully combined. The chocolate flavor will start to develop, and trust me, your kitchen will smell divine!
Step 4: Whip the Cream
In a separate bowl, whip the heavy cream until stiff peaks form. Gently fold the whipped cream into the chocolate mixture. This step is crucial for that light, airy texture that will make your cheesecake so special.
Step 5: Combine and Chill
Pour the chocolate cheesecake filling over the prepared crust and smooth the top with a spatula. Cover the pan with plastic wrap and refrigerate for at least 4 hours, or overnight if possible. The longer it chills, the better it will set!
Step 6: Serve and Enjoy
Once your cheesecake is set, carefully remove it from the springform pan. Slice it into wedges and serve with your favorite toppings, like chocolate shavings or fresh fruit. You’ll be amazed at how delicious it is!
Nutrition info: This No-Bake Chocolate Cheesecake serves about 12 people, with each slice containing approximately 300 calories, depending on the specific ingredients used.
Extend instructions: If you’re looking to impress, consider decorating the top with a drizzle of chocolate sauce for added flair. It’s all about presentation!
Final Thoughts
In conclusion, this No-Bake Chocolate Cheesecake is not just a dessert; it’s an experience! With its creamy texture, rich chocolate flavor, and ease of preparation, it’s bound to become a staple in your dessert repertoire. I encourage you to try making it, and I promise you won’t be disappointed. Happy baking (or should I say, no-baking)!
No-Bake Chocolate Cheesecake
-
Total Time:
4 hr 30 mins -
Yield:
12 servings
Indulge in a quick and easy no-bake chocolate cheesecake with a creamy avocado twist. Perfect for a delicious dessert without the fuss.
Ingredients
- • 1 ½ cups graham cracker crumbs
- • ½ cup unsalted butter, melted
- • 2 cups cream cheese, softened
- • 1 cup powdered sugar
- • 1 cup cocoa powder
- • 1 teaspoon vanilla extract
- • 1 cup heavy whipping cream
Instructions
- Prepare the Crust: In a mixing bowl, combine the graham cracker crumbs and melted butter. Mix until the crumbs are evenly coated. Press the mixture firmly into the bottom of a 9-inch springform pan to form an even layer.
- Beat the Cream Cheese: In another bowl, beat the softened cream cheese and powdered sugar together until smooth and fluffy.
- Add Cocoa and Vanilla: Mix in the cocoa powder and vanilla extract until fully combined.
- Whip the Cream: In a separate bowl, whip the heavy cream until stiff peaks form. Gently fold the whipped cream into the chocolate mixture.
- Combine and Chill: Pour the chocolate cheesecake filling over the prepared crust and smooth the top with a spatula. Cover the pan with plastic wrap and refrigerate for at least 4 hours, or overnight if possible.
- Serve and Enjoy: Once your cheesecake is set, carefully remove it from the springform pan. Slice it into wedges and serve with your favorite toppings.
Notes
Storage: Store leftovers in an airtight container in the fridge for up to 3 days.
- Prep Time: 30 mins
- Cook Time: 0 mins
- Category: Dessert
- Cuisine: American
- Method: Oven