
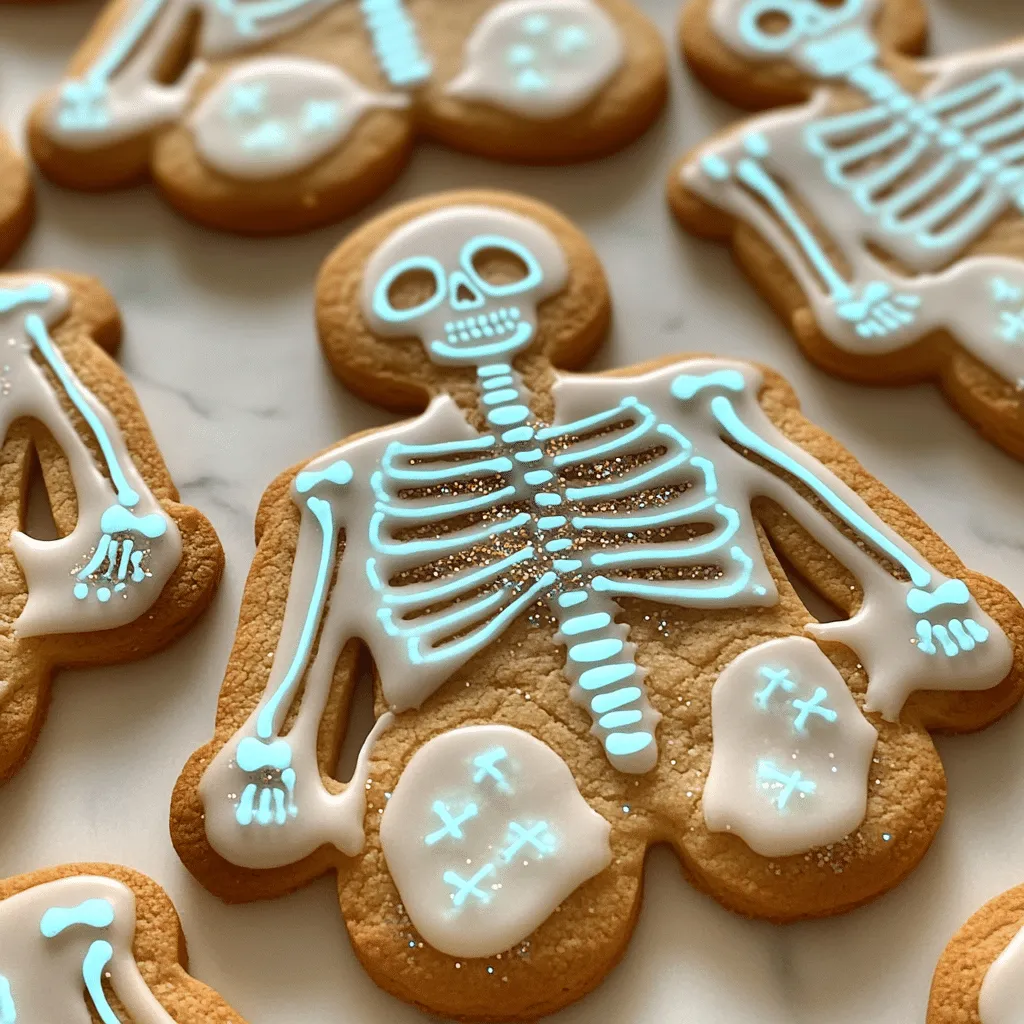
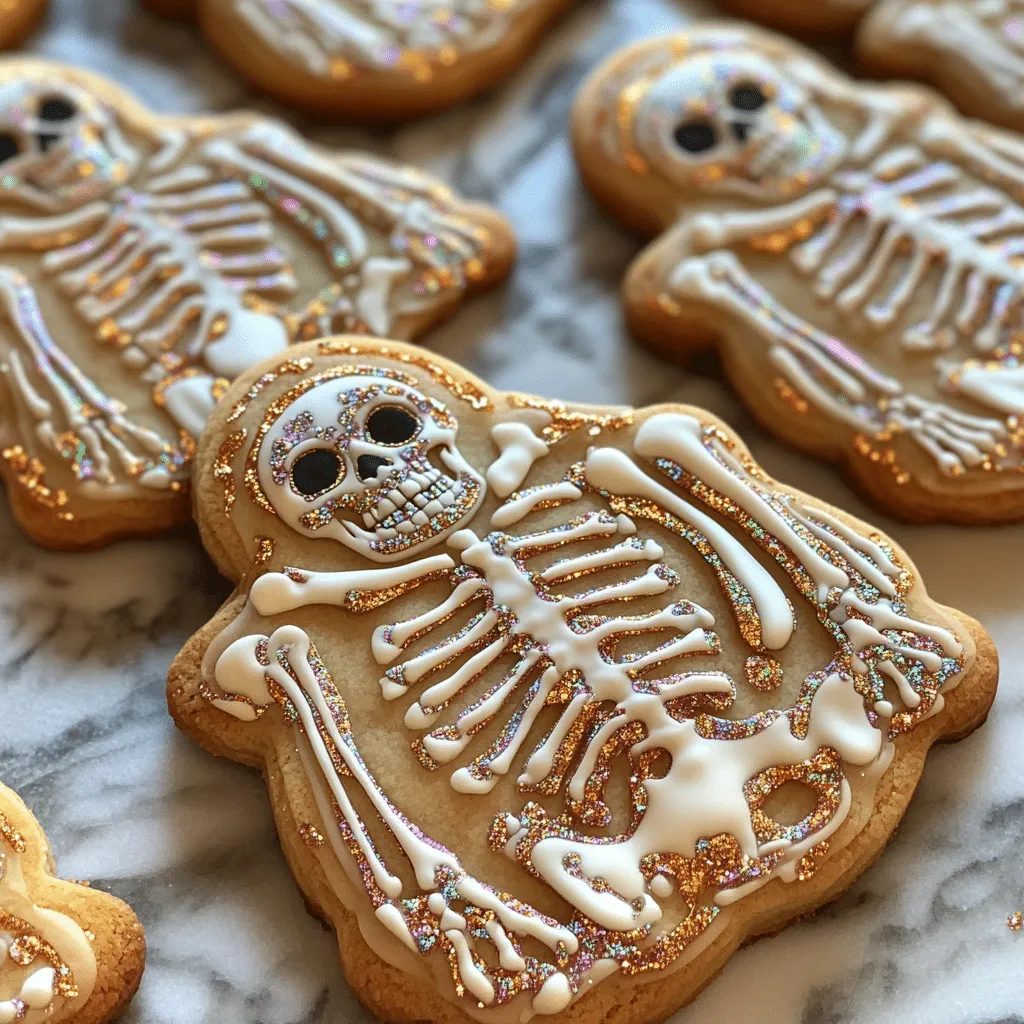
Have you ever made cookies that glow in the dark? Trust me, when I first made these Skeleton Cookies, I was absolutely blown away! I couldn’t believe how fun and easy they were to create, and they were an instant hit at every gathering since. I’ve made these delicious treats at least five times now, and each time, they leave my friends and family buzzing with excitement and compliments. If you’re looking for a unique Halloween treat that’s both spooky and scrumptious, you’ve come to the right place! Let’s dive into the world of Skeleton Cookies and get ready for a baking adventure that’s sure to impress!
Why You’ll Love This Skeleton Cookies
- Easy to Make: This recipe is simple enough for bakers of any skill level. If I can do it, so can you!
- Fun for Everyone: Great for kids and adults alike—everyone loves decorating these spooky cookies!
- Unique Visual Appeal: The glow-in-the-dark elements make these cookies a showstopper at any Halloween event.
- Delicious Flavor: With a buttery vanilla base, these cookies are not just fun to look at but amazing to eat!
- Make Ahead Convenience: You can bake and decorate these cookies in advance, saving you time on the big day.
The Secret to Perfect Skeleton Cookies
The secret to achieving the perfect Skeleton Cookies lies in using quality ingredients and the right techniques. Trust me, the glow-in-the-dark edible elements bring everything together, but it’s the perfect balance of buttery flavor and the right baking time that will make your cookies stand out. Don’t rush the chilling process—allowing the dough to chill is crucial to getting those beautifully shaped cookies that hold their form during baking.
Here’s a tip: Always use a good quality vanilla extract; it truly elevates the flavor of these cookies. And remember, if you’re in a hurry, you can even make the dough ahead of time and freeze it for later use!
Rave Reviews from Friends and Followers
“These Skeleton Cookies were the highlight of our Halloween party! Everyone was amazed when they saw them glow!” – Sarah T.
“I never thought I could make cookies that looked this cool! They were super easy and so delicious!” – Mike R.
“My kids had a blast decorating these cookies. They made our Halloween so much more fun!” – Jessica L.
Creative Variations to Try
- Chocolate Skeleton Cookies: Substitute half the flour with cocoa powder for a rich chocolate flavor.
- Spiced Pumpkin Skeleton Cookies: Add pumpkin spice to the dough for a seasonal twist!
- Peanut Butter Skeleton Cookies: Incorporate creamy peanut butter into the dough for a nutty flavor.
- Gluten-Free Skeleton Cookies: Use a gluten-free flour blend to make these cookies suitable for everyone.
Bonus: Consider adding edible glitter to your decorating supplies for an extra sparkle effect!
FAQs – All Your Questions Answered!
Can I use regular food coloring instead of glow-in-the-dark?
Yes, but for the full effect, glow-in-the-dark food coloring is essential to achieve that spooky glow!
How do I store the cookies?
Store them in an airtight container at room temperature for up to one week. They can last longer if refrigerated!
Can I freeze these cookies?
Absolutely! You can freeze both the dough and the baked cookies. Just ensure they are well-wrapped to prevent freezer burn.
What if my dough is too sticky?
If your dough feels sticky, sprinkle a little flour on your work surface and on your hands to make it easier to handle.
When is the best time to decorate the cookies?
Wait until the cookies are completely cool before decorating to ensure your icing doesn’t melt.
Storage/Serving Tips
- Store cookies in an airtight container to keep them fresh.
- They are best enjoyed within a week, but they can last up to two weeks if well-stored.
- For a fun serving option, place them on a platter with some Halloween-themed decorations!
Perfect Occasions for Skeleton Cookies
- Halloween parties
- School bake sales
- Family gatherings or Halloween movie nights
- Spooky-themed playdates
- Costume parties
- Trick-or-treat gatherings
The Complete Recipe
Thank you for sticking with me through all the details! Now, let’s get to the good part—the recipe for these fabulous Skeleton Cookies!
Skeleton Cookies
Ingredients
- 2 ¾ cups all-purpose flour
- 1 tsp baking powder
- ½ tsp salt
- 1 cup unsalted butter, room temperature
- 1 cup granulated sugar
- 1 large egg
- 1 tsp vanilla extract
- Glow-in-the-dark food coloring
- Edible glitter (optional)
- Royal icing (for decoration)
Tip: For a richer flavor, consider using brown sugar instead of granulated sugar.
Extend ingredients section: You can also experiment with flavored extracts like almond or lemon for a unique twist! Just remember, a little goes a long way.
Step-by-Step Instructions
Step 1: Prepare Your Dough
In a large mixing bowl, cream together the softened butter and sugar until light and fluffy. This usually takes about 3-5 minutes. The fluffy texture is crucial as it helps the cookies rise nicely!
Step 2: Add Egg and Vanilla
Add the egg and vanilla extract to the butter mixture. Beat until well combined, and you’ll notice a beautiful creamy texture forming.
Step 3: Combine Dry Ingredients
In a separate bowl, whisk together the flour, baking powder, and salt. Gradually add this mixture to the wet ingredients, mixing until just combined. Avoid overmixing to keep the cookies tender!
Step 4: Chill the Dough
Wrap the dough in plastic wrap and chill it in the fridge for at least 1 hour. Chilling is key to preventing the cookies from spreading too much while baking.
Step 5: Roll and Cut the Cookies
Once chilled, preheat your oven to 350°F (175°C). Roll out the dough on a floured surface to about ¼ inch thick. Use skeleton-shaped cookie cutters to cut out your cookies. Place them on a lined baking sheet!
Step 6: Bake the Cookies
Bake the cookies for 8-10 minutes or until the edges are lightly golden. Make sure to keep an eye on them—nothing is worse than burnt cookies!
Step 7: Cool and Decorate
Let the cookies cool completely on a wire rack before decorating. Once cool, it’s time to get creative with royal icing and glow-in-the-dark elements. Let your imagination run wild!
Nutrition Info:
Each cookie contains approximately 150 calories, depending on the size and amount of decorations used.
Final Thoughts
I can’t stress enough how special these Skeleton Cookies are for any Halloween celebration! They’re not just delicious; they create an unforgettable visual experience that will leave everyone talking. I encourage you to give this recipe a try. You’ll have so much fun making, decorating, and, of course, eating these spooky treats. Happy baking, and I can’t wait to hear how your Skeleton Cookies turn out!