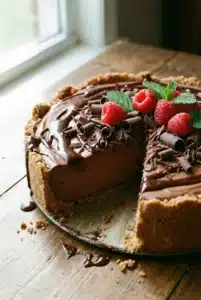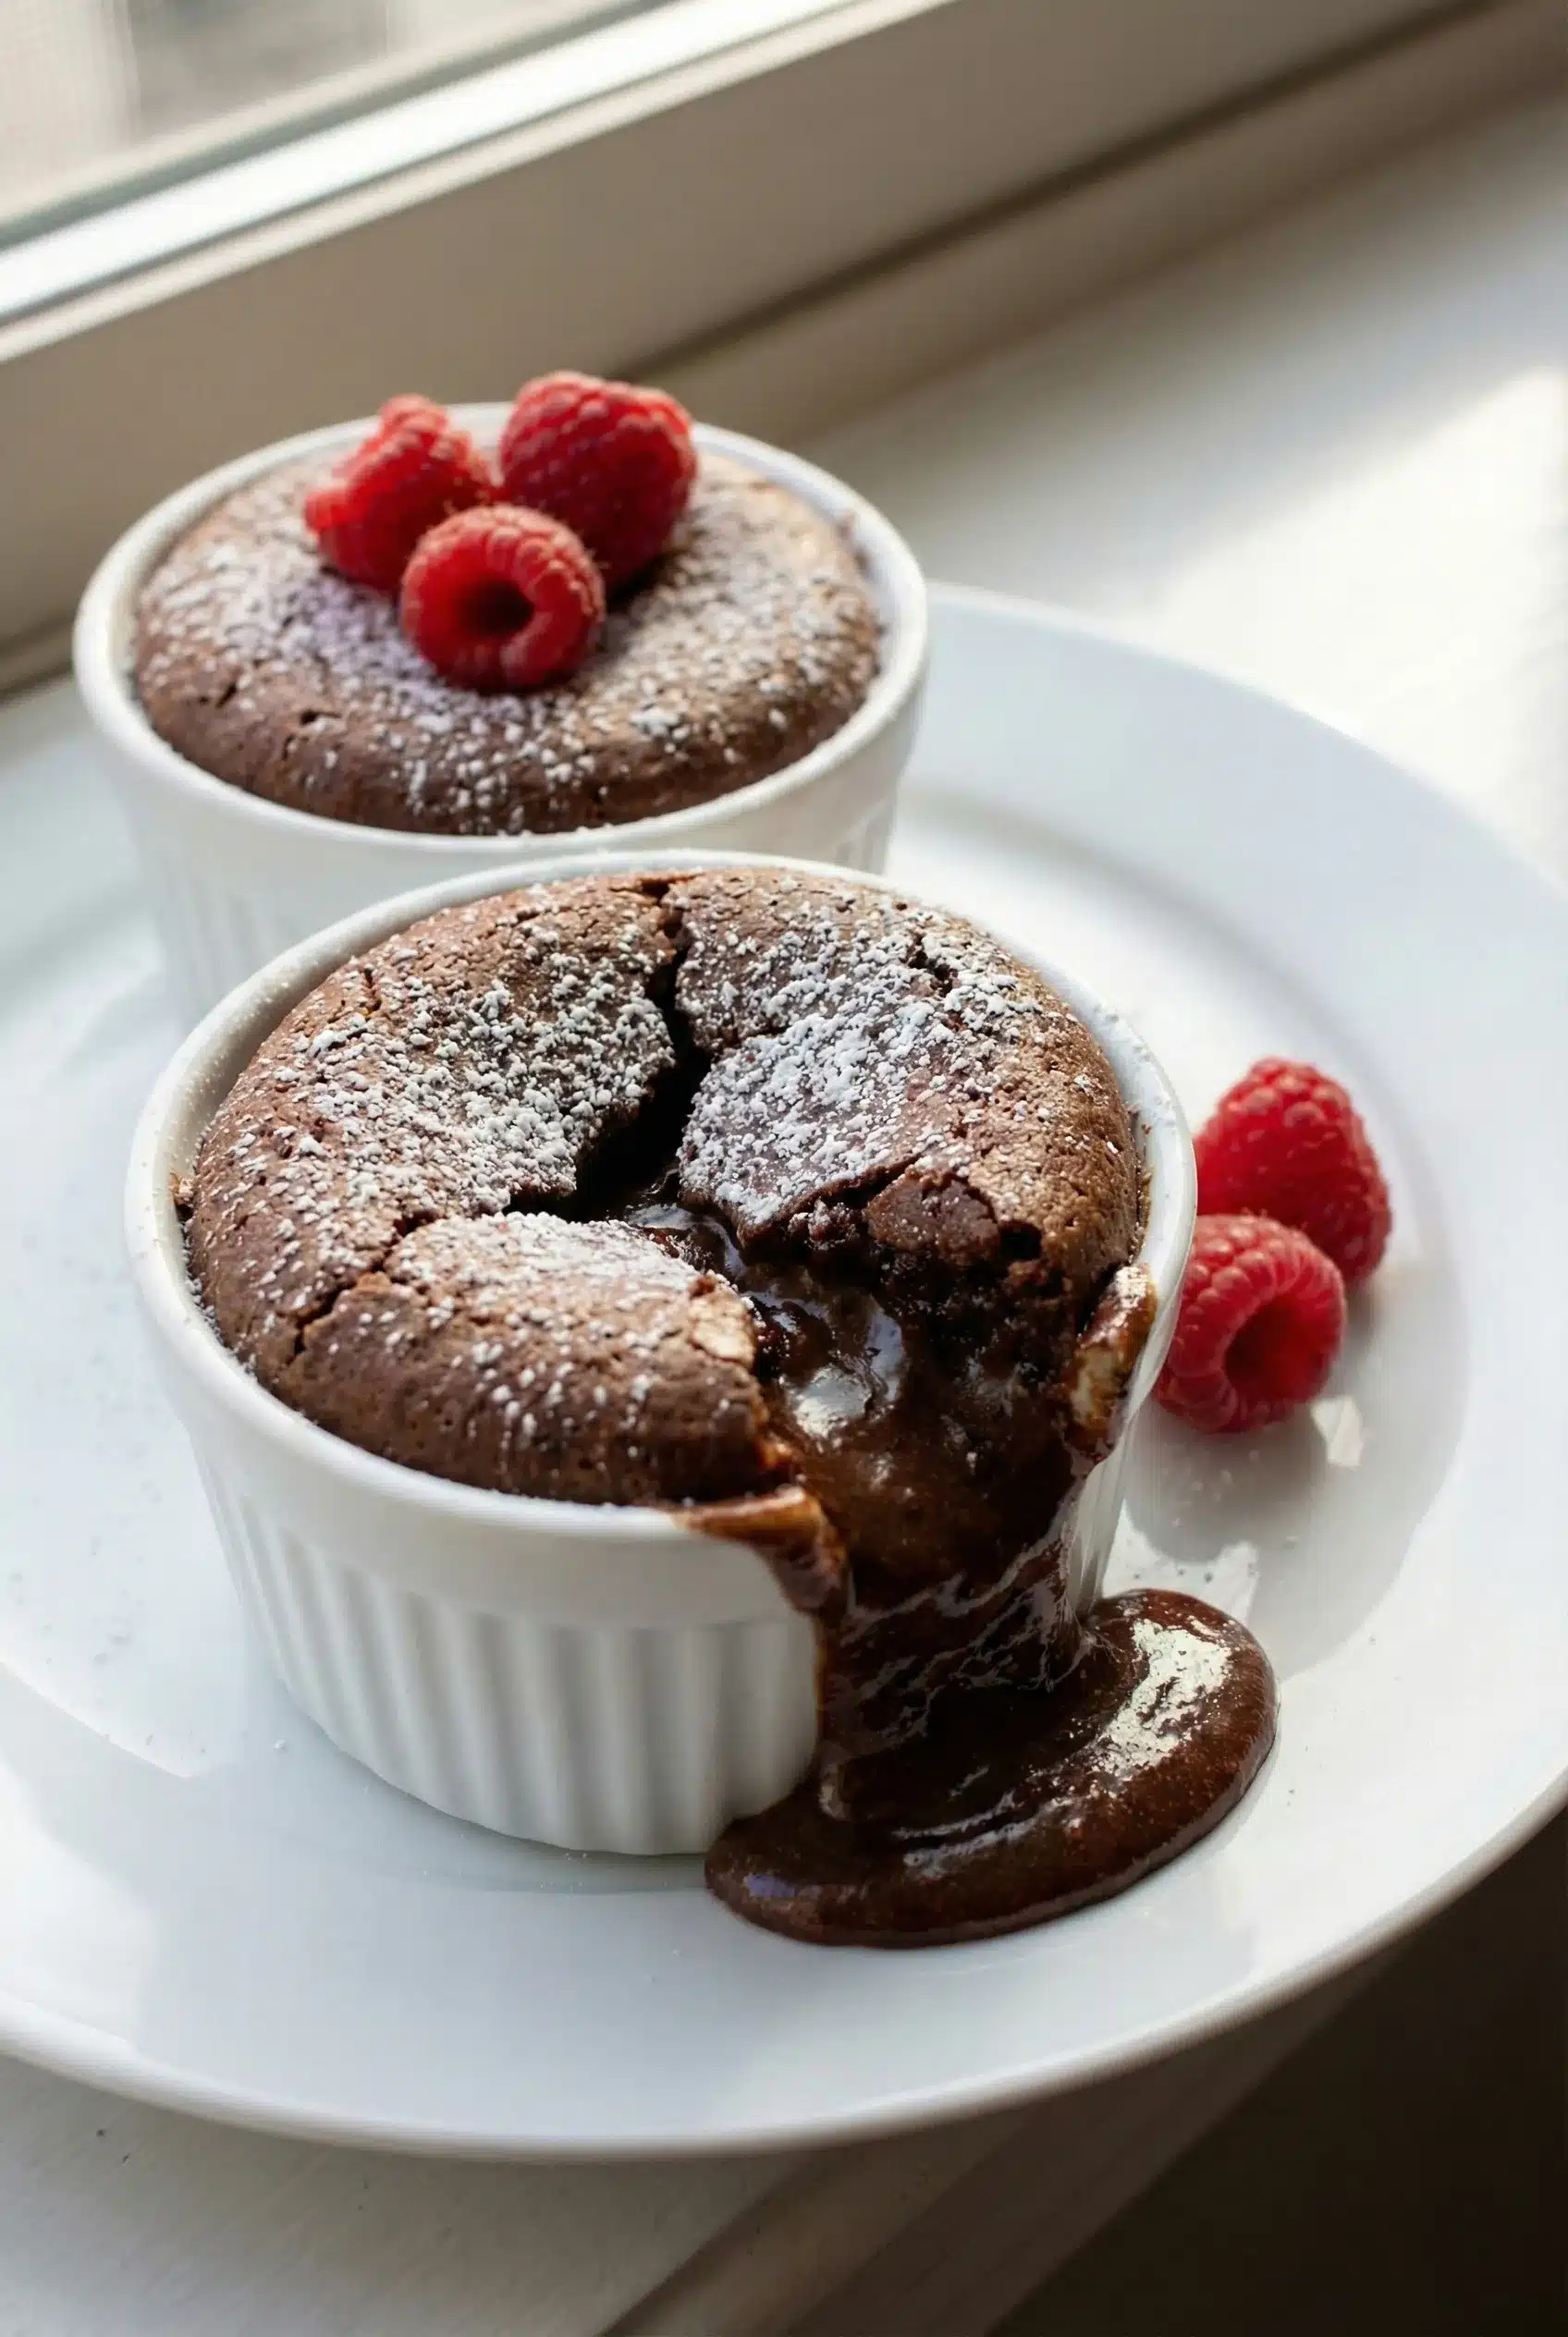
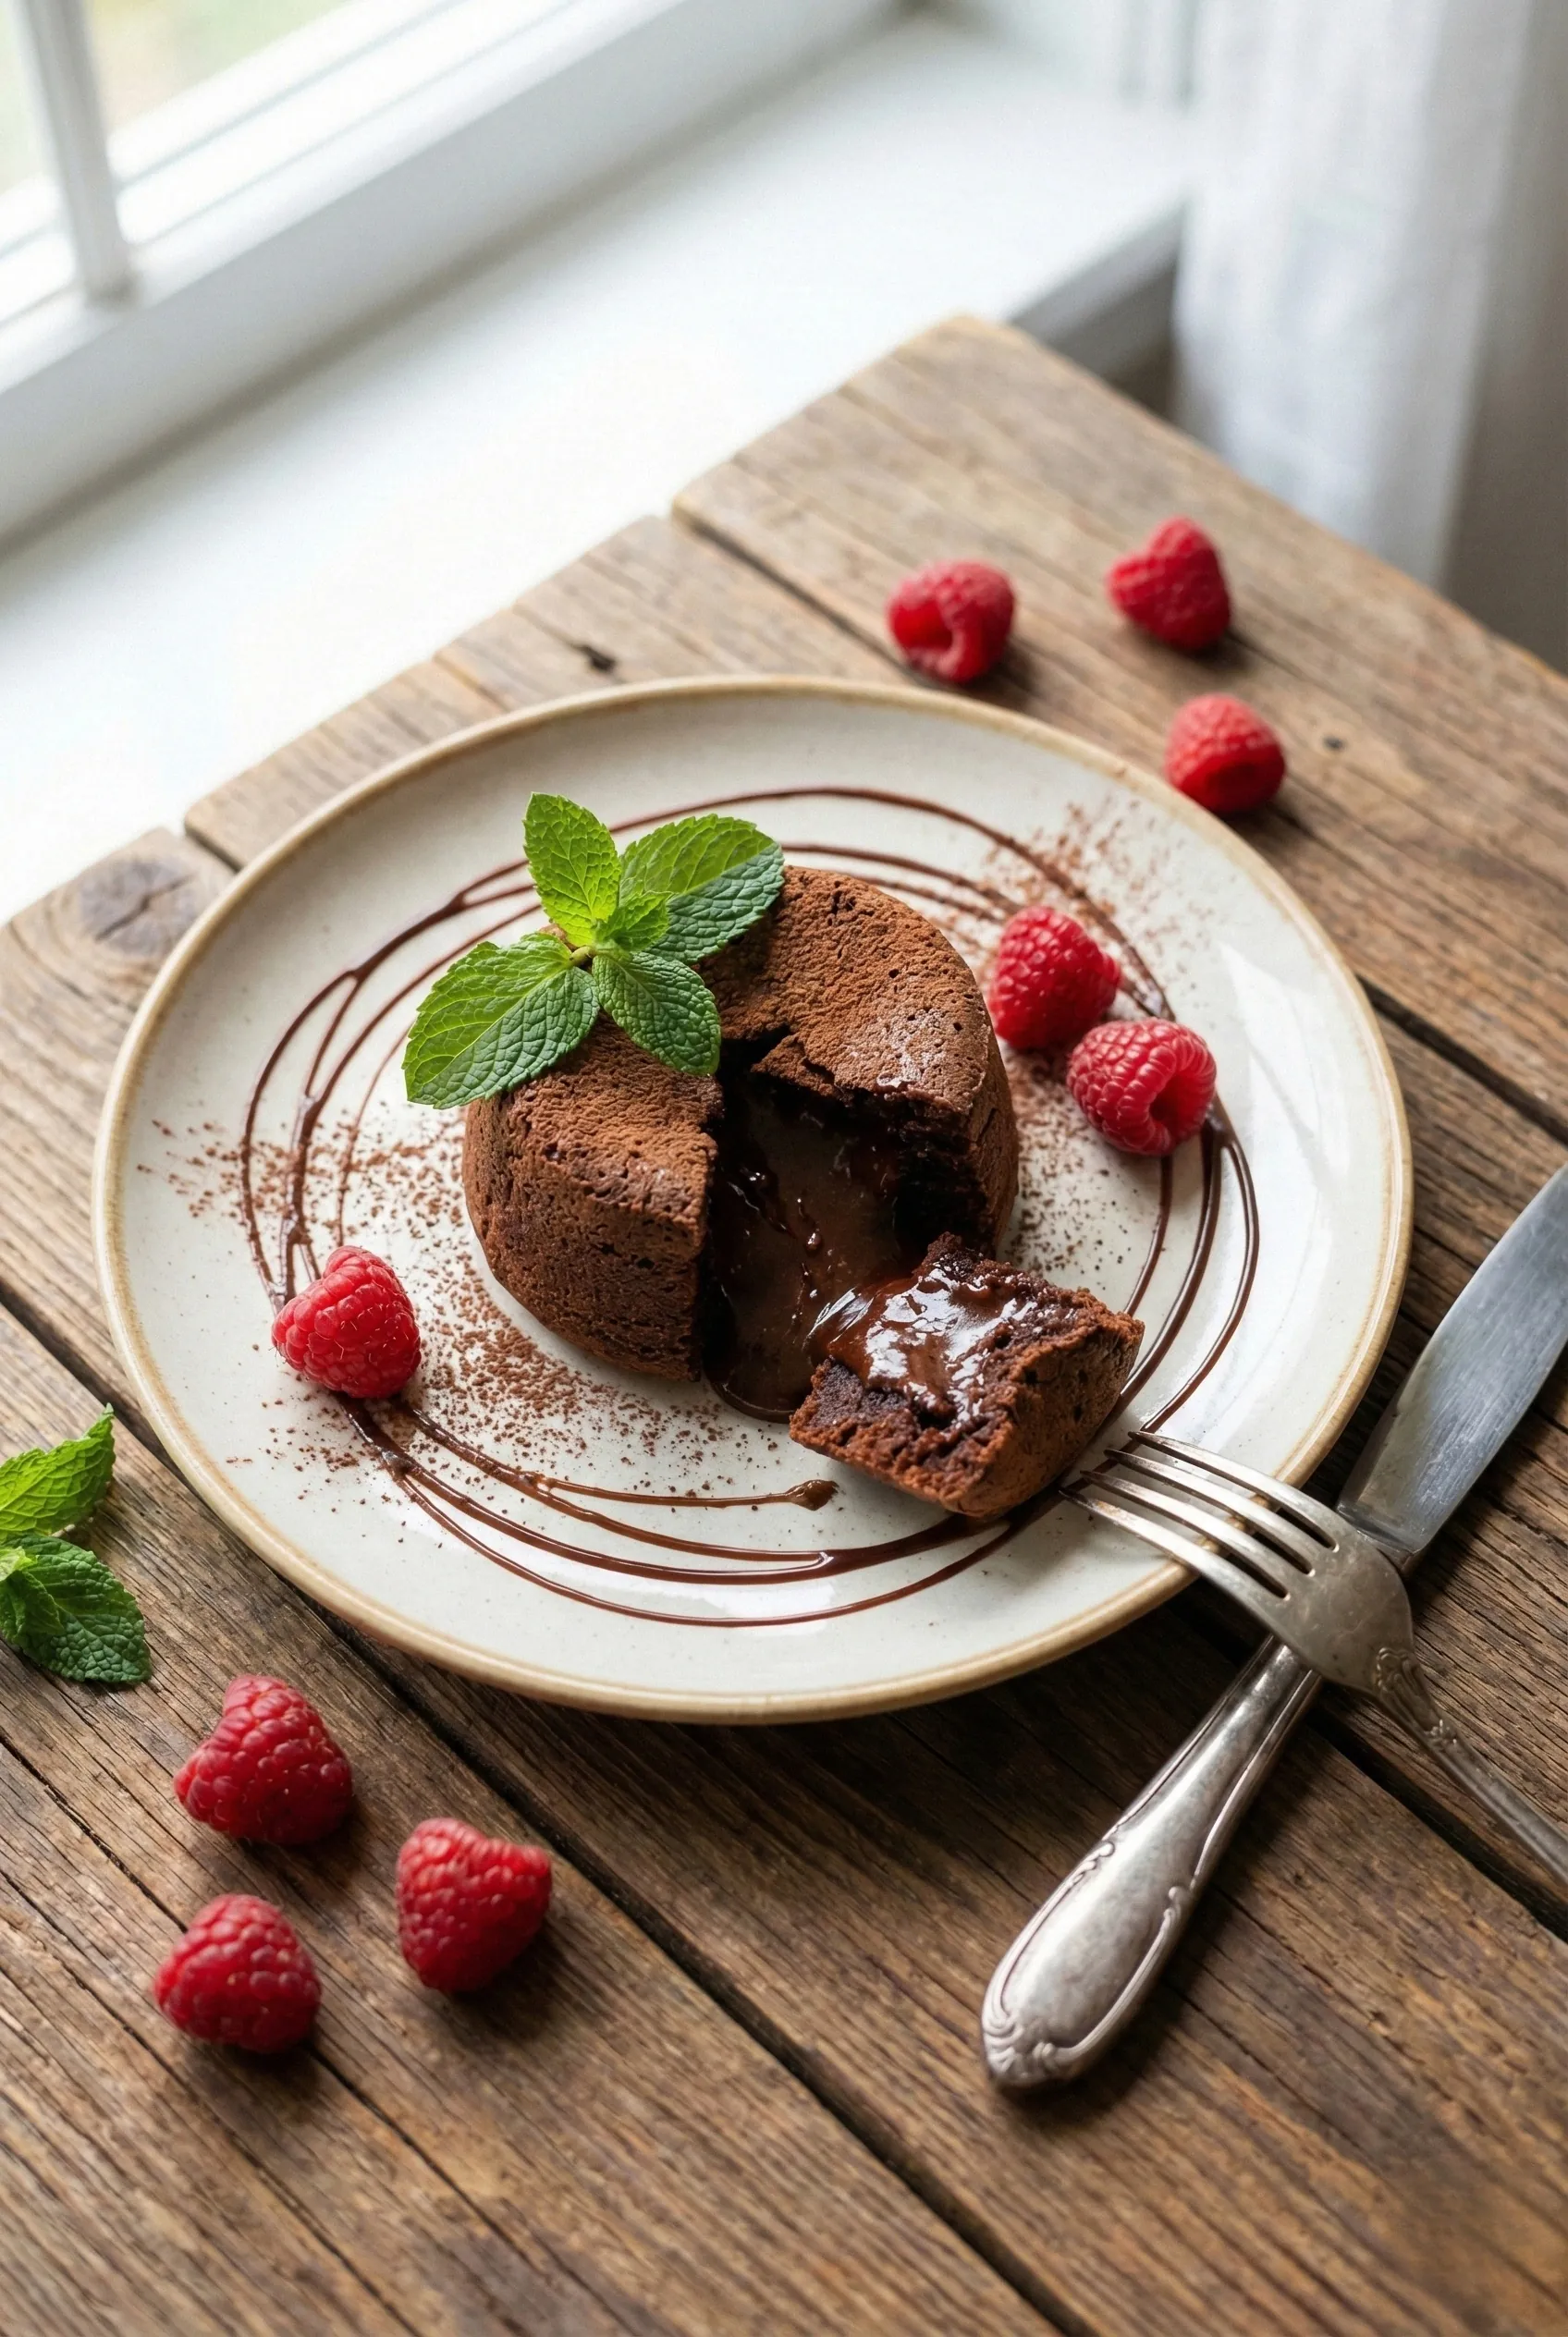
Let me tell you about one of my absolute favorite desserts to whip up: Chocolate Lava Cakes! I can’t even count how many times I’ve made this recipe—it’s become a staple in my kitchen and a guaranteed crowd-pleaser. Whenever I serve these rich, gooey delights, the compliments come pouring in! Picture this: a delicate cake shell that gives way to a molten chocolate center, flowing like a dream onto your plate. Trust me, once you make these, you’ll understand why they’re so beloved by everyone I know!
Why You’ll Love This Chocolate Lava Cakes
- Easy to Make: With just a few simple ingredients, you’re on your way to dessert heaven!
- Impressive Presentation: These individual cakes look like they belong in a fancy restaurant, making you the star of any gathering.
- Versatile Flavors: You can easily customize them with different flavors to keep things exciting.
- Perfect for Any Occasion: Whether it’s a birthday, anniversary, or just a cozy night in, they fit the bill!
- Make-Ahead Convenience: You can prepare the batter in advance and bake them right before serving, which is a total game-changer!
The Secret to Perfect Chocolate Lava Cakes
The secret to these Chocolate Lava Cakes is all in the timing and the quality of your chocolate. Using high-quality chocolate is essential because it directly impacts the flavor and richness of your cakes. I recommend using at least 60% cocoa for that deep, luscious flavor. Also, don’t skip the step of letting them cool slightly before serving; that’s when the magic happens! Trust me, with these insider tips, you’ll feel like a pro in the kitchen!
Rave Reviews from Friends and Followers
“These Chocolate Lava Cakes are nothing short of an indulgent experience! I made them for a dinner party, and everyone was raving about them. I can’t wait to make them again!” – Sarah J.
“I’ve tried other lava cake recipes, but this one is by far the best! The chocolate center was perfectly gooey and rich. Thank you for sharing!” – Mark T.
“I made these for my husband’s birthday, and he was blown away! They looked stunning and tasted even better. A must-make!” – Emily R.
Creative Variations to Try
- Nutty Delight: Add chopped hazelnuts or walnuts for a crunchy texture contrast.
- Berry Surprise: Incorporate fresh raspberries into the center for a fruity burst.
- Spiced Chocolate: Mix in a pinch of cinnamon or chili powder for a warm, spicy kick.
- Coffee Infusion: Add a teaspoon of espresso powder to deepen the chocolate flavor.
- Minty Fresh: Use peppermint extract for a festive touch, especially during the holidays.
Bonus: Drizzle with caramel sauce or serve with a scoop of vanilla ice cream for an extra layer of decadence!
FAQs – All Your Questions Answered!
Can I use a different type of chocolate? Absolutely! Just keep in mind that the flavor will vary; dark chocolate gives a richer taste, while milk chocolate will be sweeter.
How do I store leftover cakes? These cakes are best enjoyed fresh, but you can store them in an airtight container in the fridge for up to 2 days. Just reheat slightly in the microwave before serving!
Can I freeze the batter? Yes! You can freeze the batter in individual ramekins. Just bake them straight from the freezer, adding a couple of extra minutes to the baking time.
What if my cakes don’t rise? Ensure your oven is properly preheated and that you’re measuring the ingredients accurately. Overmixing can also lead to dense cakes, so mix gently!
Can I make these in advance? Absolutely! Prepare the batter ahead of time, refrigerate it in the ramekins, and bake just before serving for the freshest taste.
Storage/Serving Tips
- Store in an airtight container in the fridge for up to 2 days.
- Reheat in the microwave for about 15-20 seconds before serving to revive that gooey center.
- Serve warm with a dusting of powdered sugar or a scoop of ice cream for a delightful touch.
- Garnish with fresh berries or mint leaves for a pop of color.
Perfect Occasions for Chocolate Lava Cakes
- Date night at home
- Holiday gatherings and celebrations
- Birthday parties
- Anniversary dinners
- Casual get-togethers with friends
- Surprise treats for your loved ones
- Cozy nights in with a movie
The Complete Recipe
Thank you for sticking with me through this delicious journey! Now, let’s dive into the actual recipe for these irresistible Chocolate Lava Cakes.
Chocolate Lava Cakes
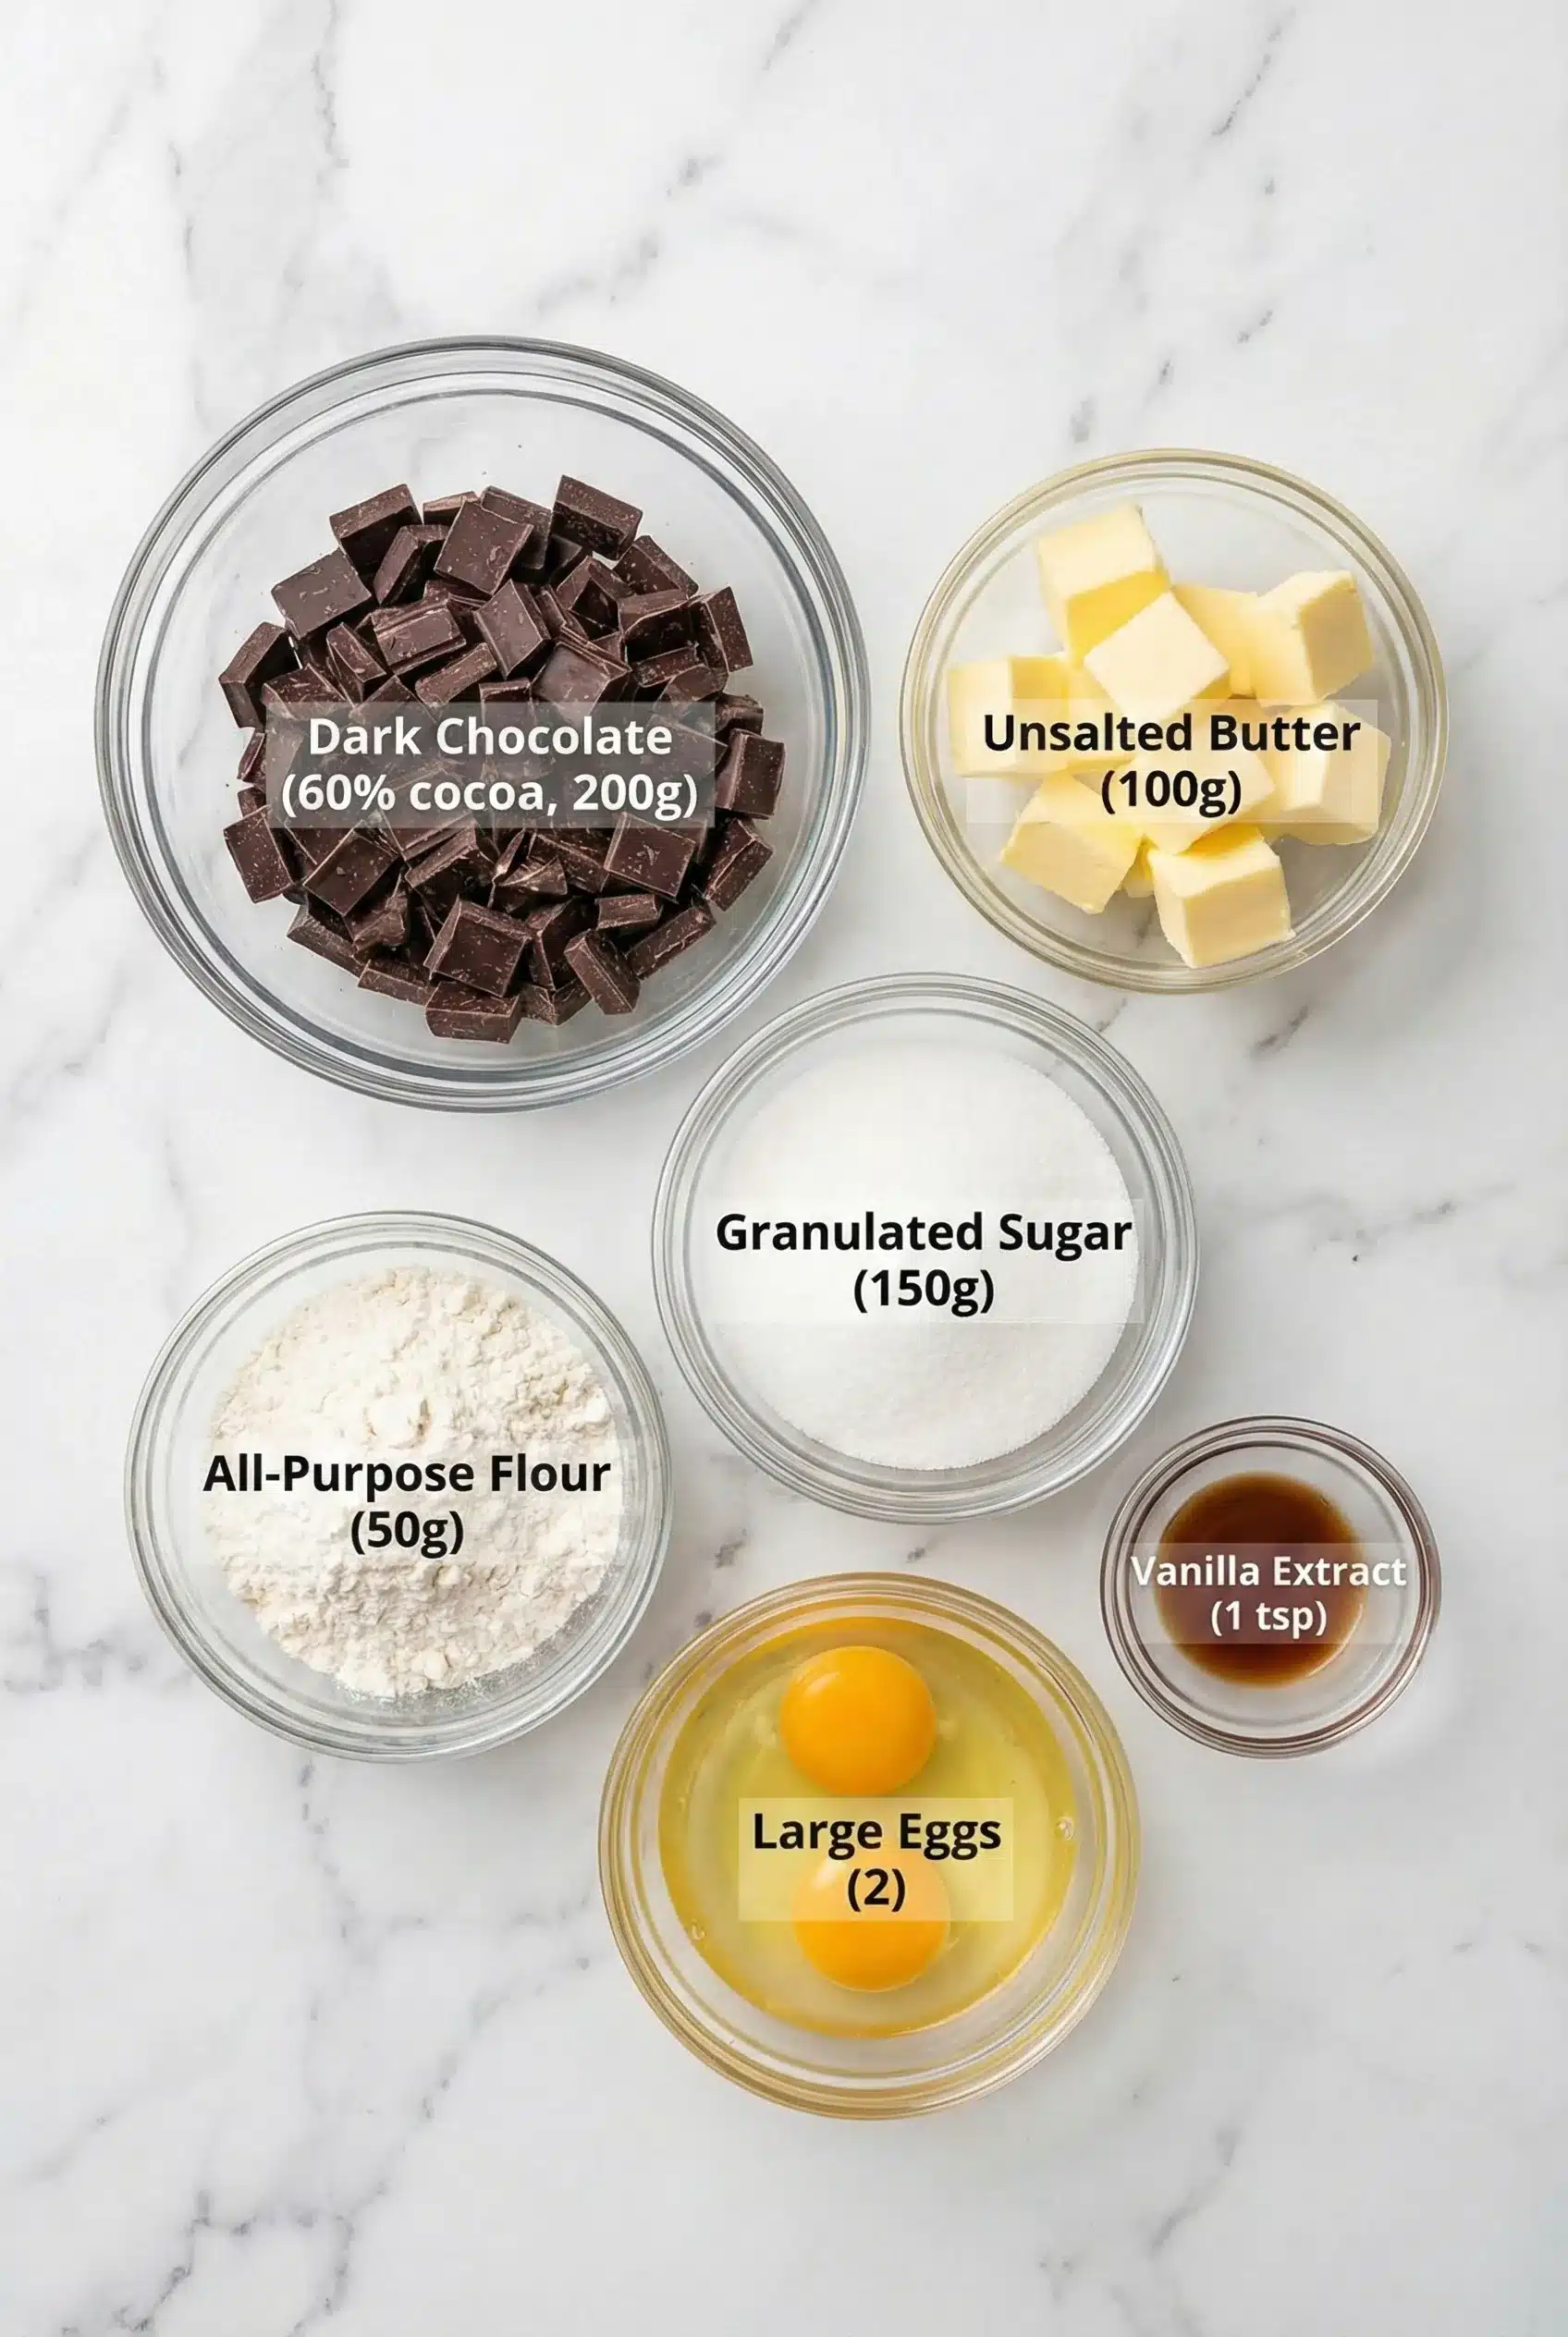
Ingredients
- 1/2 cup (1 stick) unsalted butter
- 1 cup high-quality dark chocolate (60% cocoa or more), chopped
- 2 large eggs
- 2 large egg yolks
- 1/4 cup granulated sugar
- 2 tablespoons all-purpose flour
- 1 teaspoon vanilla extract
- Tip: For an ultra-rich flavor, consider adding a tablespoon of espresso powder to the batter.
Extend ingredients section: You can substitute the all-purpose flour with a gluten-free blend if you need a gluten-free option. The chocolate is key, so choose one that you love to eat!
Step-by-Step Instructions
Step 1: Preheat Your Oven
Preheat your oven to 425°F (220°C). This is crucial for achieving that perfect molten center. While the oven warms, you can prepare your ramekins!
Step 2: Prepare the Ramekins
Grease four ramekins with butter and dust them with flour. This will help the cakes release easily after baking. I like to place them on a baking tray for easier transfer to and from the oven.
Step 3: Melt the Chocolate and Butter
In a medium microwave-safe bowl, combine the chopped chocolate and butter. Microwave in 20-second intervals, stirring in between, until melted and smooth. This step is where the magic begins!
Step 4: Whisk the Eggs and Sugar
In a separate bowl, whisk together the eggs, egg yolks, and sugar until light and frothy. This adds air into the mixture, helping the cakes rise beautifully.
Step 5: Combine Mixtures
Pour the melted chocolate mixture into the egg mixture and stir until well combined. Then gently fold in the flour and vanilla extract, being careful not to overmix!
Step 6: Fill the Ramekins
Divide the batter evenly among the prepared ramekins. You want to fill them about three-quarters full to allow room for rising and that glorious molten center!
Step 7: Bake
Bake in the preheated oven for 12-14 minutes. The edges should look firm, but the center should still be soft. This is the moment of truth!
Step 8: Cool and Serve
Allow the cakes to cool for 1-2 minutes before gently running a knife around the edges. Invert onto a plate and serve warm. The anticipation is almost unbearable, but it’s oh-so-worth-it!
Nutrition info (per cake): Approximately 350 calories, 24g fat, 25g carbohydrates, 6g protein.
Extend instructions: If you’re feeling fancy, top with homemade whipped cream or a sprinkle of sea salt for that delightful contrast of flavors. Presentation is key, so take your time to serve them beautifully!
Final Thoughts
There you have it! Your go-to recipe for Chocolate Lava Cakes that will wow your friends and family. I can’t emphasize enough how special this dessert is—it’s a true indulgence that makes every occasion feel like a celebration. I wholeheartedly encourage you to give this
Chocolate Lava Cakes
-
Total Time:
29 mins -
Yield:
4 servings
Indulge in rich, gooey chocolate lava cakes that melt in your mouth, featuring a warm, molten center and a decadent finish—perfect for any occasion.
Ingredients
- • 1/2 cup (1 stick) unsalted butter
- • 1 cup high-quality dark chocolate (60% cocoa or more), chopped
- • 2 large eggs
- • 2 large egg yolks
- • 1/4 cup granulated sugar
- • 2 tablespoons all-purpose flour
- • 1 teaspoon vanilla extract
Instructions
- Preheat your oven to 425°F (220°C).
- Grease four ramekins with butter and dust them with flour.
- In a medium microwave-safe bowl, combine the chopped chocolate and butter. Microwave in 20-second intervals, stirring in between, until melted and smooth.
- In a separate bowl, whisk together the eggs, egg yolks, and sugar until light and frothy.
- Pour the melted chocolate mixture into the egg mixture and stir until well combined. Then gently fold in the flour and vanilla extract.
- Divide the batter evenly among the prepared ramekins.
- Bake in the preheated oven for 12-14 minutes.
- Allow the cakes to cool for 1-2 minutes before gently running a knife around the edges. Invert onto a plate and serve warm.
Notes
Storage: Store leftovers in an airtight container in the fridge for up to 3 days.
- Prep Time: 15 mins
- Cook Time: 14 mins
- Category: Dessert
- Cuisine: American
- Method: Oven