Let me tell you about my absolute favorite go-to dessert: Chocolate Mousse Cups! I’ve whipped these up countless times, and every single time, they steal the show. Whether it’s a dinner party, a family gathering, or just a cozy night at home, these mousse cups are always a hit. Trust me, once you try them, you’ll understand why I can’t stop raving about them! They’re quick, decadent, and oh-so-delicious — ready in just 15 minutes! Are you ready to impress your friends and family with this rich, creamy indulgence? Let’s dive in!
Why You’ll Love This Chocolate Mousse Cups
- Quick and Easy: With just 15 minutes of prep time, you can create a dessert that feels downright luxurious.
- No Baking Required: Perfect for those hot days when you want a sweet treat without heating up the kitchen!
- Versatile Presentation: These mousse cups look gorgeous served in individual cups, making them ideal for any gathering.
- Gluten-Free Delight: Suitable for gluten-sensitive friends, so everyone can enjoy a taste of luxury!
- Make-Ahead Convenience: Prepare them in advance, and you’ll have a delightful dessert ready to impress at a moment’s notice.
The Secret to Perfect Chocolate Mousse Cups
The key to achieving the perfect Chocolate Mousse Cups lies in the quality of your chocolate and the technique of folding the whipped cream. Using a high-quality dark chocolate makes all the difference in taste — I recommend at least 70% cocoa for that rich flavor. The magic happens when you gently fold the whipped cream into the chocolate mixture; this technique traps air and gives your mousse that light, airy texture. Don’t rush this step — take your time, and you’ll be rewarded with a silky-smooth dessert that’s simply irresistible!
Rave Reviews from Friends and Followers
“These Chocolate Mousse Cups are a game-changer! I brought them to a potluck, and everyone was asking for the recipe. So easy and so good!” — Sarah T.
“I’ve never made mousse before, but this recipe made it so simple! My family couldn’t believe I made it in just 15 minutes!” — Mark L.
“I love how versatile these mousse cups are! I’ve tried different flavors, and they are all amazing. Definitely a keeper!” — Jenna R.
Creative Variations to Try
- Mint Chocolate Mousse: Add a few drops of peppermint extract for a refreshing twist.
- Chocolate Orange Mousse: Incorporate orange zest and a splash of orange juice to brighten the flavor.
- Hazelnut Chocolate Mousse: Mix in some crushed hazelnuts or use Nutella for a decadent nutty flavor.
- Spicy Chocolate Mousse: Add a pinch of cayenne pepper for a surprising kick that complements the chocolate beautifully.
Bonus: For an extra touch, top with whipped cream and fresh berries for a stunning presentation!
FAQs – All Your Questions Answered!
How long can I store Chocolate Mousse Cups?
Typically, they can be stored in the refrigerator for up to 3 days. Just make sure to cover them to prevent them from absorbing any odors.
Can I use milk chocolate instead of dark chocolate?
Absolutely! Just keep in mind that it will result in a sweeter mousse. Adjust the sugar accordingly if you prefer less sweetness.
What if my mousse doesn’t set?
Make sure your chocolate is cooled before folding in the whipped cream. If it’s too warm, it can cause the cream to deflate.
Can I make these mousse cups dairy-free?
Yes! Use a dairy-free chocolate and substitute heavy cream with coconut cream for a delicious dairy-free version.
Storage/Serving Tips
- Store mousse cups in the fridge, covered, to maintain freshness.
- Best enjoyed chilled, so consider making them a few hours ahead of serving.
- Garnish just before serving to keep the toppings fresh and appealing.
Perfect Occasions for Chocolate Mousse Cups
- Birthday parties — everyone loves a treat that feels special.
- Anniversaries — a romantic indulgence for two.
- Holiday gatherings — a festive dessert to impress guests.
- Dinner parties — elevate your hosting game with minimal effort.
- Movie nights — treat yourself to something indulgent while you binge-watch!
The Complete Recipe
Thank you for sticking with me! Now, let’s get into the nitty-gritty of making these fabulous Chocolate Mousse Cups.
Chocolate Mousse Cups
Ingredients
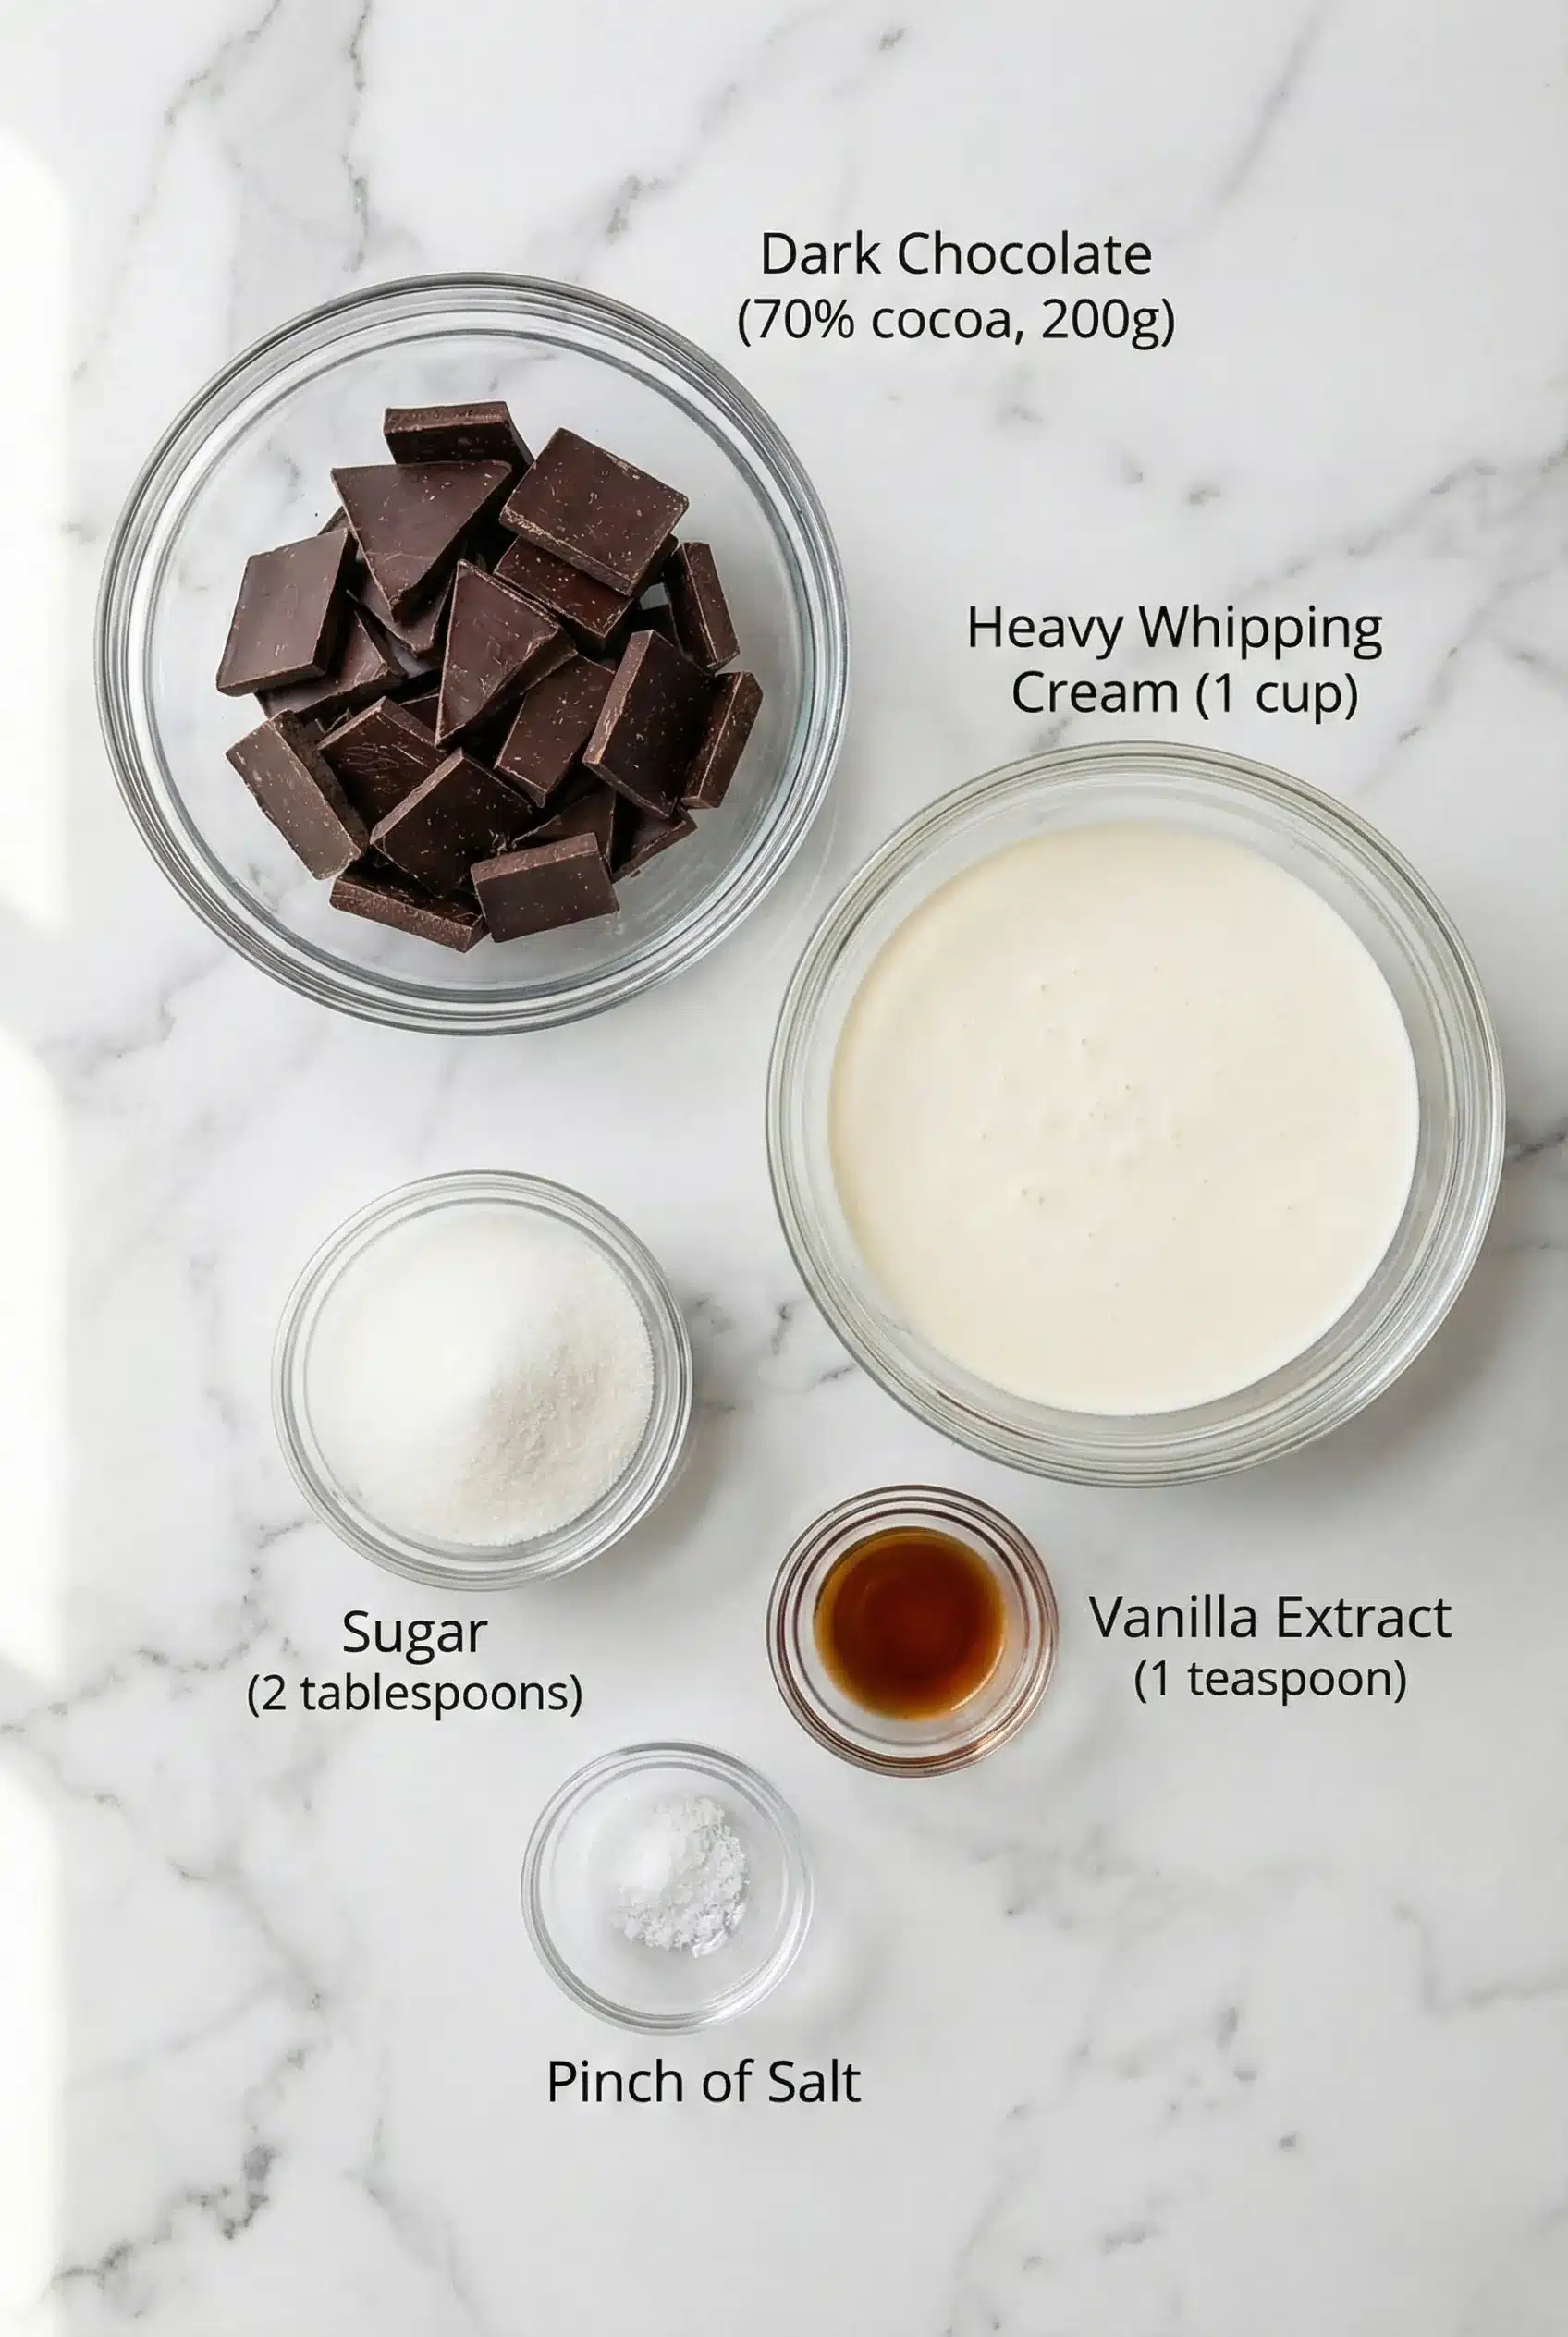
- 8 ounces high-quality dark chocolate (70% cocoa or higher)
- 2 cups heavy cream
- 1/4 cup granulated sugar
- 1 teaspoon vanilla extract
- Pinch of salt
Tip: Use chilled mixing bowls and beaters to help the cream whip faster and achieve more volume!
Optional Add-Ins: Consider adding a tablespoon of espresso for a mocha flavor or a splash of liqueur for an adult twist. Each ingredient plays a role in enhancing the chocolate flavor and creating the perfect texture.
Step-by-Step Instructions
Step 1: Melt the Chocolate
Start by breaking your chocolate into small pieces and placing it in a heatproof bowl. Melt it gently over a double boiler or in the microwave, stirring until smooth. Make sure not to overheat it — we want it silky, not burnt!
Step 2: Whip the Cream
In another bowl, add your heavy cream, sugar, vanilla extract, and salt. Using an electric mixer, whip the mixture on medium speed until soft peaks form. This step is crucial, so keep an eye on it — you want it fluffy but not over-whipped.
Step 3: Combine Chocolate and Cream
Once the chocolate has cooled slightly (but is still pourable), gently fold in about a third of the whipped cream to lighten it. Then, carefully fold in the remaining whipped cream until no streaks remain. This step is what gives your mousse that airy texture — be gentle!
Step 4: Spoon into Cups
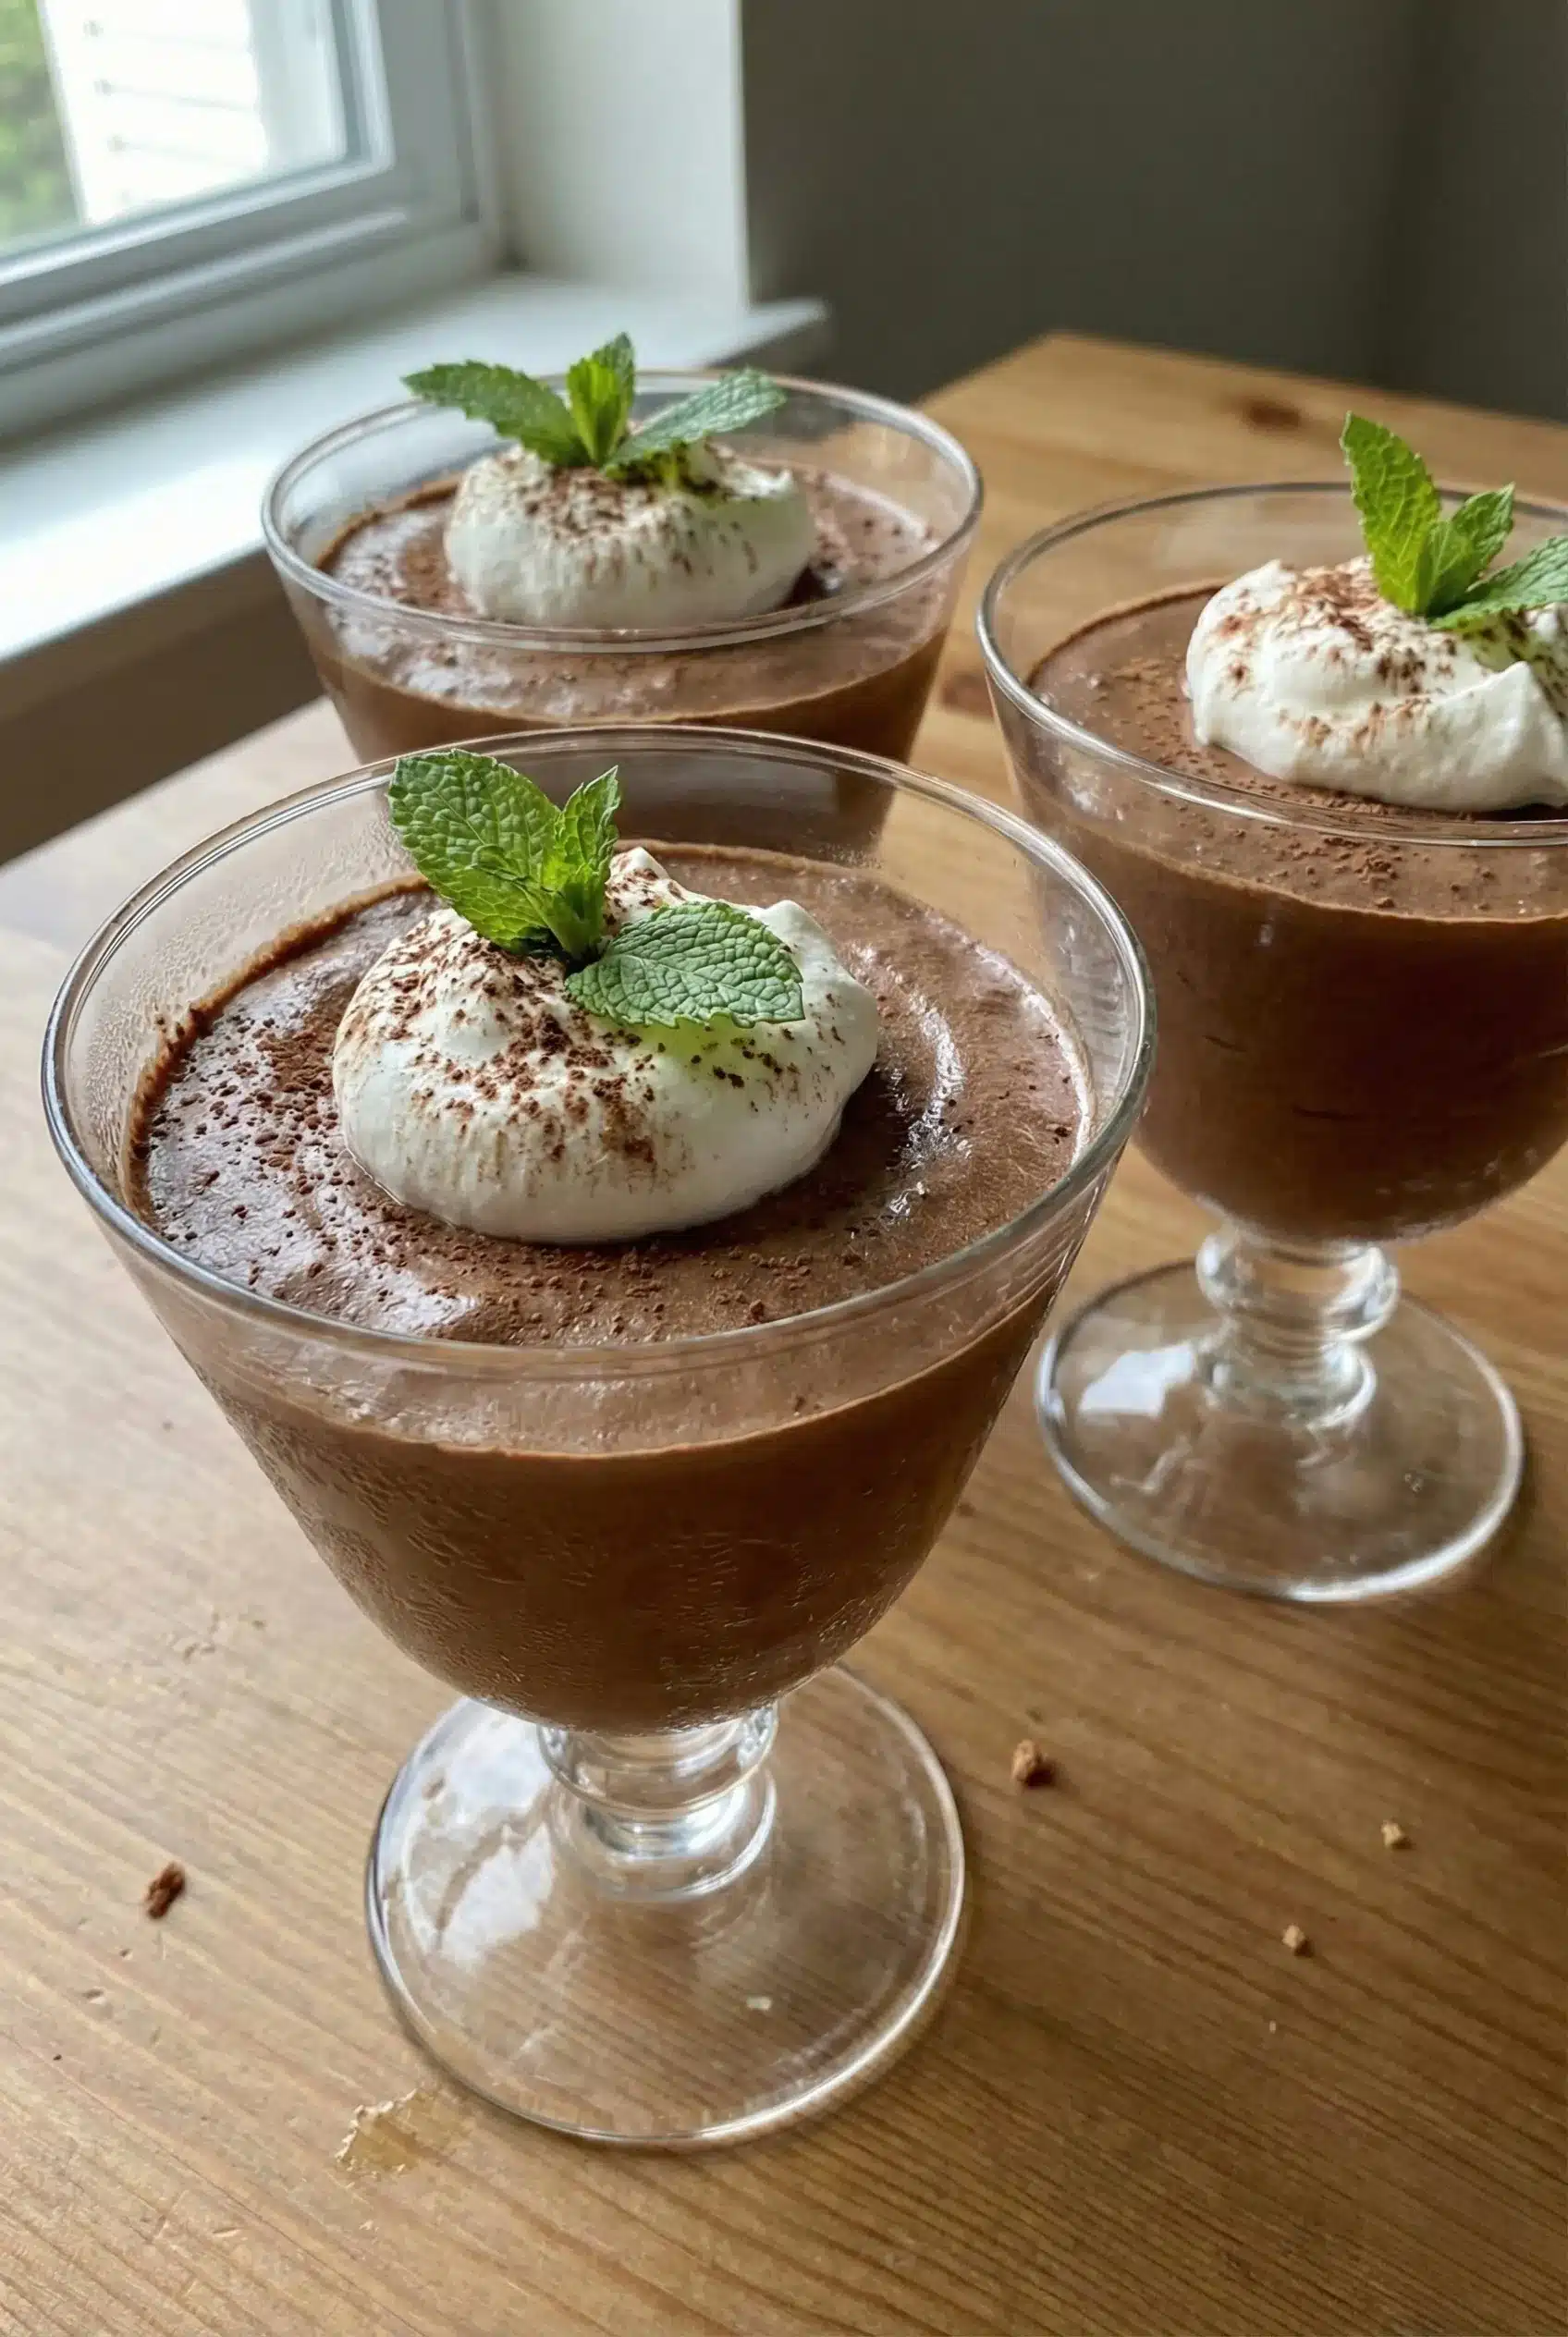
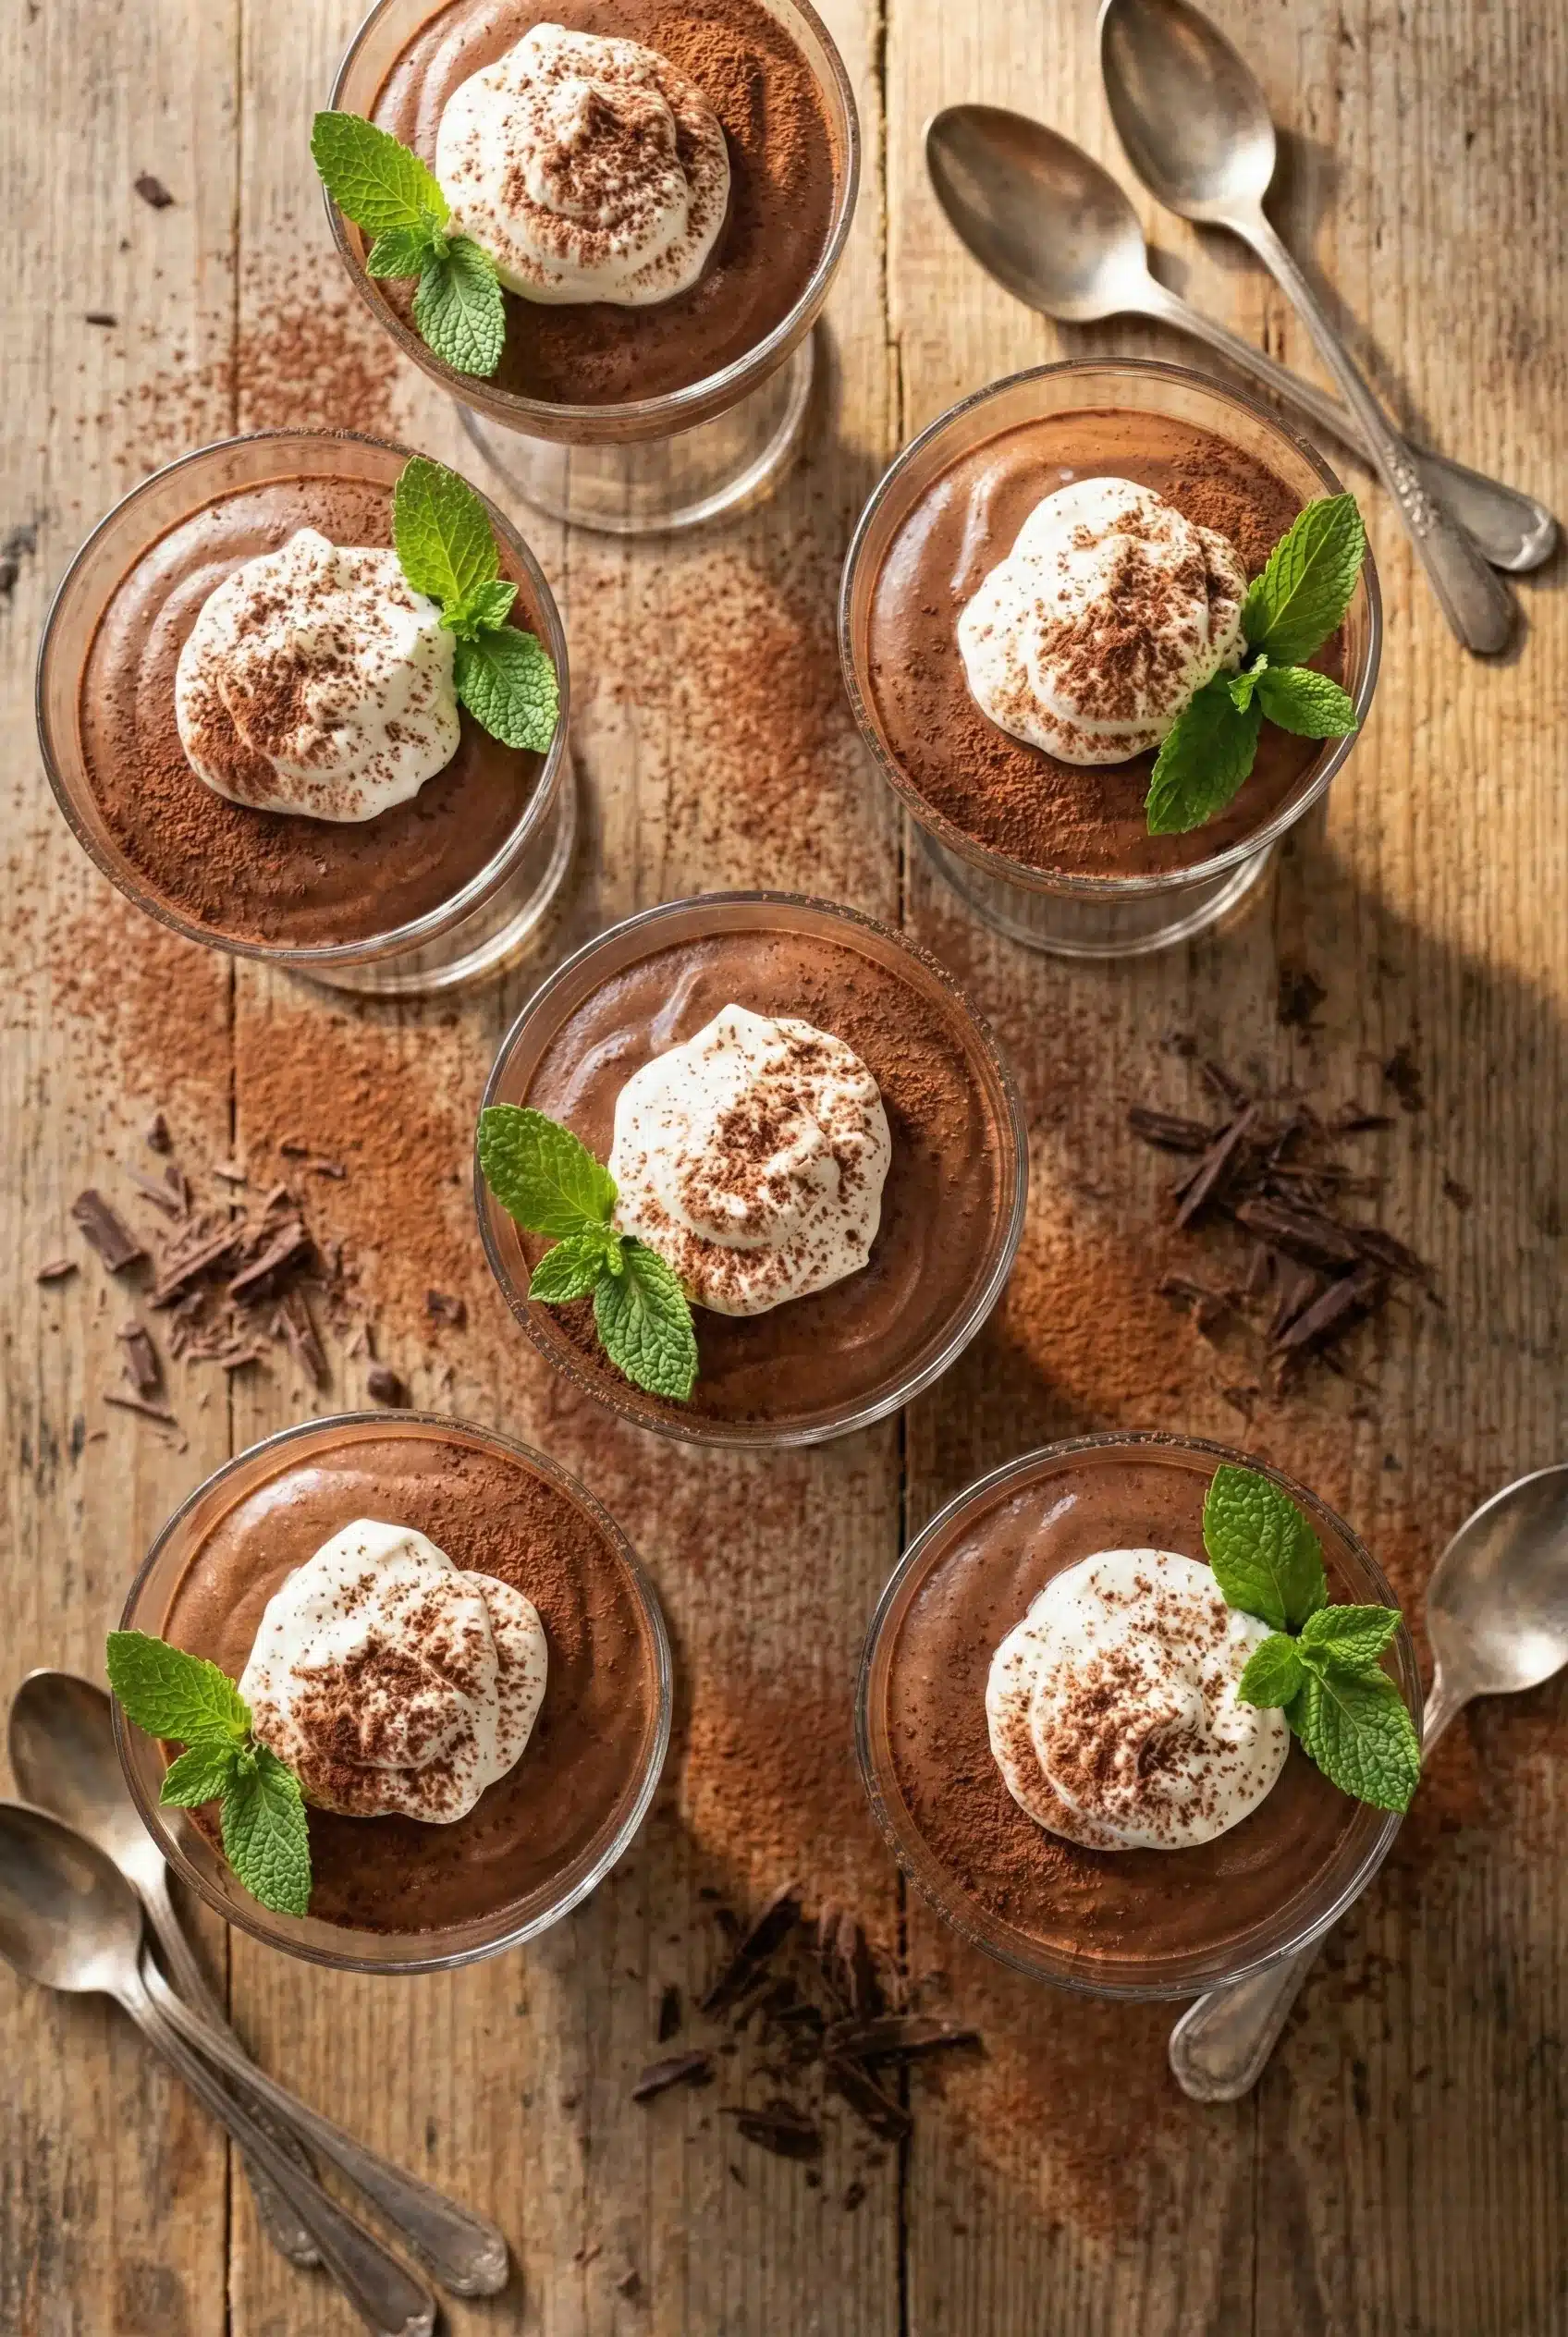
Using a spatula or a piping bag, spoon the mousse mixture into serving cups. I love using clear cups so everyone can admire the luscious chocolate layers. You can fill them up to the top or leave a little space for garnishing later — your call!
Step 5: Chill and Serve
Refrigerate the mousse cups for at least 2 hours before serving. This allows the flavors to meld and the mousse to firm up. When ready to serve, top with whipped cream, chocolate shavings, or fresh fruit for that wow factor!
Nutrition info (per serving): Approximately 250 calories, 20g fat, 15g carbohydrates, 3g protein.
Final Thoughts
Chocolate Mousse Cups are truly a showstopper, and I hope you feel inspired to make them. The blend of rich chocolate and airy cream creates a dessert that feels indulgent yet is so easy to prepare. Whether for a special occasion or simply as a treat for yourself, these mousse cups are sure to impress. So gather your ingredients, get your mixing bowls ready, and let’s make some magic happen in the kitchen! You won’t regret it!
Chocolate Mousse Cups
-
Total Time:
2 hr 15 mins -
Yield:
4 servings
Indulge in rich chocolate mousse cups made with velvety dark chocolate and creamy mascarpone, ready to delight in just 15 minutes.
Ingredients
- • 8 ounces high-quality dark chocolate (70% cocoa or higher)
- • 2 cups heavy cream
- • 1/4 cup granulated sugar
- • 1 teaspoon vanilla extract
- • Pinch of salt
Instructions
- Melt the Chocolate: Start by breaking your chocolate into small pieces and placing it in a heatproof bowl. Melt it gently over a double boiler or in the microwave, stirring until smooth.
- Whip the Cream: In another bowl, add your heavy cream, sugar, vanilla extract, and salt. Using an electric mixer, whip the mixture on medium speed until soft peaks form.
- Combine Chocolate and Cream: Once the chocolate has cooled slightly, gently fold in about a third of the whipped cream to lighten it. Then, carefully fold in the remaining whipped cream until no streaks remain.
- Spoon into Cups: Using a spatula or a piping bag, spoon the mousse mixture into serving cups.
- Chill and Serve: Refrigerate the mousse cups for at least 2 hours before serving. Top with whipped cream, chocolate shavings, or fresh fruit before serving.
Notes
Storage: Store leftovers in an airtight container in the fridge for up to 3 days.
- Prep Time: 15 mins
- Cook Time: 0 mins
- Category: Dessert
- Cuisine: French
- Method: Oven