
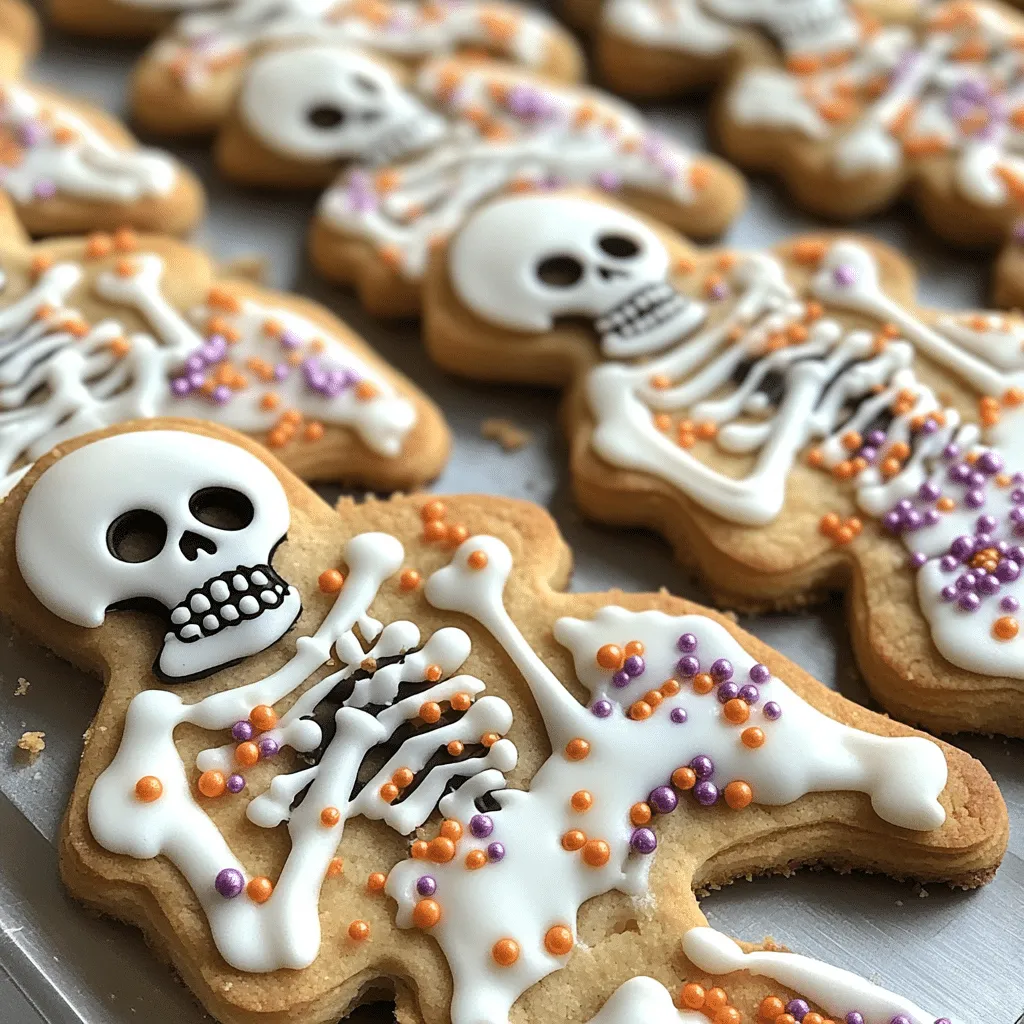
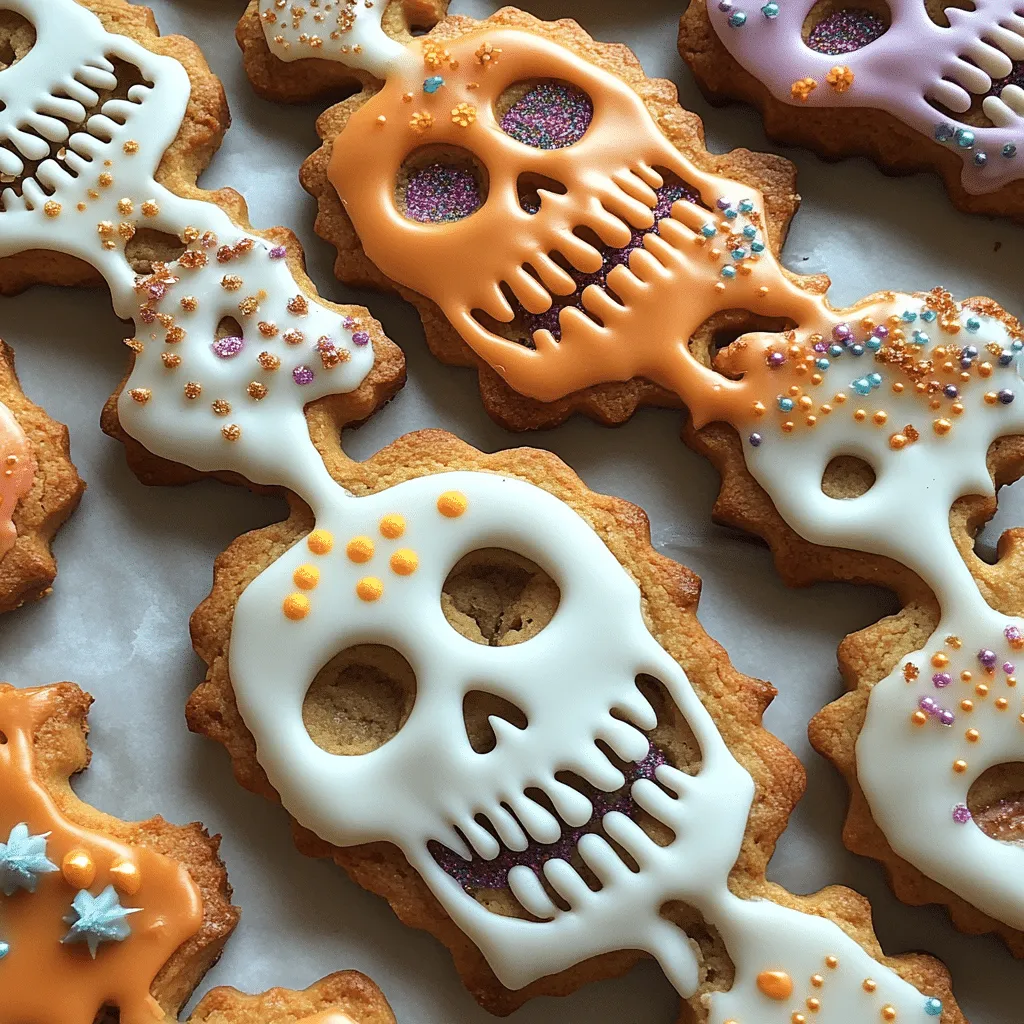
Hey there, fellow baking enthusiasts! I have to tell you about one of my absolute favorite Halloween treats: Skeleton Biscuits! I first made these adorable little guys a few years ago for a Halloween party, and let me tell you, they were an instant hit. Since then, I’ve made them countless times, and they never fail to impress. Whether it’s for a school event, a spooky get-together, or just some fun family baking, these biscuits are always the star of the show! So, grab your mixing bowls and let’s dive into this delicious recipe that will surely make your Halloween festivities extra special!
Why You’ll Love This Skeleton Biscuits Recipe
- Easy to Make: Trust me, if I can whip these up without a hitch, so can you! The recipe is straightforward, making it perfect for bakers of all levels.
- Visually Appealing: These biscuits are fun to decorate and look fantastic on any Halloween spread. Your friends will be impressed by your creativity!
- Deliciously Tasty: With a perfect blend of sweetness and buttery goodness, these biscuits are sure to please everyone’s palate!
- Versatile: You can mix and match flavors or decorations, making each batch uniquely yours!
- Make-Ahead Convenience: Bake these in advance and store them! They hold up well, making them great for planning ahead!
The Secret to Perfect Skeleton Biscuits
The key to nailing these Skeleton Biscuits is in the chilling process. Chilling the dough allows the butter to firm up, which helps the biscuits to hold their shape during baking. When you take them out of the oven, they’ll be perfectly shaped skeletons ready for decoration! Also, using a great quality vanilla extract elevates the flavor, so don’t skimp on that! I promise, it’s a game-changer!
Rave Reviews from Friends and Followers
“These Skeleton Biscuits were the highlight of our Halloween party! Everyone was raving about how cute they looked and how delicious they were!” – Sarah T.
“I made these with my kids, and we had a blast decorating them! They tasted amazing and were so much fun to create together!” – Jason M.
“I brought these to work, and my team couldn’t get enough! They were gone in minutes! Definitely a recipe to keep!” – Emily R.
Creative Variations to Try
- Chocolate Skeleton Biscuits: Swap out some of the flour for cocoa powder to create chocolate-flavored biscuits.
- Spiced Pumpkin Biscuits: Add some pumpkin puree and spices like cinnamon and nutmeg for a seasonal twist.
- Almond Flavored Biscuits: Use almond extract instead of vanilla for a nutty flavor that pairs perfectly with icing.
- Decorative Icing Variations: Try using different colored icing for a vibrant look—think pastel shades or neon colors!
Bonus Tip: Use edible glitter or sprinkles to add an enchanting touch to your skeleton biscuits!
FAQs – All Your Questions Answered!
Can I use gluten-free flour for this recipe? Absolutely! Gluten-free flour works well, but you may need to adjust the liquid ingredients slightly.
How should I store my skeleton biscuits? Keep them in an airtight container at room temperature for up to a week. They also freeze well!
Can I decorate these biscuits ahead of time? Yes! Decorate them a day before your event and store them in a cool, dry place.
What if my dough is too sticky? If your dough feels too sticky, just add a little more flour until it’s manageable. Don’t be afraid of a bit of flour!
Storage/Serving Tips
- Store skeleton biscuits in an airtight container to maintain their freshness.
- They last for about a week at room temperature, but you can freeze them for up to three months!
- For serving, arrange them on a festive platter with some Halloween-themed decorations for an impressive display.
Perfect Occasions for Skeleton Biscuits
- Halloween parties
- School bake sales
- Trick-or-treaters
- Spooky movie nights
- Fall festivals
- Family gatherings
- As classroom treats for kids
The Complete Recipe
Thank you for sticking around! I’m so excited to share this delicious recipe with you. Let’s get to the fun part!
Skeleton Biscuits
Ingredients
- 2 ¾ cups all-purpose flour
- 1 teaspoon baking powder
- ½ teaspoon salt
- 1 cup unsalted butter, softened
- 1 cup granulated sugar
- 1 large egg
- 1 teaspoon vanilla extract
- Decorating icing (store-bought or homemade)
- Optional: edible decorations like sprinkles, glitter, or colored sugar
Tip: Use cold butter for a firmer dough if you prefer a sturdier biscuit that holds its shape even better.
Step-by-Step Instructions
Step 1: Mix Dry Ingredients
In a bowl, whisk together the flour, baking powder, and salt. This step is crucial as it helps evenly distribute the leavening agent and ensures a consistent texture in your biscuits.
Step 2: Cream Butter and Sugar
In a large mixing bowl, cream together the softened butter and sugar until it’s light and fluffy. This should take about 3-5 minutes. The fluffiness is what gives your biscuits that wonderful texture!
Step 3: Add Egg and Vanilla
Beat in the egg and vanilla extract until well combined. This adds richness and flavor to your biscuits, making them even more delightful!
Step 4: Combine Wet and Dry Ingredients
Gradually add the dry ingredients to the wet mixture, stirring until just combined. Be careful not to overmix; we want tender biscuits!
Step 5: Chill the Dough
Wrap the dough in plastic wrap and refrigerate for at least 1 hour. This is where the magic happens! Chilling helps the biscuits maintain their shape while baking.
Step 6: Preheat and Prepare
Preheat your oven to 350°F (175°C) and line a baking sheet with parchment paper. This step ensures even baking and prevents sticking!
Step 7: Roll and Cut
On a floured surface, roll out the dough to about ¼ inch thickness. Cut out skeleton shapes using your favorite cookie cutters and place them on the prepared baking sheet.
Step 8: Bake
Bake in the preheated oven for 10-12 minutes or until the edges are lightly golden. Keep an eye on them; they can go from perfect to overdone quickly!
Step 9: Cool and Decorate
Allow the biscuits to cool on the baking sheet for a few minutes before transferring them to a wire rack. Once cool, decorate with icing and edible decorations. This is where the fun really begins, so get creative!
Nutrition info (per biscuit): Approximately 150 calories, 8g fat, 20g carbs, 1g protein.
Final Thoughts
So, there you have it! My beloved Skeleton Biscuits recipe is sure to bring joy to your Halloween celebrations. With their charming look and delicious taste, these biscuits are not just treats; they are a way to create lasting memories with friends and family. I encourage you to try this recipe and experience the delight it brings. Happy baking, and may your Halloween be filled with sweetness and spooky fun!