
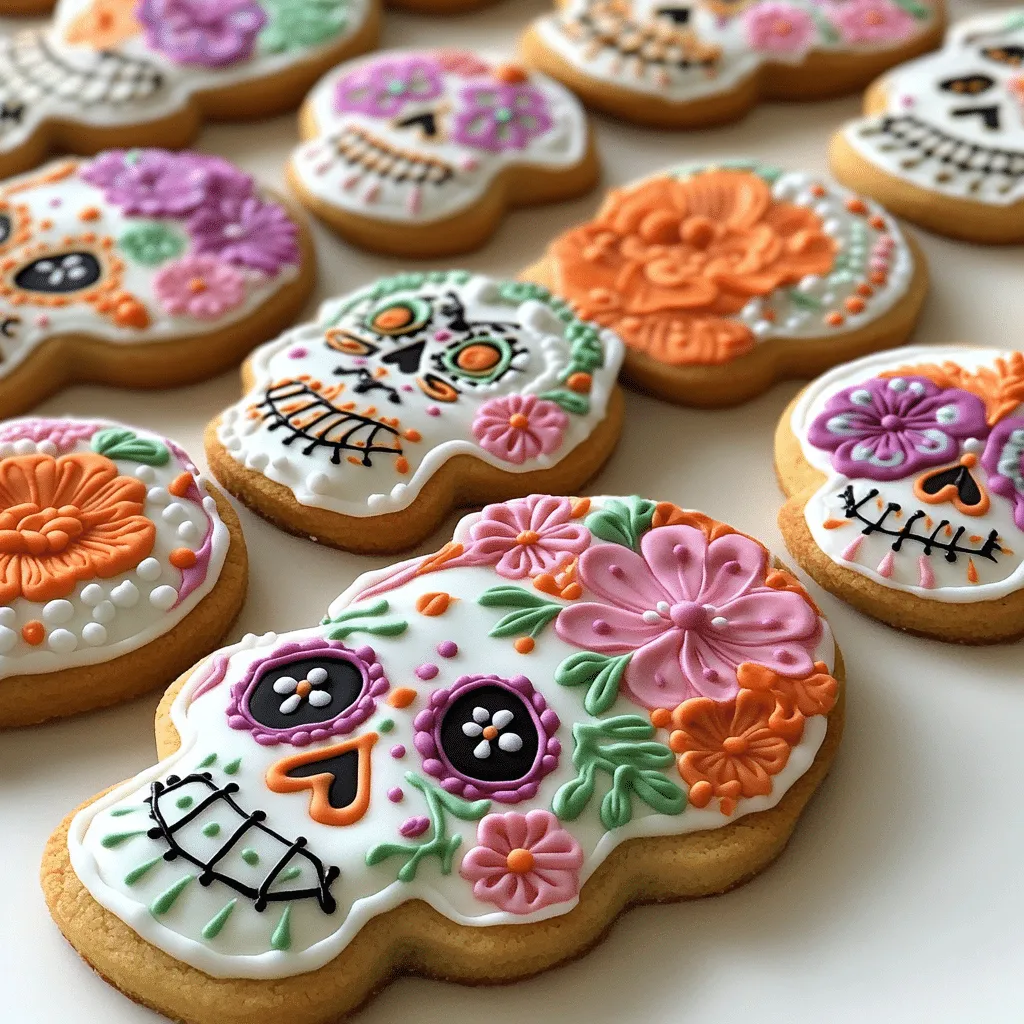
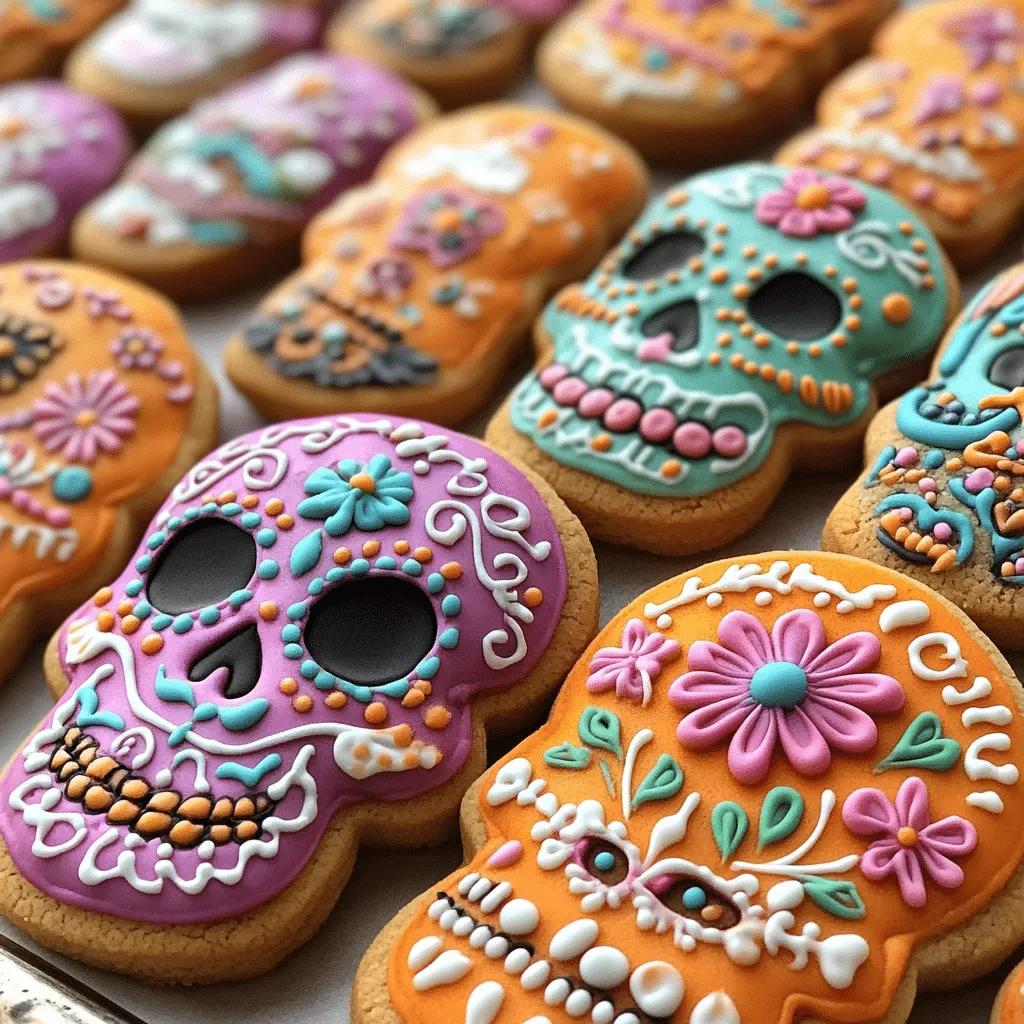
I’ll never forget the first time I made Day of the Dead Sugar Cookies. It was a vibrant celebration filled with colors, flavors, and a sense of togetherness that just warmed my heart. After baking these beauties a handful of times, they’ve become a favorite not only for me but for everyone who’s tried them! Trust me, these cookies are a total game-changer for your festive gatherings. The way they light up the table and bring a smile to faces is simply magical. Let’s dive into this delightful journey of flavor and creativity together!
Why You’ll Love This Day of the Dead Sugar Cookies
- Easy to Make: With simple ingredients and straightforward steps, you’ll feel like a pro in no time.
- Visually Stunning: The bright colors and intricate designs will wow your guests and make your gatherings unforgettable.
- Versatile Treat: Customize them with flavors and designs that reflect your personal touch or the spirit of the occasion.
- Make-Ahead Convenience: Bake them in advance and store them, making your party prep a breeze.
- Perfect for Sharing: These cookies make great gifts and are perfect for sharing with family and friends, creating sweet memories together.
The Secret to Perfect Day of the Dead Sugar Cookies
The secret to achieving the perfect Day of the Dead Sugar Cookies lies in the dough itself. It should be soft yet sturdy enough to hold its shape during baking. I always recommend using high-quality butter and vanilla extract for that rich flavor that makes your cookies absolutely irresistible. One insider tip I swear by is to chill the dough for at least an hour before rolling it out. This not only helps with shaping but also enhances the texture! Trust me, this small step will make a world of difference, and soon you’ll be crafting beautiful cookies like a seasoned baker.
Rave Reviews from Friends and Followers
“These cookies were the highlight of our Day of the Dead celebration! The flavors were spot on and the colors were so vibrant!” – Maria G.
“I can’t believe how easy these were to make! My kids had a blast decorating them, and they tasted amazing!” – Jake S.
“Every time I make these cookies, my friends ask for the recipe. They’re not just beautiful; they’re delicious too!” – Lisa T.
Creative Variations to Try
- Chocolate Chip Infusion: Add mini chocolate chips for an added layer of flavor that everyone will love.
- Spiced Pumpkin: Mix in pumpkin spice for a seasonal twist that’s perfect for fall festivities.
- Citrus Zest: Incorporate lemon or orange zest for a refreshing zing that brightens the cookie.
- Almond Flavor: Swap vanilla for almond extract to create a nutty, aromatic delight.
Bonus: For a fun twist, try adding edible glitter to your icing for a sparkling finish!
FAQs – All Your Questions Answered!
Can I make the dough ahead of time? Yes! You can prepare the dough a day or two in advance. Just wrap it tightly and store it in the fridge.
What’s the best way to store these cookies? Keep them in an airtight container at room temperature for up to a week.
Can I freeze the cookies? Absolutely! These cookies freeze well. Just make sure to layer them with parchment paper and store them in a sealed bag.
What if my dough is too sticky? If the dough is sticky, try chilling it for a bit longer or adding a touch more flour until you reach the desired consistency.
Storage/Serving Tips
- Store cookies in an airtight container to keep them fresh.
- They can last up to a week at room temperature.
- For longer storage, freeze them for up to three months.
- Serve on a colorful platter to enhance the festive spirit!
Perfect Occasions for Day of the Dead Sugar Cookies
- Day of the Dead celebrations to honor loved ones.
- Family gatherings where sharing is key.
- School parties or bake sales that need a festive touch.
- Birthday celebrations, especially for those who love vibrant themes.
- Seasonal events, like Halloween or Día de los Muertos festivals.
- Gift giving for friends, neighbors, or coworkers.
The Complete Recipe
Thank you for joining me on this delicious journey! Now, let’s get to the fun part – the actual recipe for these amazing Day of the Dead Sugar Cookies.
Day of the Dead Sugar Cookies
Ingredients
- 2 ¾ cups all-purpose flour
- 1 teaspoon baking powder
- ½ teaspoon salt
- 1 cup unsalted butter, softened
- 1 ½ cups granulated sugar
- 2 large eggs
- 2 teaspoons vanilla extract
- Food coloring (various colors for decorating)
- Powdered sugar (for icing)
Tip: Make sure your butter is at room temperature for the best creaming results. It should be soft but not melted.
Extend ingredients section: Feel free to experiment with flavored extracts like almond or lemon to personalize your cookies. The choice of food coloring can also reflect the theme of your celebration, making each batch unique!
Step-by-Step Instructions
Step 1: Prepare Your Dough
In a large bowl, whisk together the flour, baking powder, and salt. In another bowl, cream the softened butter and granulated sugar until light and fluffy. This usually takes about 3-5 minutes. The key here is to incorporate air into the mixture, which will give you a light texture.
Step 2: Combine Ingredients
Beat in the eggs one at a time, followed by the vanilla extract. Gradually add the dry ingredients to the wet ingredients, mixing until fully combined. The dough should come together nicely without being too sticky.
Step 3: Chill the Dough
Wrap the dough in plastic wrap and refrigerate for at least one hour. This is a crucial step as it firms up the dough and makes rolling it out much easier. Trust me, you’ll thank yourself later!
Step 4: Roll and Cut
Once chilled, preheat your oven to 350°F (175°C). On a floured surface, roll out the dough to about ¼ inch thickness. Use cookie cutters to create fun shapes that celebrate the Day of the Dead tradition. Place them on a baking sheet lined with parchment paper.
Step 5: Bake the Cookies
Bake for 8-10 minutes or until the edges are lightly golden. Keep an eye on them; every oven is different! Let them cool completely on a wire rack before decorating. This will ensure the icing doesn’t melt away!
Step 6: Decorate and Enjoy!
Now comes the fun part! Use your colored icing to bring your cookies to life. Feel free to get creative with designs and patterns that represent the holiday. Once decorated, let the icing set before serving. These cookies not only taste amazing but are a feast for the eyes, too!
Nutrition info: Each cookie contains approximately 150 calories, depending on the size and decorations. Remember, these are meant to be enjoyed in moderation!
Extend instructions: If you find decorating a bit challenging, consider using store-bought icing for ease. You can also use sprinkles for a fun touch. The most important part is to enjoy the process and let your creativity shine through.
Final Thoughts
I hope you’re as excited about these Day of the Dead Sugar Cookies as