

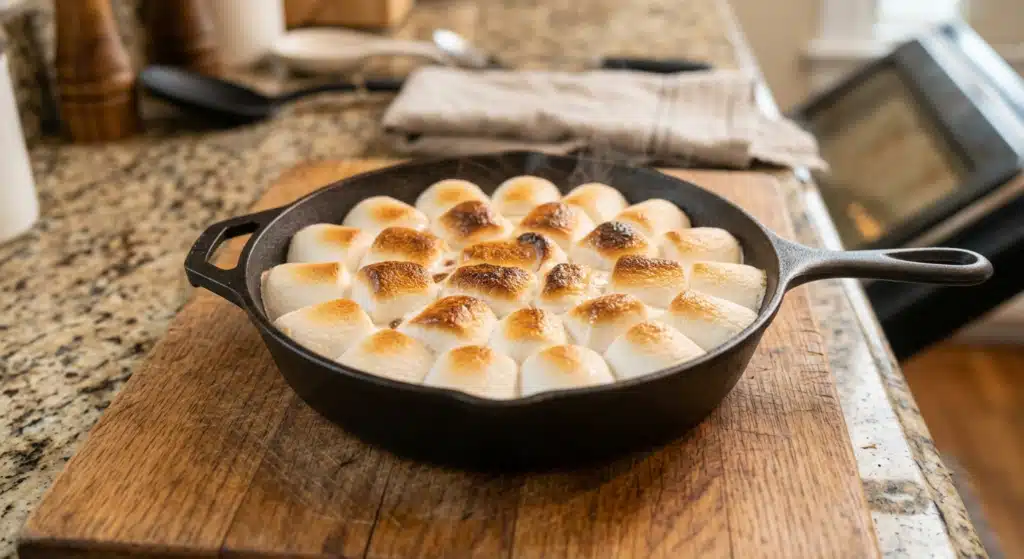
A layer of melted milk chocolate topped with toasted, golden-brown marshmallows, all scooped up with crisp graham crackers. This baked s’mores dip brings the classic campfire experience indoors without the need for an open flame. The base consists of rich, warm chocolate that melts into a smooth consistency, while the marshmallows on top puff up and develop a slightly crisp, caramelized exterior with a soft, gooey center.
Serve this dip during casual weekend gatherings, family movie nights, or holiday parties when you want a quick, shareable dessert. It takes only a few minutes to assemble and bake, making it a highly practical choice for last-minute entertaining. You get all the nostalgic flavors of a traditional s’more in a convenient, scoopable format that allows guests to serve themselves. Because it relies on pantry staples and basic kitchen equipment, you can pull this dessert together with very little planning.
Why You’ll Love This Baked S’mores Dip
- Simple preparation: This recipe requires only three basic ingredients and involves almost zero active prep work.
- Quick cooking: The entire dessert bakes in the oven in just a few minutes, delivering warm results almost instantly.
- Accessible ingredients: You only need standard chocolate chips, standard marshmallows, and graham crackers, which are easy to find in any grocery store.
- No open flame required: You can achieve the classic toasted flavor using a standard kitchen oven instead of building a fire.
- Easy to share: The single-skillet presentation makes it simple for a group to gather around and scoop their own portions at the same time.
Ingredients You’ll Need
For the Main Dish
- 2 cups milk chocolate chips
- 25 standard large marshmallows
For Serving
- 1 box of graham crackers
The milk chocolate chips form the rich, melty base of the dip. They melt smoothly under the heat of the marshmallows, creating a warm, fluid layer for dipping. Standard large marshmallows provide the classic puffed texture and toast beautifully in the oven, creating a protective layer that insulates the chocolate below. Graham crackers offer a sturdy, crunchy vehicle for scooping and a mild, lightly sweet flavor that balances the rich chocolate and sugar.
Ingredient Notes and Substitutions
Chocolate Chips: While milk chocolate provides the traditional s’mores flavor, semi-sweet or dark chocolate chips will work just as well and can reduce the overall sweetness of the dish. Do not use chocolate chunks or chopped chocolate bars unless they are chopped very uniformly. Uneven pieces will melt at different rates, leaving some parts of the dip runny and other parts solid.
Marshmallows: Standard large marshmallows are ideal for covering the surface of the skillet evenly. Mini marshmallows can be used in a pinch, but they will toast much faster and may become overly crispy before the chocolate fully melts underneath. Avoid flavored, colored, or stuffed marshmallows, as the added ingredients can alter the melting consistency and clash with the classic chocolate flavor.
Dippers: Graham crackers are the traditional choice. However, if you want to vary the serving options, consider using vanilla wafers, shortbread cookies, pretzel crisps, or even tart fruit like strawberries and green apple slices. The saltiness of pretzels or the acidity of fruit can cut through the dense sweetness of the melted sugar and chocolate.
Equipment Needed
- 8-inch or 10-inch cast-iron skillet: Cast iron retains heat exceptionally well, which helps melt the chocolate evenly and keeps the dip warm long after it leaves the oven.
- Oven mitts: Essential for safely handling the heavy, hot skillet.
- Heat-proof trivet or wooden cutting board: Required to protect your table or countertop from the hot cast iron during serving.
If a cast-iron skillet is unavailable, a standard round ceramic or oven-safe glass baking dish of similar size can be used. Keep in mind that glass and ceramic will not hold heat as long as cast iron, so the dip may firm up more quickly once served.
How to Make the Recipe
- Prepare the oven and skillet: Preheat your oven to 350°F (175°C). Ensure your cast-iron skillet is completely clean and fully dry. Even a drop of water can cause the chocolate to seize and become grainy.
- Add the chocolate base: Pour the milk chocolate chips directly into the skillet. Spread them out evenly so the entire bottom of the pan is covered in a single layer. This ensures the chocolate melts at a consistent rate.
- Arrange the marshmallows: Place the large marshmallows on top of the chocolate chips, standing them upright. Pack them somewhat closely together, starting from the outside edge and working your way into the center. The marshmallows will expand as they heat, creating a solid, cohesive topping.
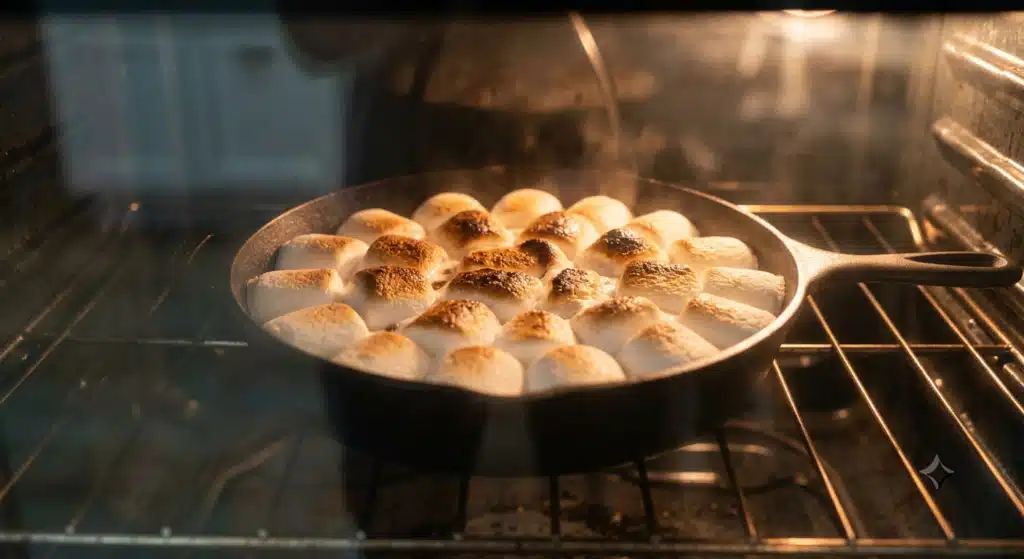
- Bake the dip: Place the skillet in the center of the preheated oven. Bake for 5 to 7 minutes. Watch the oven closely during the final two minutes. The step is complete when the marshmallows have puffed up significantly and the tops have turned a deep, toasted golden brown.
- Serve immediately: Carefully remove the hot skillet from the oven using thick oven mitts. Place it on a heat-proof trivet or wooden board. Serve the dip immediately while the chocolate is melted and the marshmallows provide a warm, gooey pull when scooped with a graham cracker.
Tips for the Best Results
- Ensure a completely dry skillet: Before adding your chocolate, thoroughly wipe down the cast-iron skillet. Any residual moisture will cause the melting chocolate to seize, turning it thick and lumpy rather than smooth and dip-friendly.
- Pack the marshmallows tightly: Leave very little space between the marshmallows when arranging them over the chocolate chips. As they bake and expand, a tight arrangement ensures they form a continuous seal. This prevents the direct oven heat from scorching the chocolate below.
- Watch the oven closely: Sugar burns rapidly. Once the marshmallows begin to turn golden, they will darken to black within a matter of seconds. Keep the oven light on and monitor the skillet continuously during the final two minutes of baking.
- Use sturdy dippers: Select whole, unbroken graham crackers for serving. The melted marshmallow layer can be quite thick and sticky, which will easily snap thin or fragile cookies.
- Do not stir the dip: Resist the urge to mix the melted chocolate and toasted marshmallows together before serving. Leaving the layers intact provides a better visual presentation and ensures each scoop contains the right ratio of toasted topping to chocolate base.
- Keep the pan warm: To extend the serving time, serve the dip directly in the cast-iron skillet rather than transferring it to a serving bowl. The residual heat from the heavy metal keeps the chocolate in a fluid, dippable state for much longer.
Common Mistakes to Avoid
- Using the wrong pan size: Spreading two cups of chocolate chips into a massive 12-inch or 14-inch skillet will create a base that is too thin, making it difficult to scoop and highly prone to burning. Stick to an 8-inch or 10-inch skillet for the best depth.
- Baking at too high a temperature: While it might be tempting to crank the oven to 450°F to toast the marshmallows quickly, high heat can easily burn the delicate milk chocolate underneath before the marshmallows are fully softened. Sticking to 350°F (175°C) ensures the chocolate melts gently while the top toasts.
- Waiting too long to serve: This dish is highly time-sensitive. If left to sit at room temperature for more than 15 minutes, the chocolate will begin to harden and the marshmallows will become tough and rubbery. Always assemble and bake this recipe right before you intend to eat it.
- Adding extra liquids: Do not add milk, cream, or butter to the chocolate chips in an attempt to make them melt better. The chocolate chips will melt perfectly on their own under the insulating layer of marshmallows. Added liquids can cause the mixture to separate.
Serving Suggestions
Serve this warm dessert immediately after it leaves the oven, surrounded by a generous pile of graham crackers. For a varied spread, place small bowls of secondary dippers nearby, such as lightly salted pretzel twists, fresh strawberry halves, apple slices, or crisp shortbread cookies.
This dish pairs excellently with cold milk, hot coffee, or espresso, as the bitterness of the coffee helps cut through the heavy sweetness of the melted chocolate and sugar. Serve it as a casual dessert after a barbecue, during a holiday movie marathon, or as a cozy autumn treat when the weather begins to cool down.
Storage and Reheating
Cooling the food: Allow any leftover dip to cool completely in the skillet at room temperature. The marshmallows will deflate and the chocolate will harden back into a solid block.
Refrigerating leftovers: Once completely cooled, use a spatula to lift the leftover chocolate and marshmallow block out of the skillet. Transfer it to an airtight storage container and refrigerate for up to three days. Leaving it in the cast-iron skillet in the refrigerator can introduce moisture and cause the pan to rust.
Freezing: Do not freeze this dish. Freezing fundamentally changes the cellular structure of the marshmallows, turning them sticky, weepy, and rubbery once thawed.
Reheating: To reheat leftovers, place the desired portion in a microwave-safe bowl. Microwave on 50% power in 15-second intervals, checking the consistency each time. Do not use full power, or the chocolate will scorch and the marshmallows will inflate and explode. Keep in mind that reheated s’mores dip will not have the same toasted, crispy top as the freshly baked version, but it will regain its soft, gooey texture.
Frequently Asked Questions
Can I make this baked s’mores dip ahead of time? You can assemble the skillet ahead of time by layering the chocolate chips and marshmallows, covering it, and leaving it at room temperature for a few hours. However, you should not bake it until the exact moment you are ready to serve. Once baked, the dip must be eaten immediately while it is hot and gooey.
Can I use a microwave instead of an oven? While a microwave will melt the chocolate and soften the marshmallows, it will not toast or brown the tops of the marshmallows. You will miss out on the caramelized flavor and slightly crispy texture that makes the dish special. Furthermore, you cannot put a cast-iron skillet in the microwave. If you must use a microwave, use a glass dish and heat on low power.
Why did my chocolate become hard and grainy? Chocolate seizes and becomes grainy when it comes into contact with a small amount of water, or when it is exposed to sudden, excessively high heat. Ensure your skillet is completely dry before adding the chips, and do not exceed the recommended oven temperature of 350°F (175°C).
Can I double the recipe? Yes, you can easily double the recipe if you are serving a large crowd. You will need a larger cast-iron skillet, such as a 12-inch or 14-inch pan, to accommodate the extra ingredients while maintaining the correct depth. The baking time may increase by a minute or two, so watch the marshmallows closely.
Can I add other layers to the dip? Yes. For added texture and flavor, you can spread a thin layer of peanut butter, caramel sauce, or toasted pecans in the bottom of the skillet before adding the chocolate chips. Ensure any additions are at room temperature before baking so they heat evenly with the rest of the ingredients.
Final Thoughts
Making this dessert at home allows you to enjoy a nostalgic, comforting treat without setting up a campfire. By following the simple layering technique and monitoring your oven closely, you will achieve an excellent balance of smooth chocolate and toasted, fluffy sugar. Gather your favorite dippers, prepare your cast-iron skillet, and try this baked s’mores dip for your next casual evening in.