Let me tell you about one of my all-time favorite Halloween traditions—baking spooky Eyeball Cookies! I’ve made them for family gatherings, school parties, and even just for a fun evening at home. Every time I whip up a batch, the excitement in the room is palpable. Kids and adults alike can’t get enough of these delicious, creepy treats, and trust me, they’re always the hit of the party! If you want to wow your family this Halloween, you are in the right place!
Why You’ll Love This Eyeball Cookies
- Simple and Quick: With just a few basic ingredients, you can have these cookies ready in no time!
- Visually Striking: The unique design of these cookies makes them a perfect centerpiece for any Halloween spread.
- Fun for All Ages: Baking these cookies is a delightful activity for kids and adults; everyone can join in on the fun!
- Delicious Flavor: These cookies combine sweetness and a hint of spice, making them irresistible.
- Make-Ahead Convenience: You can prepare the dough in advance, so you’ll be ready when Halloween arrives!
The Secret to Perfect Eyeball Cookies
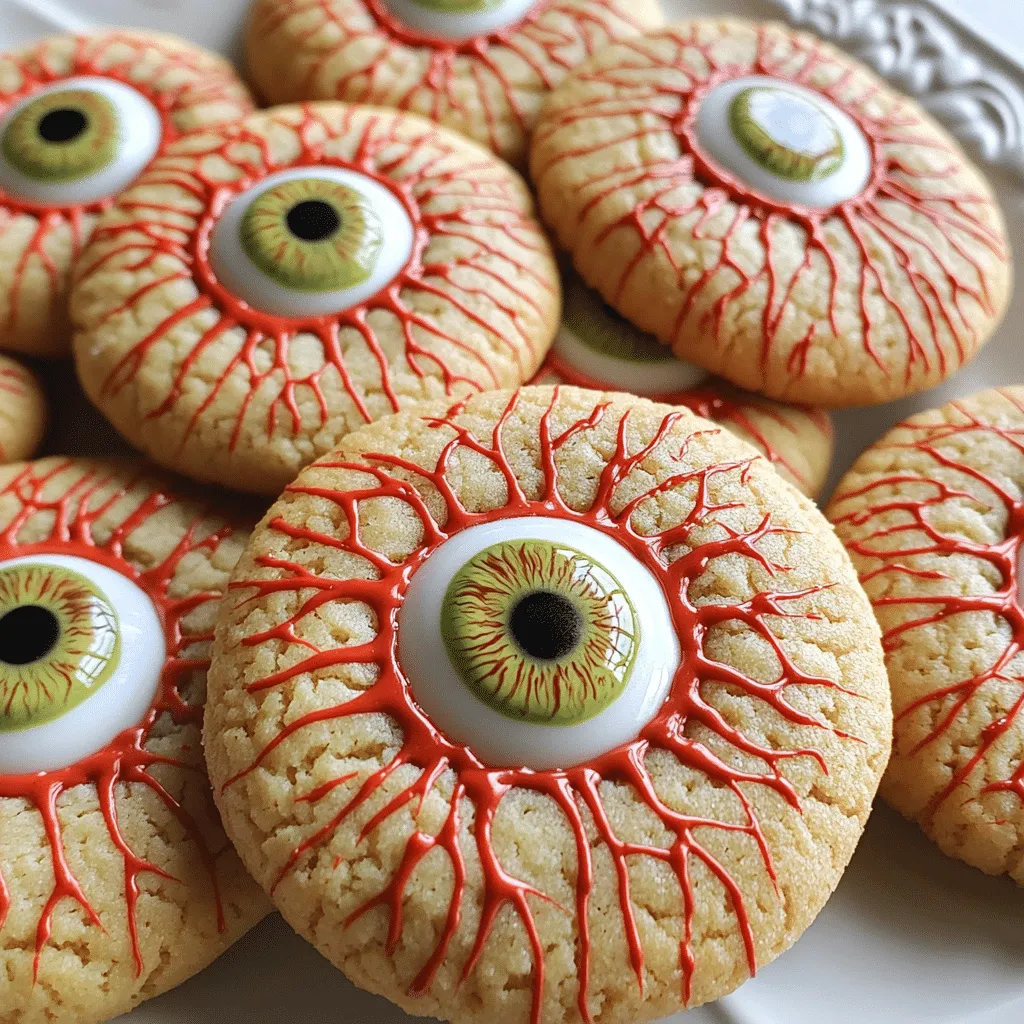
The secret to making Eyeball Cookies that will leave everyone raving is all in the chilling of the dough. Trust me; don’t skip this step! Chilling the dough ensures that the cookies hold their shape while baking, giving you those perfectly round eyeballs. Another insider tip? Use good quality food coloring for the “eyeball” effect. It makes a world of difference in terms of vibrancy! You’ll feel like a pro baker, even if you’re just getting started.
Rave Reviews from Friends and Followers
“These Eyeball Cookies are an absolute game-changer! I brought them to a Halloween party, and everyone went wild! Can’t wait to make them again!” – Sarah J.
“I loved making these with my kids! They were so much fun to decorate and tasted amazing. Definitely a new Halloween tradition!” – Mike T.
“I was blown away by how easy these were to make. They looked so professional, and my guests were so impressed! Thank you for sharing!” – Jenna L.
Creative Variations to Try
- Chocolate Chip Eyeballs: Add mini chocolate chips for a delicious twist on the classic flavor.
- Red Velvet Eyeballs: Use red velvet cookie dough for a fun and festive color!
- Pumpkin Spice Eyeballs: Incorporate pumpkin spice into the dough for an autumnal flavor.
- Nutty Eyeballs: Add chopped nuts for a delightful crunch.
Bonus: Try using different colored icing to create vibrant “eyes” for a truly spooky look!
FAQs – All Your Questions Answered!
Can I make the dough ahead of time? Absolutely! You can prepare the dough a day in advance and keep it in the fridge. Just remember to let it sit out for a few minutes before rolling it out to make it easier to work with.
How do I store these cookies? Keep the cookies in an airtight container at room temperature. They last about 3-5 days, but I doubt they’ll last that long!
Can I substitute the flour? Yes! You can use gluten-free flour as a direct substitute if you have dietary restrictions.
What if my cookies spread too much while baking? Ensure you chill the dough for at least 30 minutes before baking. This will help them retain their shape!
Storage/Serving Tips
- Store your Eyeball Cookies in an airtight container to keep them fresh.
- They can be kept at room temperature for up to 5 days.
- For an impressive presentation, serve them on a spooky platter with some fake cobwebs and plastic spiders!
Perfect Occasions for Eyeball Cookies
- Halloween parties
- School bake sales
- Spooky movie nights
- Costume contests
- Fall harvest festivals
- Neighborhood trick-or-treat gatherings
The Complete Recipe
Thank you for your enthusiasm and interest! Now, let’s get to the fun part—making these spooky Eyeball Cookies!
Eyeball Cookies

Ingredients
- 2 ¾ cups all-purpose flour
- 1 teaspoon baking soda
- ½ teaspoon salt
- 1 cup unsalted butter, softened
- 1 cup granulated sugar
- 1 cup brown sugar, packed
- 2 large eggs
- 1 teaspoon vanilla extract
- Food coloring (red and green)
- Chocolate chips or candy eyeballs for decoration
Tip: Make sure your butter is at room temperature for easy mixing. This helps create a smoother dough that bakes evenly.
Extend ingredients section: Consider adding in some chopped nuts or even using a flavored extract, like almond, for a unique twist on flavor. Each ingredient plays a crucial role in the cookie’s texture and flavor profile, so choose quality ingredients for the best results!
Step-by-Step Instructions
Step 1: Preheat Your Oven
Preheat your oven to 350°F (175°C). This is the perfect temperature for baking cookies to a chewy, golden perfection.
Step 2: Mix the Dry Ingredients
In a bowl, whisk together the flour, baking soda, and salt. This step is essential for evenly distributing the leavening agent, ensuring all cookies rise uniformly.
Step 3: Cream the Butters and Sugars
In a large mixing bowl, cream together the softened butter, granulated sugar, and brown sugar until light and fluffy. This usually takes about 3-5 minutes. The fluffier the mixture, the lighter your cookies will be!
Step 4: Add Eggs and Vanilla
Beat in the eggs one at a time, then add the vanilla extract. Keep mixing until everything is well combined. This adds moisture and flavor to your cookies!
Step 5: Combine Wet and Dry Ingredients
Gradually add your dry ingredients to the wet mixture, mixing until just combined. Be careful not to overmix. Overmixing can create tough cookies, and nobody wants that!
Step 6: Chill the Dough
Cover the dough with plastic wrap and chill in the refrigerator for at least 30 minutes. This is the magic step that helps the cookies keep their shape and allows the flavors to meld.
Step 7: Shape the Cookies
Once chilled, scoop dough and roll into balls. Place them on a lined baking sheet, spacing them about 2 inches apart.
Step 8: Bake!
Bake for 10-12 minutes or until the edges are lightly golden. The centers might look slightly underbaked, but they will continue to firm up as they cool.
Step 9: Decorate!
Once cooled, use your food coloring to create eyeball designs on the cookies. Add chocolate chips or candy eyeballs for that perfect spooky touch!
Step 10: Enjoy!
Serve them up at your Halloween party or keep them for a special family treat. Enjoy the reactions as everyone bites into these delightful cookies!
Nutrition info (per cookie): Approximately 150 calories, 7g fat, 21g carbohydrates, and 2g protein. Remember that these are just estimates, and the joy they bring is priceless!
Final Thoughts
I can’t express how much fun these Eyeball Cookies are to make and share! They’re not just cookies; they’re a way to create memories with your loved ones. Whether it’s a Halloween bash or a quiet evening at home, these cookies are sure to bring smiles and excitement. So, what are