Every Halloween, I find myself eagerly gathering my ingredients to whip up a batch of Hocus Pocus Cookies, a magical recipe that has become a beloved tradition in my household. I’ve made these enchanting treats countless times and they never fail to impress friends and family alike! The vibrant colors, delightful flavors, and whimsical shapes capture the spirit of the season and turn any gathering into a spooktacular celebration. Trust me, once you try making these cookies, you’ll be hooked!
Why You’ll Love This Hocus Pocus Cookies
- Easy to Make: This recipe is straightforward, ensuring that even novice bakers can create delicious cookies without a hitch.
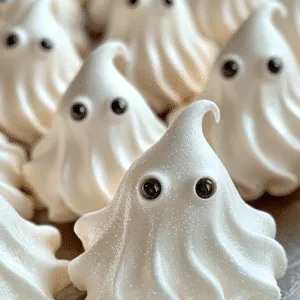
- Visually Stunning: The colorful frosting and creative designs make these cookies a showstopper at any event.
- Versatile Flavors: Customize the flavors and colors to suit your taste or the occasion!
- Perfect for All Ages: Kids and adults alike will love decorating these cookies, making it a fun family activity.
- Make-Ahead Convenience: These cookies can be baked in advance and stored, making them perfect for busy schedules.
The Secret to Perfect Hocus Pocus Cookies
The secret to achieving the perfect Hocus Pocus Cookies lies in the combination of a soft, chewy cookie base and a rich, buttery frosting that holds its shape. The key ingredient? Cream cheese! It adds a delightful tanginess that balances the sweetness perfectly. Trust me, once you incorporate cream cheese into your frosting, it’s a game-changer! To ensure your cookies bake evenly, always use room temperature ingredients and chill the dough for at least 30 minutes before baking. It makes all the difference!
Rave Reviews from Friends and Followers
“These Hocus Pocus Cookies were a hit at our Halloween party! Everyone couldn’t get enough of them!” – Sarah J.
“I love how easy and fun it was to decorate these cookies. They tasted amazing too!” – Mark T.
“My kids had the best time making these cookies! They are now part of our family tradition.” – Emily L.
Creative Variations to Try
- Spooky Chocolate Chip: Add mini chocolate chips for a delightful surprise in every bite!
- Pumpkin Spice: Incorporate pumpkin puree and a blend of warm spices for a seasonal twist.
- Monster Cookies: Mix in colorful candy pieces for a fun and festive look.
- Maple Pecan: Use maple syrup in the frosting and crushed pecans for a unique flavor.
Bonus: For an extra flair, try using edible glitter or sprinkles to add some sparkle to your cookies!
FAQs – All Your Questions Answered!
Can I use gluten-free flour for this recipe? Absolutely! Just substitute with a 1:1 gluten-free flour blend, and you’ll still get delicious cookies.
How do I store leftover cookies? Keep them in an airtight container at room temperature for up to a week.
Can I freeze the dough? Yes! You can freeze the unbaked dough for up to 3 months. Just thaw in the refrigerator before baking.
What if my frosting is too runny? If your frosting is too runny, simply add more powdered sugar until you reach the desired consistency.
Storage/Serving Tips
- Store cookies in an airtight container to keep them fresh and soft.
- They’ll last up to a week at room temperature or up to a month in the freezer.
- For serving, arrange the cookies on a festive platter and consider adding some Halloween-themed decorations for that extra touch!
Perfect Occasions for Hocus Pocus Cookies
- Halloween parties
- School bake sales
- Fall festivals
- Family gatherings
- Cookie decorating nights with friends
- Trick-or-treating celebrations
The Complete Recipe
Thank you for joining me on this exciting baking adventure! Now, let’s dive into the actual recipe for these enchanting Hocus Pocus Cookies.
Hocus Pocus Cookies

Ingredients
- 2 ¾ cups all-purpose flour
- 1 teaspoon baking soda
- ½ teaspoon salt
- ¾ cup unsalted butter, softened
- 1 cup granulated sugar
- 1 cup packed brown sugar
- 2 large eggs
- 1 teaspoon vanilla extract
- 1 cup cream cheese, softened
- 4 cups powdered sugar
- Food coloring (various colors as desired)
- Sprinkles for decoration (optional)
Tip: Ensure your butter and cream cheese are at room temperature for easy mixing and a smooth frosting consistency. For added flavor, consider using flavored extracts like almond or maple in your frosting.
Step-by-Step Instructions
Step 1: Preheat Your Oven
Preheat your oven to 350°F (175°C). This ensures the cookies will bake evenly and rise beautifully.
Step 2: Mix the Dry Ingredients
In a medium bowl, whisk together the flour, baking soda, and salt. This step is crucial for even distribution of the leavening agent and will help your cookies rise perfectly.
Step 3: Cream the Butter and Sugars
In a large mixing bowl, cream together the softened butter, granulated sugar, and brown sugar until light and fluffy. This should take about 3-4 minutes. The air you incorporate here is key to achieving a light cookie texture!
Step 4: Add Eggs and Vanilla
Beat in the eggs one at a time, then stir in the vanilla extract. Make sure to scrape down the sides of the bowl to incorporate all the deliciousness.
Step 5: Combine Wet and Dry Ingredients
Gradually blend in the dry ingredients until just combined. Overmixing can lead to tough cookies, so be gentle!
Step 6: Chill the Dough
Wrap the dough in plastic wrap and chill in the refrigerator for at least 30 minutes. This helps the flavors meld and prevents the cookies from spreading too much while baking.
Step 7: Bake the Cookies
Drop rounded tablespoons of dough onto ungreased baking sheets. Bake for 10-12 minutes, or until the edges are lightly golden. The centers might look slightly underbaked, but they’ll firm up as they cool!
Step 8: Prepare the Frosting
While the cookies cool, beat together the softened cream cheese and powdered sugar until smooth. Add a few drops of food coloring to create your desired shades. This frosting is not only tasty but also perfect for decorating!
Step 9: Decorate!
Once the cookies are completely cooled, spread the frosting on top and add sprinkles or additional decorations as desired. Get creative! Each cookie can be uniquely designed, adding to the fun!
Nutrition Info: Each cookie contains approximately 150 calories, with 5g of fat and 2g of protein. Enjoy in moderation!
Final Thoughts
As you can see, these Hocus Pocus Cookies are not just a treat; they are an experience! The joy of baking, decorating, and sharing these magical cookies with loved ones makes them truly special. I encourage you to whip up a batch this Halloween and watch as they disappear faster than you can say “Hocus Pocus!” Trust me, once you try this recipe, it will become a cherished tradition in your home too!