Let me tell you, there’s nothing quite like the joy of whipping up a batch of Mummy Cookies to get into the Halloween spirit! I’ve made these delightful treats countless times, and they never fail to bring smiles to faces young and old. They’re not just cute and spooky; they’re a total crowd-pleaser at any Halloween gathering. Whether you’re a baking novice or a seasoned pro, trust me when I say this recipe is a game-changer. In just 30 minutes, you’ll have a tray of charming Mummy Cookies that look like they came straight from a bakery. Let’s dive into this festive fun!
Why You’ll Love This Mummy Cookies
- Quick and Easy: Ready in just 30 minutes, perfect for last-minute baking.
- Fun for Everyone: A great activity for kids and adults alike, making memories in the kitchen.
- Adorable Presentation: These cookies are not just tasty; they’re visually stunning and festive!
- Versatile Base: The cookie base is simple and can be customized to your taste.
- Perfect for Any Occasion: Ideal for Halloween parties, school events, or family gatherings.
The Secret to Perfect Mummy Cookies
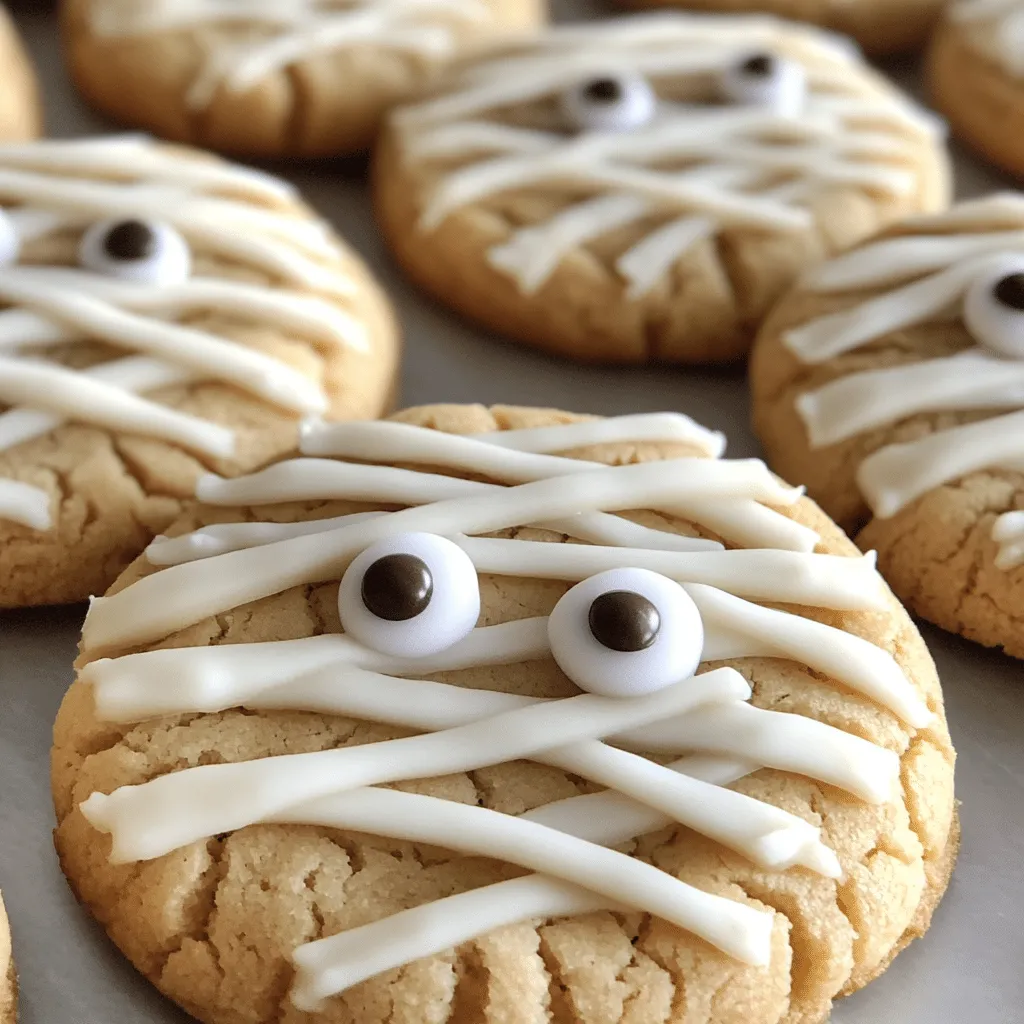
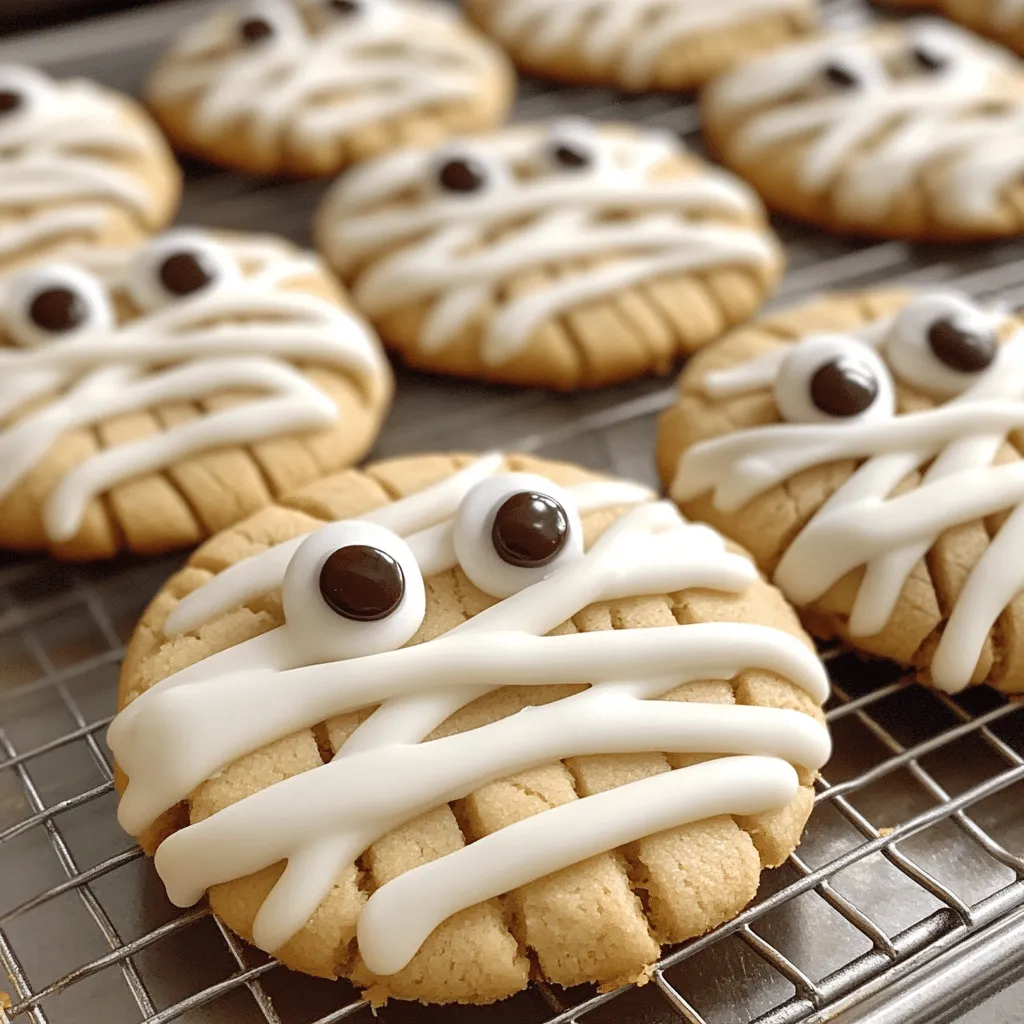
The secret to making perfect Mummy Cookies lies in the balance of flavor and decoration. The cookie base is a classic sugar cookie, buttery and sweet, but the real magic comes from the white icing that creates the mummy’s wrappings. I recommend using a piping bag for the icing to achieve that cute, crisscross pattern. Don’t worry if you don’t have one; a zip-top bag with the corner snipped off works just as well! Trust me, once you master this technique, you’ll feel like a baking superstar.
Rave Reviews from Friends and Followers
“These Mummy Cookies were the hit of our Halloween party! Everyone asked for the recipe!” — Sarah J.
“I made these with my kids, and they had so much fun decorating them. They tasted amazing too!” — Mark T.
“I can’t believe how easy these were to make. I’ll definitely be making them again!” — Lisa M.
Creative Variations to Try
- Chocolate Chip Mummies: Add chocolate chips to the cookie dough for a delightful surprise.
- Pumpkin Spice Mummies: Incorporate pumpkin spice into the dough for a seasonal twist.
- Peanut Butter Mummies: Swap half the butter for peanut butter for a rich, nutty flavor.
- Gluten-Free Mummies: Use a gluten-free flour blend to make these accessible for everyone.
Bonus: Drizzle some melted chocolate over the icing for an extra touch of sweetness and a fun design!
FAQs – All Your Questions Answered!
Can I make the dough ahead of time? Yes! You can prepare the dough and refrigerate it for up to 2 days before baking.
How do I store leftover cookies? Store them in an airtight container at room temperature for up to a week.
Can I substitute ingredients? Absolutely! Feel free to swap butter for margarine or use a dairy-free alternative.
What if I don’t have piping bags? You can use a zip-top bag with a small corner cut off to pipe the icing.
How do I make the icing thicker? If your icing is too runny, add a bit more powdered sugar until you reach your desired consistency.
Storage/Serving Tips
- Store cookies in an airtight container to keep them fresh.
- Best enjoyed within the first week of baking for maximum freshness.
- Serve at room temperature for the best taste and texture.
- Consider pairing with a glass of milk or hot cider for a cozy treat!
Perfect Occasions for Mummy Cookies
- Halloween parties and spooky gatherings
- School bake sales and events
- Family movie nights with a Halloween theme
- Playdates or kids’ birthday parties
- Neighborhood trick-or-treat celebrations
The Complete Recipe
Thank you for sticking with me! Now, let’s get into the fun part: the actual recipe for these adorable Mummy Cookies!
Mummy Cookies
Ingredients
- 1 cup unsalted butter, softened
- 1 cup granulated sugar
- 2 large eggs
- 2 ½ cups all-purpose flour
- 1 teaspoon baking powder
- ½ teaspoon salt
- 1 teaspoon vanilla extract
- 1 cup white icing (store-bought or homemade)
- Chocolate chips or candies for eyes
Tip: Make sure your butter is softened to room temperature for easy mixing. This will ensure a light, fluffy cookie!
Extend ingredients section: You can also add ½ cup of mini chocolate chips for a delightful twist. If you’re looking for a healthier option, try substituting half of the sugar with a sugar alternative. Remember, each ingredient plays a crucial role in the texture and flavor, so don’t skip on quality!
Step-by-Step Instructions
Step 1: Preheat Your Oven
Start by preheating your oven to 350°F (175°C). This is essential for even baking. While the oven heats up, you can prepare your cookie dough.
Step 2: Cream Butter and Sugar
In a large mixing bowl, cream together the softened butter and sugar until light and fluffy, about 3-5 minutes. This step is crucial for creating a soft cookie texture. You’ll notice a beautiful pale color and airy texture when it’s ready.
Step 3: Add Eggs and Vanilla
Beat in the eggs one at a time, followed by the vanilla extract. Make sure everything is well incorporated. The eggs help bind the ingredients together and add moisture to your cookies.
Step 4: Combine Dry Ingredients
In a separate bowl, whisk together the flour, baking powder, and salt. Gradually add this dry mixture to the wet ingredients, mixing just until combined. Overmixing can lead to tough cookies, so stop as soon as you see no dry flour!
Step 5: Shape and Bake Cookies
Using a tablespoon or cookie scoop, drop rounded balls of dough onto a baking sheet lined with parchment paper, spacing them about 2 inches apart. Bake for 10-12 minutes, or until the edges are lightly golden. Your kitchen will smell heavenly during this time!
Step 6: Cool and Decorate
Once baked, allow the cookies to cool on the baking sheet for a few minutes before transferring them to a wire rack to cool completely. Once cooled, it’s time to decorate! Use your white icing to create mummy wrappings, and add chocolate chips or candies for the eyes. Get creative and have fun with the designs!
Nutrition Info:
Each cookie is approximately 150 calories, depending on size and icing. These treats are meant for special occasions, so enjoy them in moderation!
Final Thoughts
So there you have it! Mummy Cookies that are not only delicious but also a blast to make. I can’t emphasize enough how fun it is to see everyone’s faces light up when they see these adorable treats. This recipe is special because it brings people together, whether you’re baking with family or surprising friends at a party. I hope you give these Mummy Cookies a try — they’re sure to become a Halloween tradition in your home, just like they have in mine!