Every holiday season, I find myself excitedly whipping up a batch of Little Debbie Christmas Tree Desserts. Trust me, if you want to bring joy and festive cheer to your gatherings, this is the recipe you need in your life! I can’t even count how many times I’ve made these delightful treats, and each time they disappear faster than I can say “Merry Christmas!” They’re a total crowd-pleaser, and I can’t wait to share this magical recipe with you!
Why You’ll Love This Little Debbie Christmas Tree Dessert Recipe
- Incredibly easy to make: No baking skills needed! If I can do it, so can you.
- Visually stunning: These desserts are almost too cute to eat—almost!
- Versatile flavors: You can customize them to suit your taste or theme.
- Perfect for make-ahead: Prep them a day in advance, and you’re good to go!
- Fun for all ages: Kids love decorating them, and adults can’t resist their charm!
The Secret to Perfect Little Debbie Christmas Tree Desserts
The key to making these Little Debbie Christmas Tree Desserts a showstopper lies in the assembly and decoration. Trust me when I say that using fresh ingredients and taking a little extra time to pipe icing and sprinkle decorations makes all the difference! I always use high-quality chocolate and vibrant sprinkles to make them pop. And here’s a pro tip: chill your assembled trees in the fridge for about 30 minutes before serving. This solidifies everything beautifully and makes them easier to handle. You’ll feel like a holiday baking superstar!
Rave Reviews from Friends and Followers
“These are the cutest desserts ever! My kids loved helping decorate them, and they tasted amazing!” – Sarah T.
“I brought these to a holiday party, and they were the first thing to disappear! Everyone was asking for the recipe!” – Mark L.
“I never thought I could make something so festive! The Little Debbie Christmas Tree Desserts were a huge hit at my family gathering!” – Jenna R.
Creative Variations to Try
- Chocolate Mint: Use mint-flavored icing and add crushed peppermint on top!
- Red Velvet: Swap in red velvet cake for a rich, festive twist.
- Nutty Delight: Add chopped nuts for a crunchy texture contrast.
- Fruit Fest: Decorate with dried fruits like cranberries or apricots for a natural touch.
Bonus: Drizzle some caramel sauce on top for an extra layer of flavor that will wow your guests!
FAQs – All Your Questions Answered!
Can I make these in advance? Absolutely! These Little Debbie Christmas Tree Desserts can be made a day ahead. Just store them in an airtight container in the fridge.
What can I substitute for the chocolate? You can use white chocolate or even a dairy-free alternative if you’re looking for a different flavor profile!
How do I store leftovers? Keep them in an airtight container at room temperature for up to three days. After that, the freshness may start to decline.
Can I freeze them? Yes! You can freeze the assembled trees for up to a month. Just make sure to wrap them tightly!
Storage/Serving Tips
- Store in an airtight container to keep them fresh.
- They can last up to three days at room temperature.
- For a festive presentation, serve them on a decorative platter with colorful holiday napkins.
Perfect Occasions for Little Debbie Christmas Tree Desserts
- Holiday parties with friends and family
- School bake sales or holiday events
- Cookie exchanges or potlucks
- Kids’ birthday parties during the winter season
- Workplace holiday celebrations
The Complete Recipe
Thank you for sticking with me through this delicious journey! Now, let’s get to the good part—the recipe!
Little Debbie Christmas Tree Desserts
Ingredients
- 1 box of Little Debbie Christmas Tree Cakes (10-pack)
- 1 cup of semisweet chocolate chips
- 1 cup of green frosting (store-bought or homemade)
- Sprinkles for decoration
- Optional: crushed candy canes, mini marshmallows, or colored sugars
Tip: For a smoother chocolate coating, add a teaspoon of vegetable oil to the melting chocolate. This will give you a glossy finish that looks professional!
Step-by-Step Instructions
Step 1: Melt the Chocolate
In a microwave-safe bowl, melt the semisweet chocolate chips in 30-second intervals, stirring in between, until fully melted and smooth. This should take about 1-2 minutes. Be careful not to overheat it!
Step 2: Dip the Cakes
Carefully dip each Little Debbie Christmas Tree Cake into the melted chocolate, making sure to coat it fully. Use a fork to help lift it out, allowing excess chocolate to drip off. Place them on a cooling rack to set.
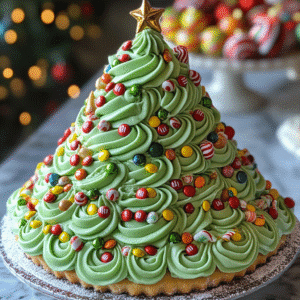
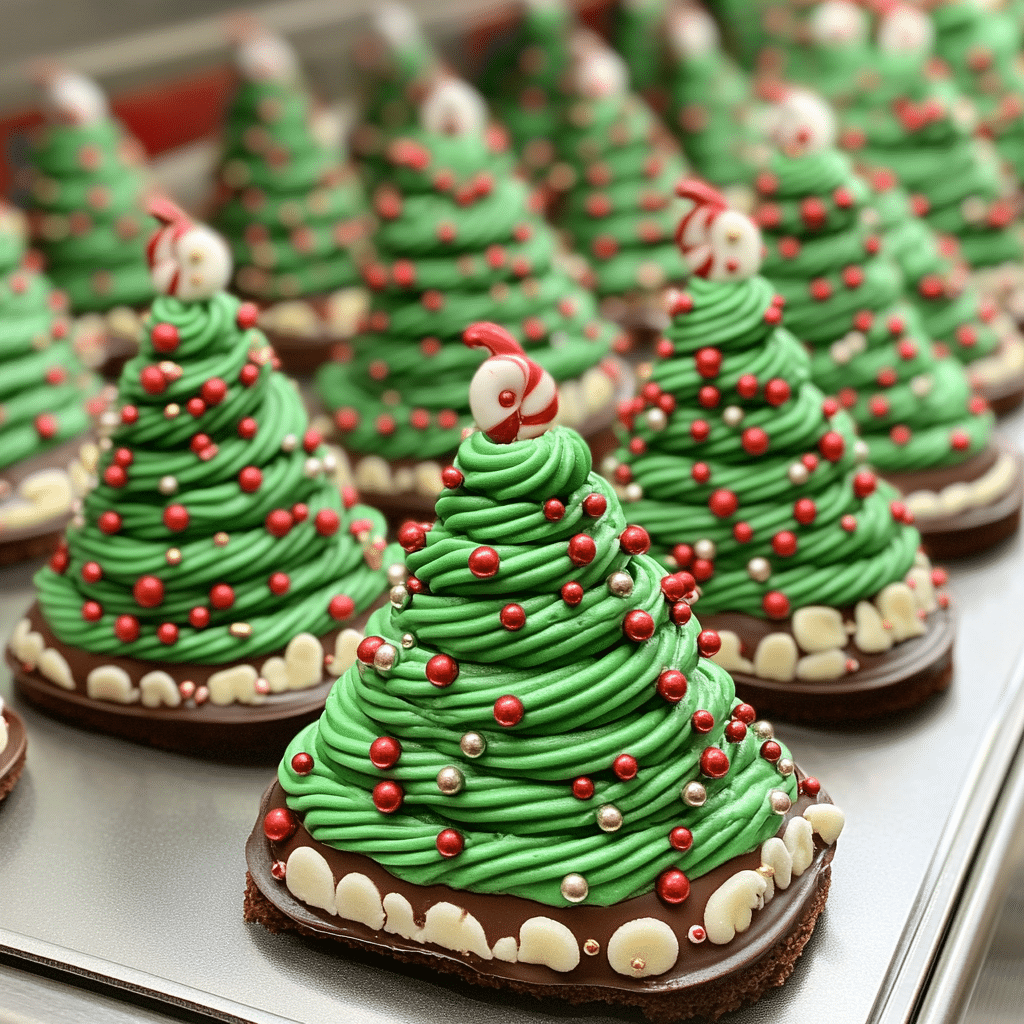
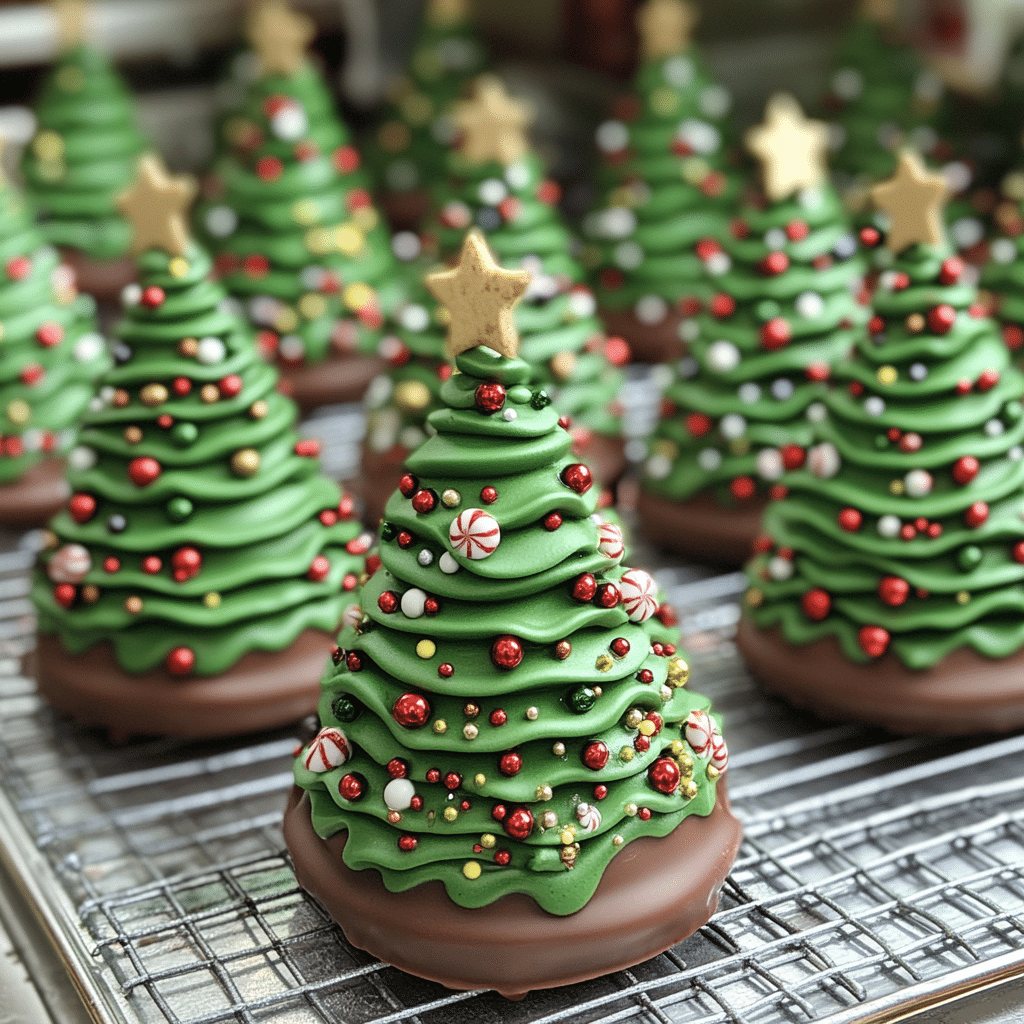
Step 3: Decorate
Once the chocolate has hardened, it’s time to get creative! Use a piping bag or a ziplock with the corner cut off to pipe green frosting onto the trees. Let your imagination run wild as you decorate with sprinkles, crushed candy canes, or marshmallows!
Step 4: Chill and Serve
Place the decorated trees in the fridge for about 30 minutes to set everything in place. This step is crucial for keeping the decorations from smudging. Once set, serve them on a beautiful platter and watch as your guests’ eyes light up!
Nutrition Info: Each dessert is approximately 150 calories, depending on the toppings used. Perfectly indulgent for the holidays!
Final Thoughts
There you have it—your new go-to recipe for Little Debbie Christmas Tree Desserts. These adorable treats are not only a feast for the eyes but also a delight for the taste buds. I promise you’ll love making them as much as you’ll love eating them! So gather your ingredients, rally the family, and start creating these sweet memories this holiday season. Trust me, everyone will be asking for your secret recipe, and you can proudly say it’s all about the holiday spirit!