
Crunchy, Decadent, and Zero-Effort Delicious
I’ve been bringing these No-Bake Coffee Toffee Crunch Bars to every gathering for the past two years, and they’ve become my secret weapon for impressing dessert lovers without spending hours in the kitchen. These No-Bake Coffee Toffee Crunch Bars are the ultimate no-fuss indulgence that combines buttery graham cracker goodness, rich coffee notes, and that addictive toffee crunch we all crave. Simple enough for a weeknight treat, impressive enough for your most demanding guests—these bars are ridiculously easy to make despite tasting like they came from a gourmet bakery.
If you’ve ever felt intimidated by dessert-making, this is your sign to stop worrying. These bars require zero baking skills and practically impossible to mess up. Plus, your friends will absolutely believe you spent the entire afternoon perfecting them!
☕ Why These Coffee Toffee Crunch Bars Will Win You Over
✅ Genuinely No-Bake No oven? No problem. No wait times while something bakes? Even better! Just mix, press, chill, and cut.
✅ Takes Less Than 15 Minutes Active Time Seriously. From grabbing ingredients to pressing into the pan, you’re looking at roughly 10 minutes of actual work. The refrigerator does the heavy lifting.
✅ Coffee Lovers’ Dream That perfect balance of instant coffee with sweet toffee and chocolate creates a sophisticated flavor profile that tastes way more complex than it actually is.
✅ Customizable to Your Taste Swap the nuts, use dark chocolate instead of semi-sweet, add sea salt on top, or experiment with different extract flavors. Make them yours!
🔑 The Secret to Perfect Coffee Toffee Crunch Bars
You might think no-bake bars can’t possibly compete with traditional baked desserts. Here’s the magic: the combination of butter, brown sugar, and graham crackers creates a naturally sturdy base that holds everything together beautifully without any baking required.
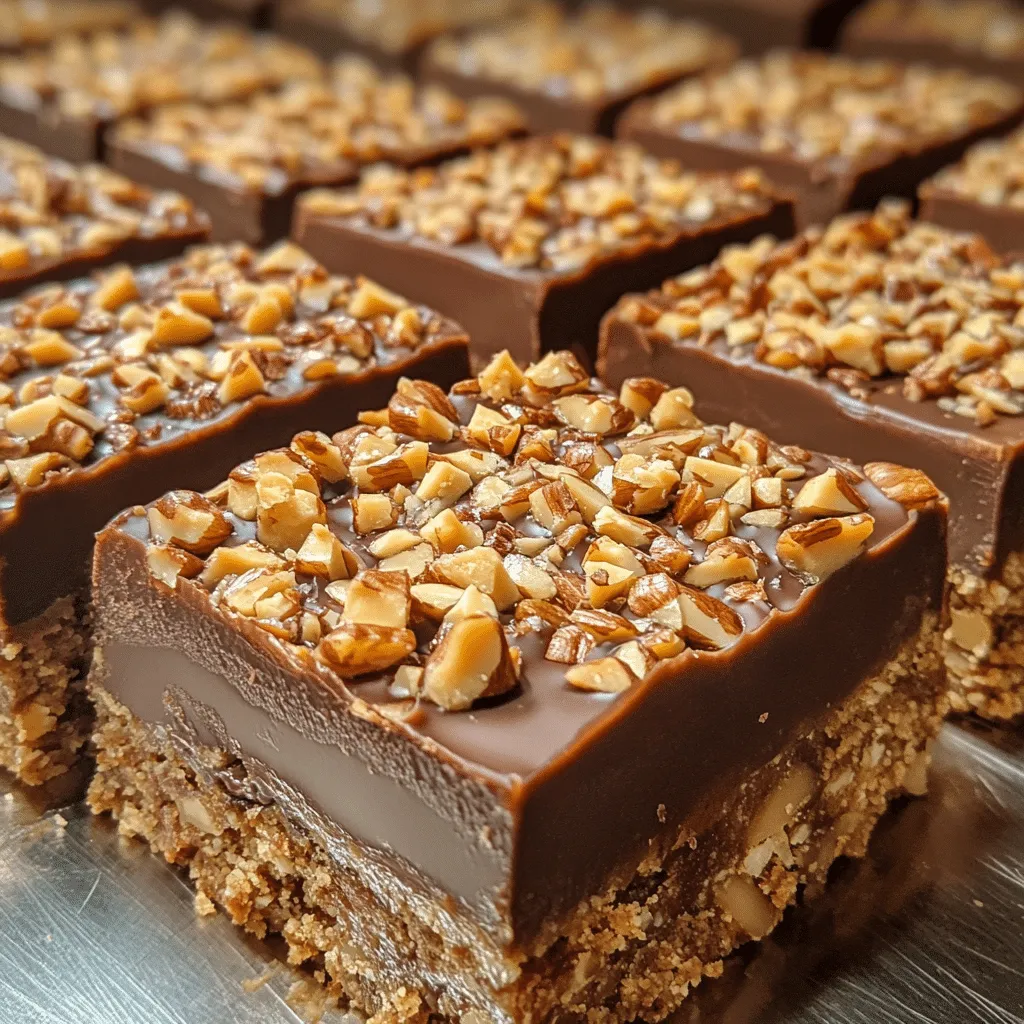
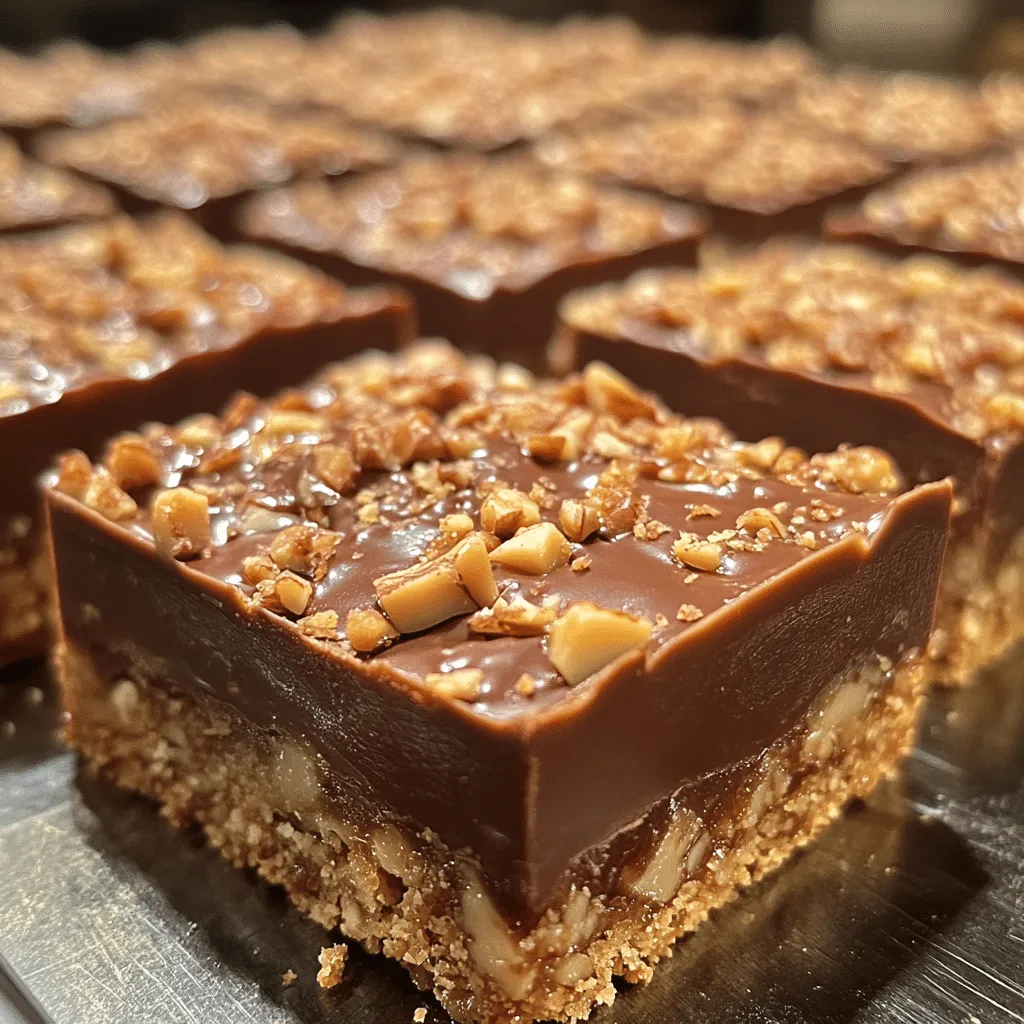
The real genius is in the layering strategy. The buttery graham cracker foundation provides structural integrity, while the toffee bits add bursts of caramel crunch throughout. That instant coffee? It’s the secret ingredient that elevates these from ordinary to extraordinary—it amplifies the chocolate and toffee flavors without making them taste like a coffee shop dessert. The top layer of melted chocolate seals everything together while adding richness and elegance.
🍫 Rave Reviews from Friends and Followers
💬 “These are insanely good. I literally made three batches in one week!” – Jennifer M.
💬 “Finally, a no-bake dessert that actually tastes impressive. My dinner guests had no idea!” – Marcus T.
💬 “The coffee flavor is so subtle but perfect. Keeps me coming back for more!” – Amanda K.
📌 Creative Variations to Try
Once you master the basic recipe, these variations will revolutionize your dessert game:
Espresso Kick: Double the instant coffee for a more pronounced coffee flavor
Sea Salt & Caramel: Add 1/2 teaspoon sea salt to the chocolate layer and sprinkle more on top
Dark Chocolate Dream: Substitute dark chocolate chips for semi-sweet to create a richer, less sweet bar
Macadamia Luxury: Swap pecans for macadamia nuts and add a touch of white chocolate drizzle
Mocha Madness: Mix a tablespoon of cocoa powder into the graham cracker mixture along with the coffee
Bonus: For an alcohol-infused version, add 1-2 tablespoons of coffee liqueur or bourbon to the butter and sugar mixture before combining with the graham crackers!
🧠 FAQs – All Your Questions Answered!
Can I make these ahead? Absolutely! These actually improve after a day or two as flavors meld together. Make them up to a week in advance and store them in an airtight container.
My bars won’t hold together—what went wrong? Make sure you’re pressing the mixture firmly into the pan. It should be compact enough to hold its shape. If needed, refrigerate the base for 30 minutes before adding chocolate.
Can I use a different size pan? Yes! An 8×10-inch pan will make thinner bars, while a smaller 7×7-inch pan will make thicker, chewier ones. Adjust accordingly.
What nuts work best? Pecans and walnuts are classic, but almonds, hazelnuts, or even pistachios create interesting flavor combinations!
Do I really need the instant coffee? While you can omit it, that coffee element truly transforms these bars from good to exceptional. We highly recommend keeping it!
🧊 Storage Tips
These treats are built to last:
Store in an airtight container with parchment paper between layers to prevent sticking
Keep refrigerated for up to one week, or freeze for up to three months
Remove from refrigerator 5 minutes before serving for the perfect texture balance
They also travel beautifully for potlucks and picnics!
🎉 Perfect Occasions for No-Bake Coffee Toffee Crunch Bars
These impressive yet effortless bars are ideal for:
Weeknight desserts when you need something fast
Office potlucks and work events
Holiday gift-giving (they look amazing in festive packaging!)
Last-minute dinner party desserts
Afternoon coffee breaks and snack attacks
Movie nights and game day gatherings
🔗 Helpful Resources
Best Instant Coffee for Baking
Top Ice Pop Molds for Your Next Treat
Premium Chocolate Chip Brands Ranked
More No-Bake Dessert Ideas
📋 The Complete Recipe
Ready to make these show-stopping bars? Here’s everything you need:
No-Bake Coffee Toffee Crunch Bars
🧺 Ingredients
For approximately 16-20 bars, gather:
- 1 cup unsalted butter, melted
- 1 cup packed brown sugar
- 2 cups graham cracker crumbs
- 1 cup finely chopped nuts (such as pecans or walnuts)
- 1 cup semi-sweet chocolate chips
- 1 cup toffee bits
- 1 tablespoon instant coffee granules
- 1 teaspoon vanilla extract
- 1/2 teaspoon salt
🍽️ Step-by-Step Instructions
Step 1: Prepare Your Workspace Begin by preparing an 8×8-inch or 9×9-inch baking pan. Line the bottom and sides with parchment paper, allowing some overhang for easy removal later. This ensures your bars won’t stick and gives you a clean, professional appearance.
Step 2: Create the Buttery Base In a large mixing bowl, combine the melted butter and brown sugar. Whisk together until the mixture is smooth and the sugar is completely dissolved. This creates a rich foundation that will hold everything together.
Step 3: Incorporate Graham Crackers Add the graham cracker crumbs to the butter and sugar mixture. Stir well until the crumbs are fully incorporated and the mixture appears evenly combined, like wet sand.
Step 4: Add Nutty Texture Next, add the finely chopped nuts to the bowl. Mix thoroughly to ensure they’re evenly distributed throughout the graham cracker base. This creates pockets of crunch in every bite.
Step 5: Awaken the Coffee Magic In a small bowl, combine the instant coffee granules with the vanilla extract and salt. Stir until the coffee granules are completely dissolved. Add this aromatic mixture to the graham cracker base and stir until fully combined. This step infuses the entire bar with sophisticated coffee notes.
Step 6: Mix in the Toffee Fold in the toffee bits, ensuring they’re evenly spread throughout the mixture. Reserve a small handful for topping if you’d like extra crunch.
Step 7: Press and Perfect Transfer the mixture into your prepared pan. Using a spatula or the back of a spoon, press the mixture firmly and evenly into the bottom of the pan. Aim for an even, compact layer that will hold together beautifully once set.
Step 8: Melt the Chocolate In a microwave-safe bowl, combine the semi-sweet chocolate chips. Microwave in 30-second intervals, stirring between each interval, until the chocolate is completely melted and smooth. This should take about 1 to 2 minutes total. Patience here prevents burned chocolate!
Step 9: Spread Chocolate Heaven Pour the melted chocolate over the pressed graham cracker mixture. Use a spatula to spread it evenly across the entire surface, ensuring complete coverage and a beautiful finish.
Step 10: Add a Finishing Touch Once the chocolate is spread evenly, sprinkle reserved toffee bits on top for garnish and extra texture. This optional step adds visual appeal and an extra crunch factor.
Step 11: Chill to Perfection Place the pan in the refrigerator and allow the bars to chill for at least 2 hours, or until the chocolate is set and the bars are firm to the touch. Overnight chilling yields the best results.
Step 12: Unmold After the bars have chilled, remove the pan from the refrigerator. Use the parchment paper overhang to lift the entire slab out of the pan in one satisfying motion.
Step 13: Cut and Serve Place the bars on a cutting board and use a sharp knife to cut them into squares or rectangles, depending on your preferred serving size. Clean the knife between cuts for neat, professional-looking bars.
Step 14: Enjoy Serve immediately or store in an airtight container in the refrigerator for up to one week. These bars are perfect at any temperature!
Nutrition (per bar):
- Calories: ~215
- Carbs: 22g
- Sugar: 18g
- Fat: 14g
✨ Final Thoughts
Whether you’re looking for an impressive weeknight dessert or a foolproof treat for your next gathering, these No-Bake Coffee Toffee Crunch Bars deliver sophisticated flavor with zero stress. They prove that the best desserts don’t require a hot oven or complicated techniques—just good ingredients, careful layering, and a little patience. Now stop reading and start making!