I can still remember the first time I made Red Velvet Cheesecake. It was a chilly Saturday afternoon, and I was searching for a show-stopping dessert to impress my friends at our monthly get-together. Little did I know, this luscious creation would become the star of the show and a staple in my baking repertoire. I’ve made this decadent dessert countless times, and trust me, it never fails to wow everyone! The rich flavors, creamy layers, and stunning visual appeal make it a go-to for celebrations, special occasions, or simply satisfying my sweet tooth. Are you ready to dive into a world of velvety bliss? Let’s get started!
Why You’ll Love This Red Velvet Cheesecake
- Irresistible Flavor: The combination of tangy cream cheese and rich chocolatey red velvet is nothing short of divine.
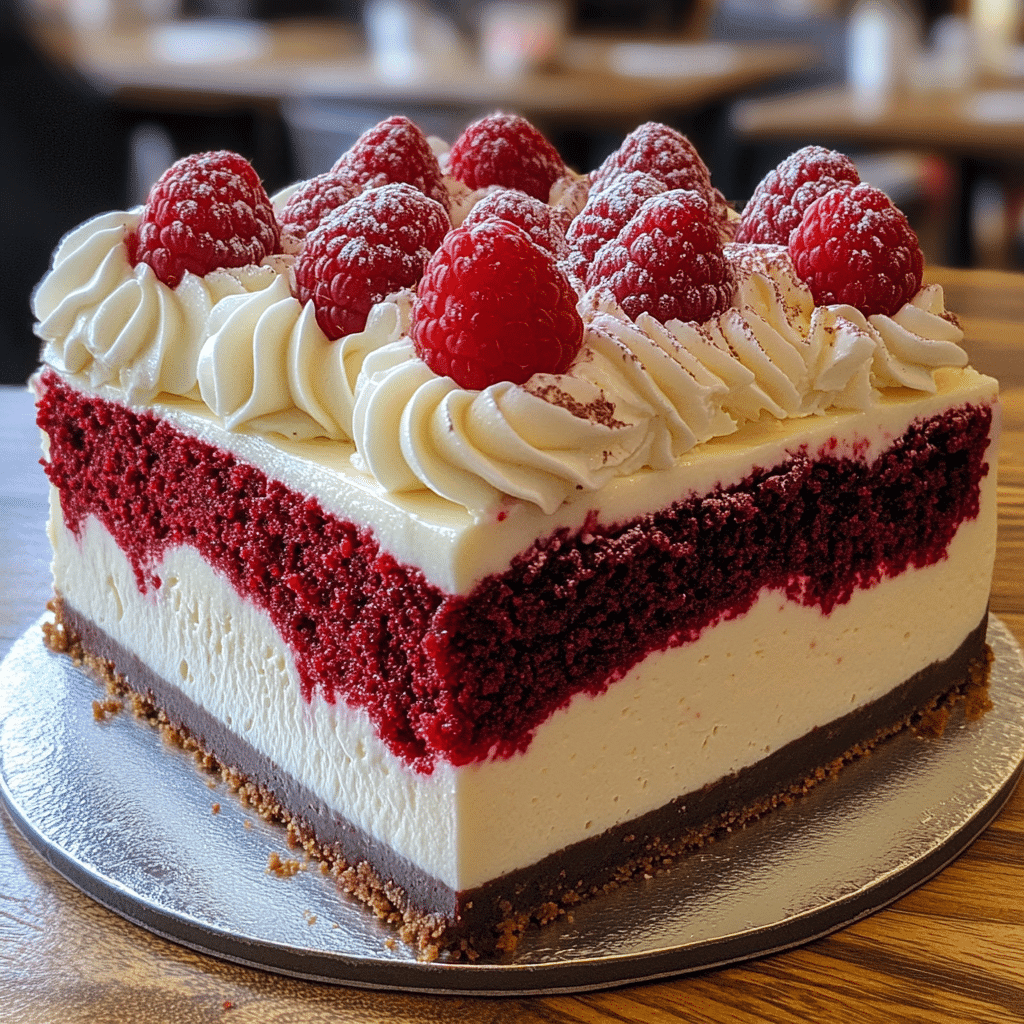
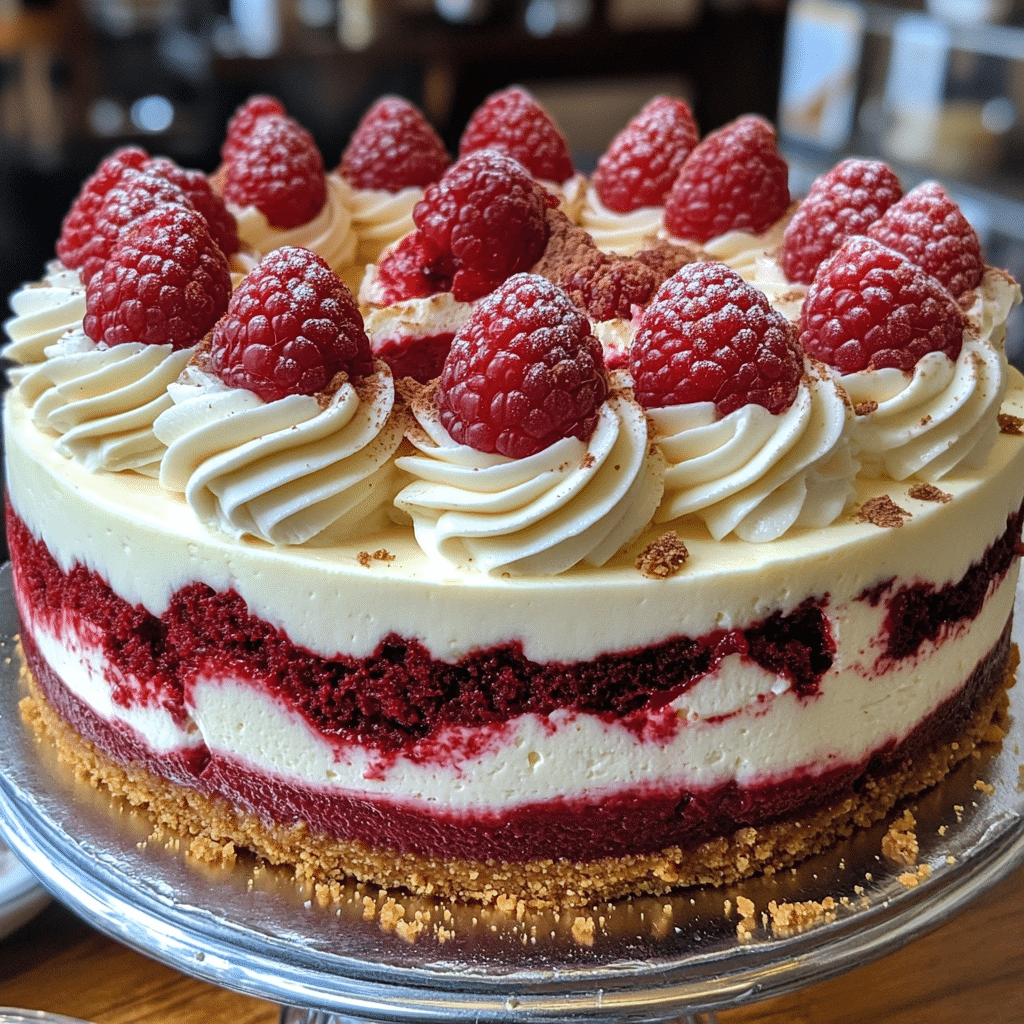
- Stunning Presentation: This cheesecake is a feast for the eyes, with its vibrant red color and creamy white layers.
- Easy to Make: Don’t be intimidated! This cheesecake is surprisingly simple, even for novice bakers.
- Versatile Delight: Perfect for birthdays, anniversaries, or any celebration, it fits any occasion beautifully.
- Make-Ahead Convenience: You can prepare it a day in advance, making entertaining a breeze.
The Secret to Perfect Red Velvet Cheesecake
The key to achieving the perfect Red Velvet Cheesecake lies in the balance of flavors and textures. The secret ingredient? Buttermilk! It adds a tangy richness that elevates the cake and creates a tender crumb. I always recommend using room temperature ingredients, especially the cream cheese, as this helps achieve that creamy, dreamy texture we all crave. Don’t forget to mix gently; overmixing can lead to a dense cheesecake. Trust me, with these insider tips, you’ll be making a show-stopping cheesecake in no time!
Rave Reviews from Friends and Followers
“This Red Velvet Cheesecake is the best dessert I’ve ever had! The layers are so creamy, and the flavor is out of this world!” – Sarah L.
“I took this cheesecake to a potluck, and everyone was raving about it! It was gone in minutes!” – Mike H.
“As someone who doesn’t bake often, I was amazed at how easy this was to make. Thank you for sharing such a fantastic recipe!” – Emily T.
Creative Variations to Try
- Chocolate Chip Red Velvet Cheesecake: Fold in chocolate chips for an extra indulgent twist.
- White Chocolate Drizzle: Top with melted white chocolate for a luxurious finish.
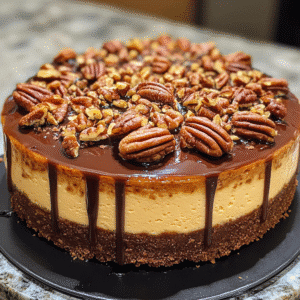
- Nutty Delight: Add crushed pecans or walnuts into the crust for a delightful crunch.
- Coconut Cream Red Velvet Cheesecake: Incorporate coconut cream into the filling for a tropical twist.
Bonus: Try adding a layer of raspberry sauce between the cheesecake and the crust for a fruity zing!
FAQs – All Your Questions Answered!
How do I store leftover Red Velvet Cheesecake?
Store your cheesecake in an airtight container in the refrigerator, where it will keep well for up to 5 days. If you want to keep it longer, you can freeze it for up to 3 months!
Can I use regular milk instead of buttermilk?
While buttermilk is recommended for its tangy flavor, you can substitute with regular milk by adding a tablespoon of vinegar or lemon juice to one cup of milk, letting it sit for 5 minutes to curdle.
What if my cheesecake cracks?
Cracks can happen, especially if the cheesecake is overbaked. To prevent this, make sure to bake it at a lower temperature and avoid opening the oven door too often.
How long does it take to make this cheesecake?
The prep time is about 30 minutes, with a baking time of around 60 minutes. Don’t forget to let it cool for at least 4 hours before serving! Patience is key!
Storage/Serving Tips
- Store in the fridge in an airtight container for up to 5 days.
- For longer storage, freeze slices wrapped in plastic wrap and aluminum foil for up to 3 months.
- Serve chilled for the best flavor and texture.
- Garnish with whipped cream or fresh berries for added visual appeal.
Perfect Occasions for Red Velvet Cheesecake
- Birthday celebrations – it’s always a crowd-pleaser!
- Valentine’s Day – a romantic dessert to share.
- Christmas gatherings – its festive color fits right in!
- Baby showers – it’s a showstopper for any sweet table.
- Potlucks – bring something unique that everyone will love!
- Weekend brunches – serve it alongside coffee for a delightful treat.
The Complete Recipe
Thank you for sticking with me through this delicious journey! Now, let’s get to the fun part: making your very own Red Velvet Cheesecake!
Red Velvet Cheesecake
Ingredients
- 1 ½ cups graham cracker crumbs
- ½ cup unsalted butter, melted
- 1 cup granulated sugar
- 2 cups cream cheese, softened
- 3 large eggs
- 1 cup sour cream
- ½ cup buttermilk
- 1 tablespoon vanilla extract
- 2 tablespoons cocoa powder
- 1 ½ cups all-purpose flour
- 1 teaspoon red food coloring
- 1 teaspoon baking powder
- Pinch of salt
Tip: Make sure all your ingredients are at room temperature for a smooth batter. This is essential for that velvety texture!
Step-by-Step Instructions
Step 1: Prepare the Crust
Preheat your oven to 325°F (160°C). In a mixing bowl, combine graham cracker crumbs and melted butter until well combined. Press the mixture firmly into the bottom of a 9-inch springform pan. This crust is the perfect base for your cheesecake!
Step 2: Make the Cheesecake Batter
In a large mixing bowl, beat the softened cream cheese and granulated sugar until smooth. Add the eggs one at a time, mixing well after each addition. Incorporate the sour cream, buttermilk, vanilla extract, cocoa powder, red food coloring, baking powder, and salt. Mix until everything is well blended and creamy. You want it to be smooth like velvet!
Step 3: Bake the Cheesecake
Pour the cheesecake batter over the crust, smoothing the top with a spatula. Bake in the preheated oven for about 60 minutes or until the edges are set and the center is slightly jiggly. This slight jiggle is what makes a cheesecake creamy!
Step 4: Cool and Chill
Once baked, turn off the oven and crack the oven door, allowing the cheesecake to cool gradually for about an hour. This helps prevent cracking. After it’s cooled, refrigerate for at least 4 hours, or overnight for the best results.
Step 5: Serve and Enjoy!
When you’re ready to serve, carefully remove the sides of the springform pan. Slice into pieces and serve chilled. You can add whipped cream or fresh berries on top for an extra special presentation!
Nutritional Info: Each slice of Red Velvet Cheesecake contains approximately 350 calories, 24g of fat, 25g of carbohydrates, and 6g of protein.